How do I track bills and vendors?
Manage suppliers in Settings›Expenses›Vendors and the amounts you owe them in Settings›Expenses›Bills. In each, click Actions to add a new record. A purchase order can also be turned into a bill with Convert to Bill.
Add a vendor
-
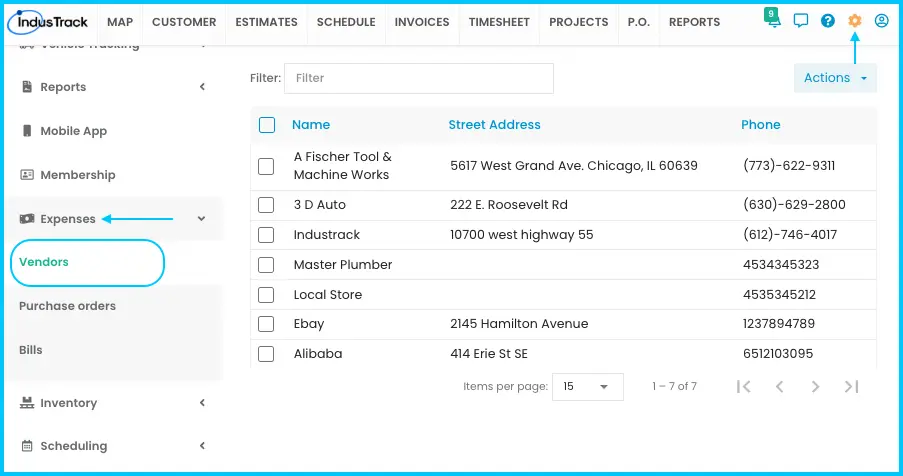
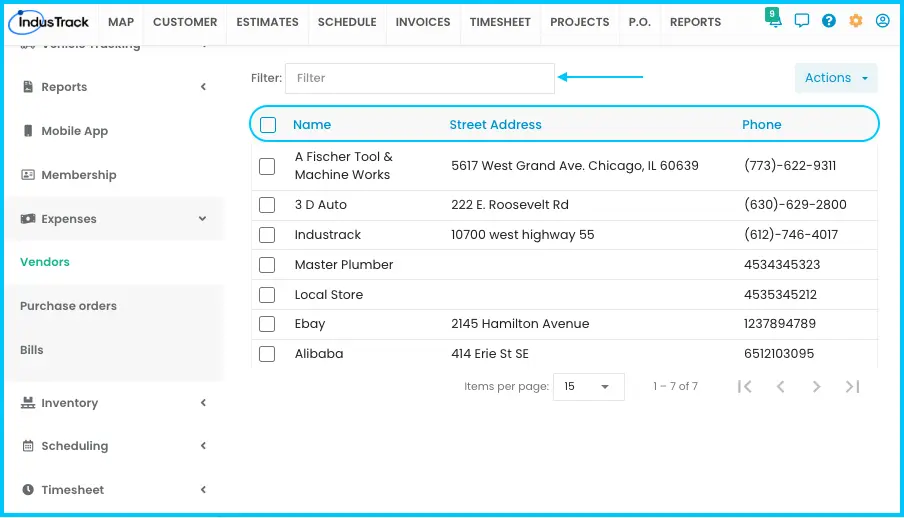
Go to Settings›Expenses›Vendors. Search the list first so you don't create a duplicate.
-
Click Actions›+ Add a New Vendor.
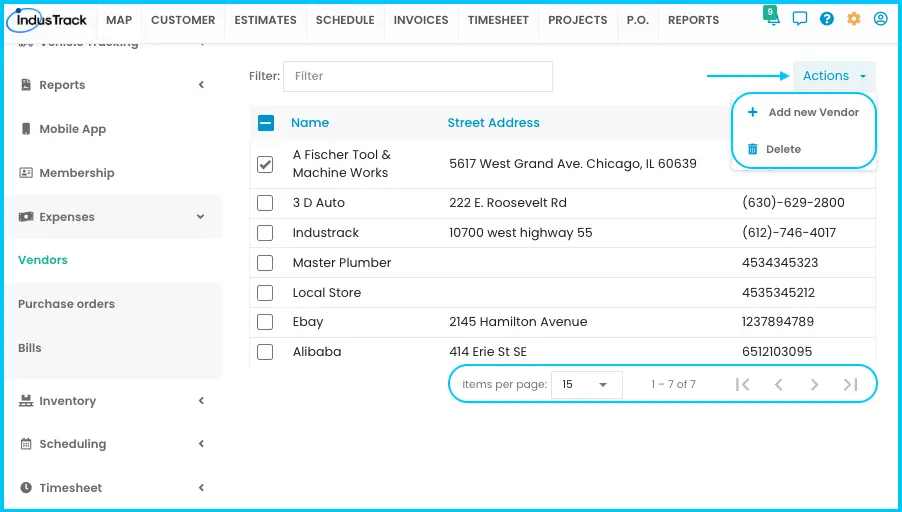
Watch: Opening the form to add a new vendor -
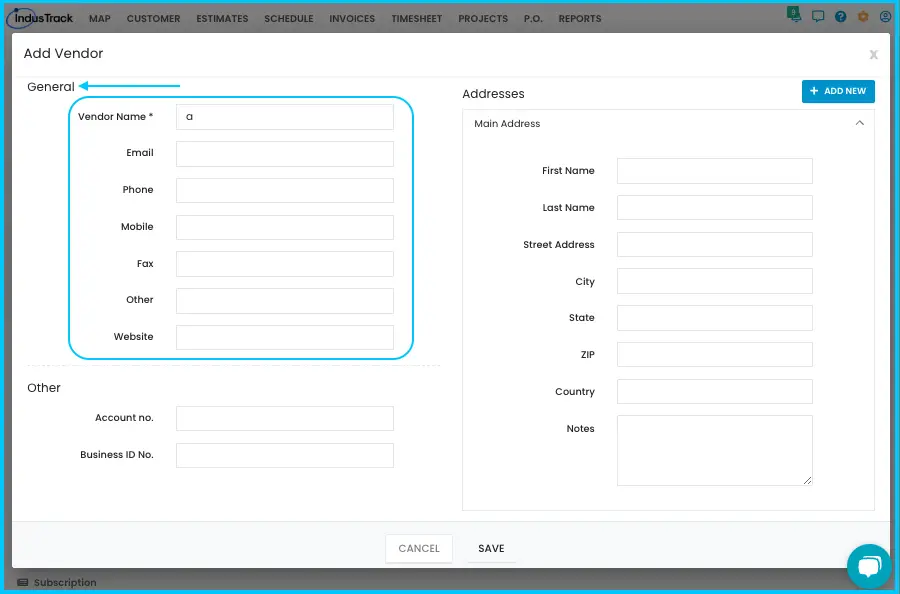
Fill in the general information:
- Vendor Name (required)
- Email, Phone, Mobile, Fax, Other (any other contact details) and Website
-
Fill in the Main Address: first and last name, street address, city, state, ZIP, country, and Notes (landmarks or other details).
-
Optional: click + Add New to add more locations. Use the arrows to expand or collapse them, and Delete to remove one (it's removed at once). The main address can't be deleted.
Watch: Adding the main address and more locations for a vendor -
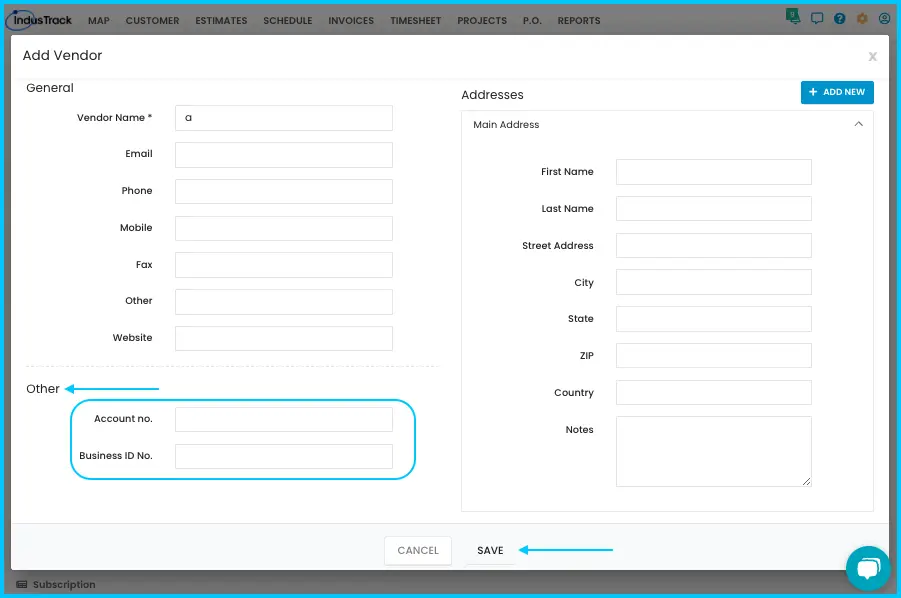
Optional: add the Account No. (your code for the vendor) and Business ID No. (registration number).
-
Click Save.
You can also create a vendor while making a purchase order. See How do I create, send and receive purchase orders?
Edit or delete a vendor
-
Edit: click the vendor's name, update the fields and click Save.
Watch: Editing a vendor's details -
Delete: check the vendor or vendors (or the checkbox in the Name header for all), click Actions›Delete and click Yes. Deleting permanently removes the vendor from your account. Purchase orders and bills linked to the vendor stay as they are.
Watch: Deleting a vendor
The Vendors list shows Name, Street Address and Phone. Use the filter bar to search and click a column header to sort.
Add a bill
Bills record amounts you owe for goods or services bought on credit, such as vendor invoices, phone bills and utility bills.
-
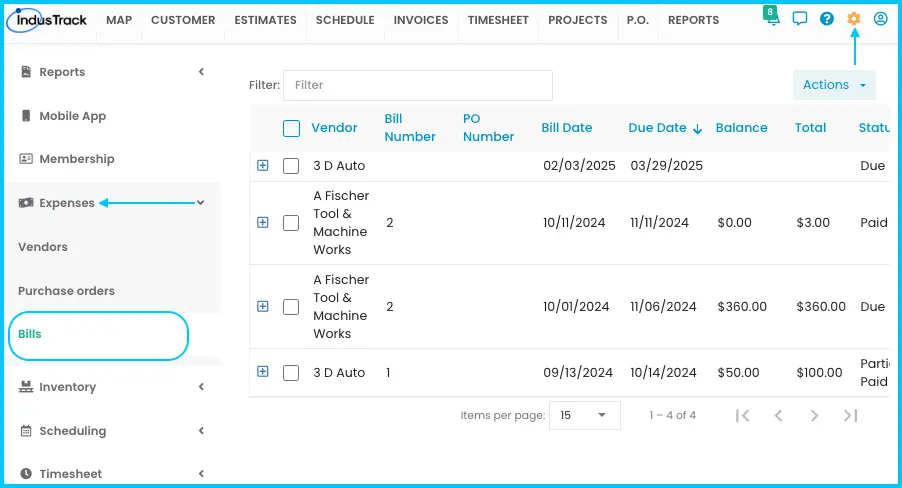
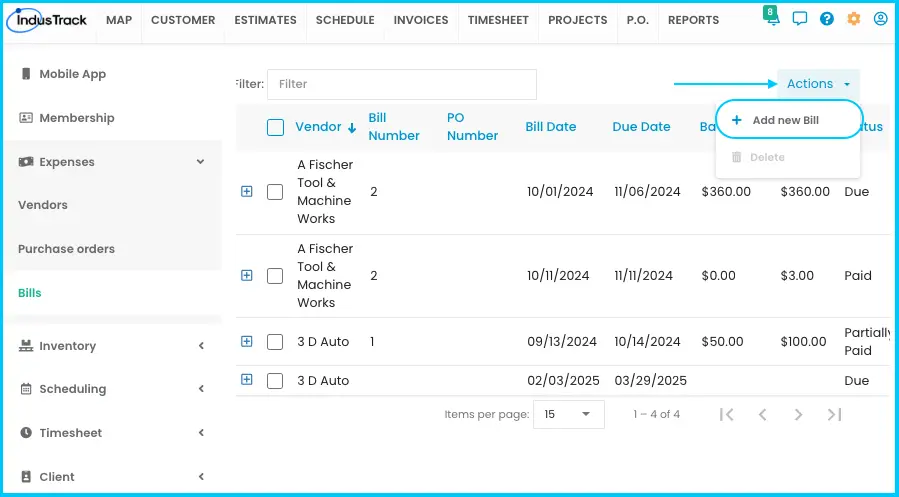
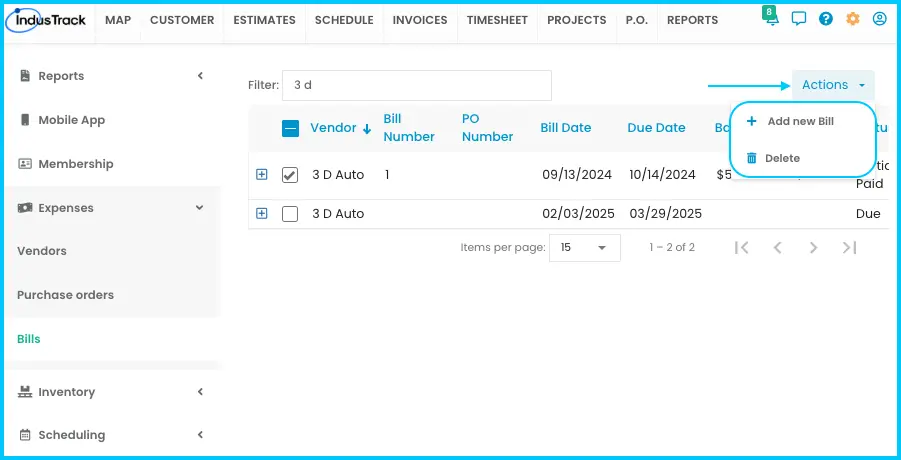
Go to Settings›Expenses›Bills and click Actions›+ Add New Bill.
-
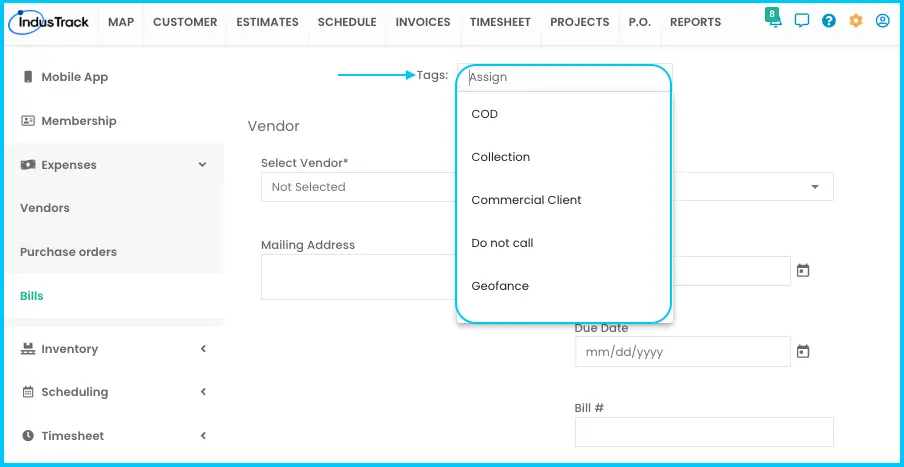
Optional: click the Tags search bar and select tags to group the bill. See How do I use tags?
-
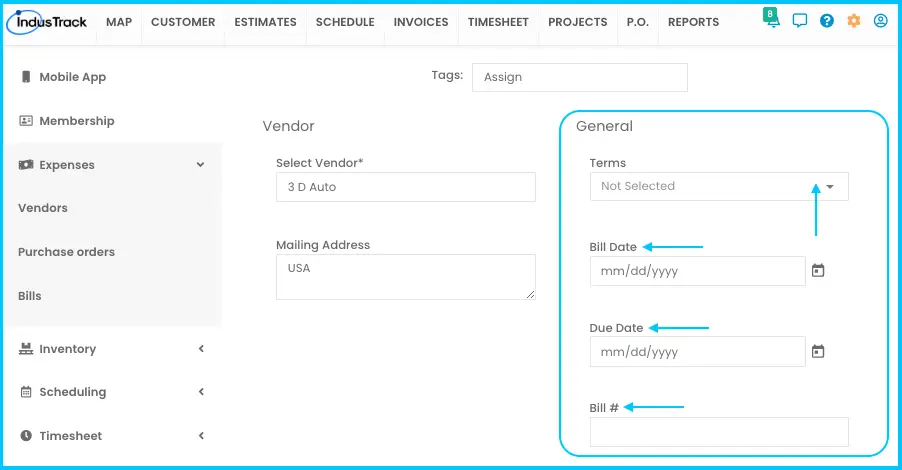
Select the vendor and enter the vendor's Mailing Address. If the vendor isn't listed, add it first (see above).
Watch: Choosing the vendor and entering the mailing address on a bill -
Enter the bill details:
- Terms: pick a payment term. The Due Date fills in from it.
- Bill Date: the date the bill was issued.
- Bill Number: a unique number.
-
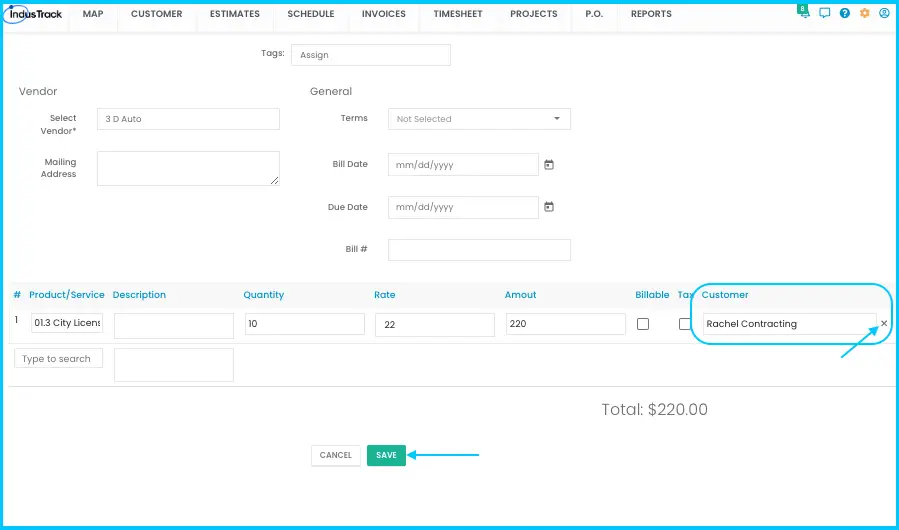
Add the parts and services: click the Parts & Services search bar and pick an item, or type its name, number or code. The details fill in. Enter the Quantity; the amount is calculated.
- Mark as Billable if the item is chargeable to a client, and Assign a Customer to link it to that customer. The item then shows up on that customer's invoice.
- Mark as Taxable if the item is taxed.
Watch: Adding parts and services to a bill and marking them billable or taxable - To remove the customer, click the X button near the customer box.
-
Click Save. The bill is added to the list and stays open for editing.
Record a payment
-
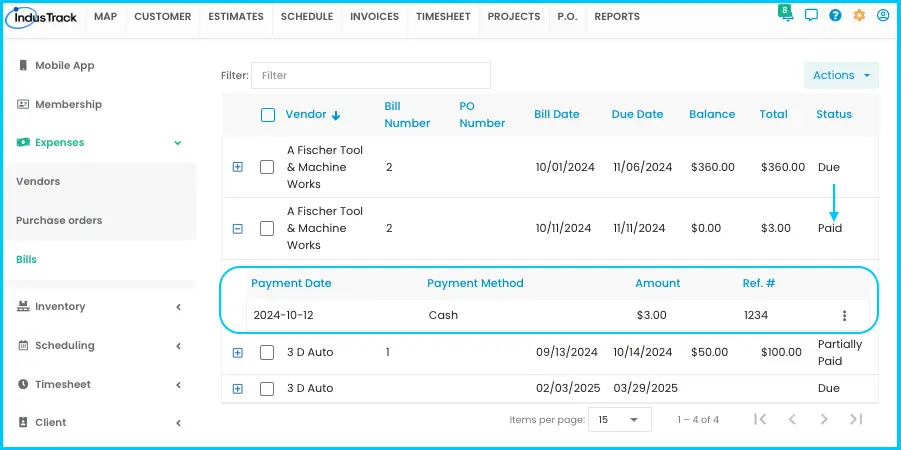
In the Bills list, click the + icon next to the bill.
Watch: Opening the payment details with the + icon -
Click + Add New Payment.
-
Select the payment method: Credit Card, Check or Cash.
-
Enter the amount and a reference number.
-
Click Save. If the payment covers the full balance, the bill status updates to Paid. If it's less than the balance, the status updates to Partially Paid.
Watch: Adding a payment to a bill
For a paid bill, the + icon shows the payment date, method, amount and reference number.
The Bills list
| Column | What it shows |
|---|---|
| Vendor | The supplier or service provider. |
| Bill Number | The bill's unique number. |
| PO Number | The linked purchase order. |
| Bill Date | When the bill was issued. |
| Due Date | When payment is due. |
| Balance | The amount still unpaid. |
| Total | The full amount. |
| Status | For example, unpaid, partially paid, paid or overdue. |
Search by vendor name, balance or status, and click a column header to sort. To delete bills, check them and click Actions›Delete (the option is disabled until you select a bill).
Common questions
Can I turn a purchase order into a bill?
Yes. In the PO list, choose Convert to Bill from the 3-dot menu. The PO status changes to Billed. See How do I create, send and receive purchase orders?
Do bills sync to QuickBooks?
No. Bills don't sync to QuickBooks Online or QuickBooks Desktop.
Was this article helpful?
Contact support