How do I create, send and receive purchase orders?
Click P.O. in the module headers (or go to Settings›Inventory›Purchase Orders) and click + Add New. Pick a vendor, add the items and save. From the PO list, use the 3-dot menu to Send Mail to the vendor and, when the order arrives, Receive Inventory into a warehouse.
Where to find purchase orders
-
Click P.O. in the module headers, on the Home or Settings page. If it's greyed out, you don't have access.
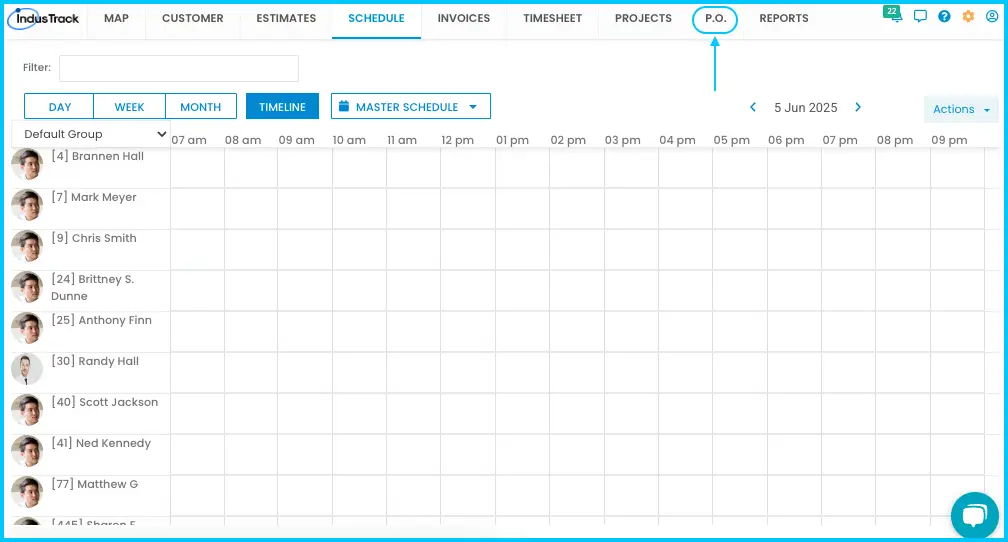
-
Or go to Settings›Inventory›Purchase Orders. Both work the same way.
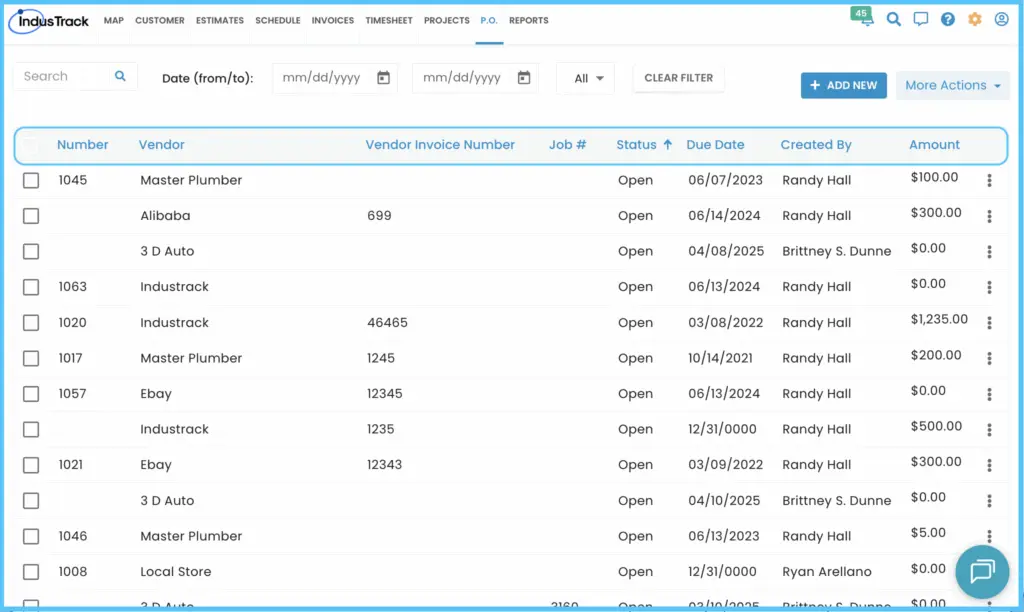
Create a purchase order
-
Click + Add New.
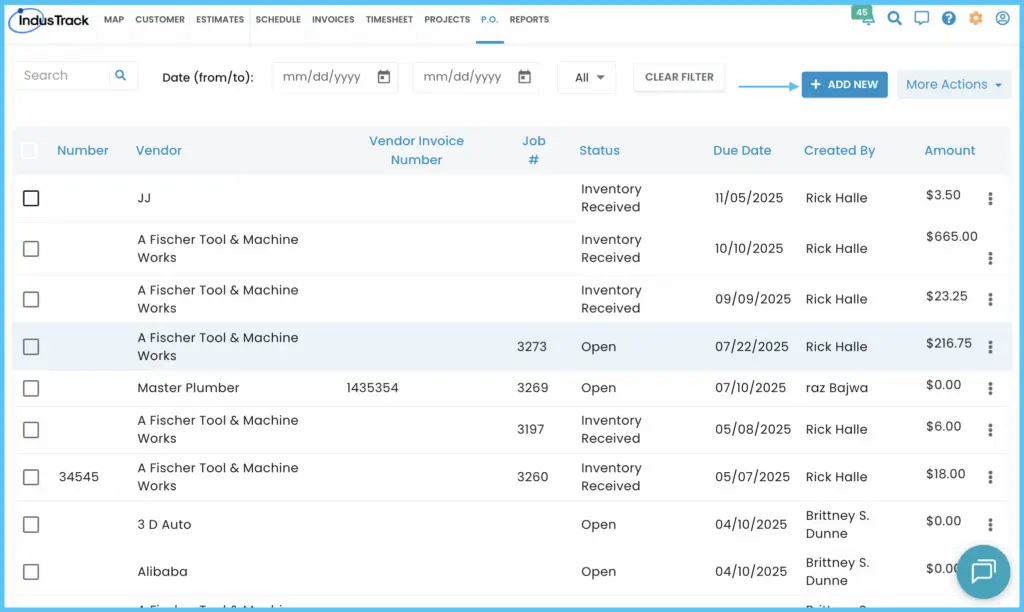
-
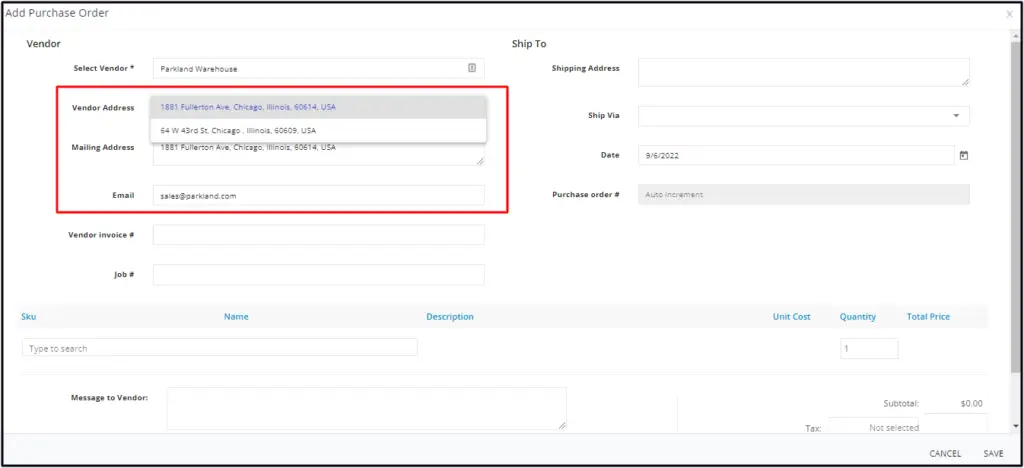
Vendor (required): pick the vendor. The Vendor Address and Mailing Address fill in.
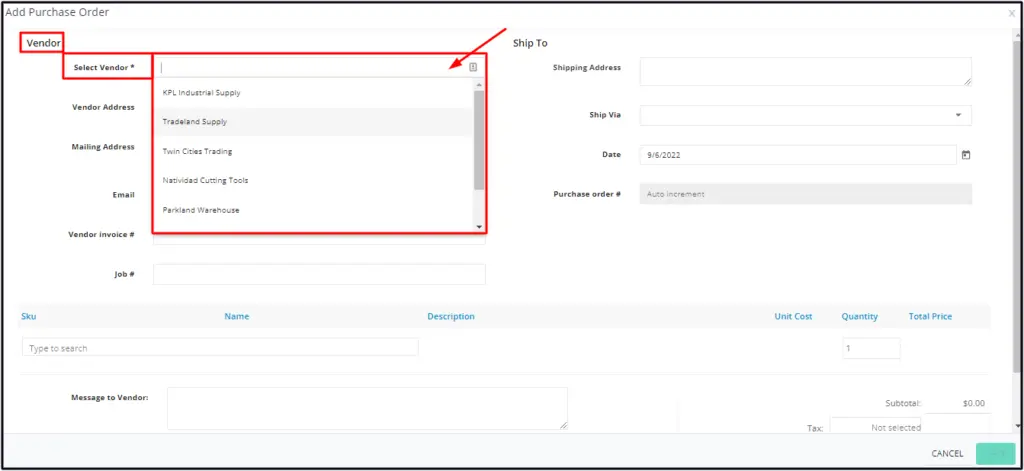
- Vendor has several locations? Pick the right address; the mailing address updates.
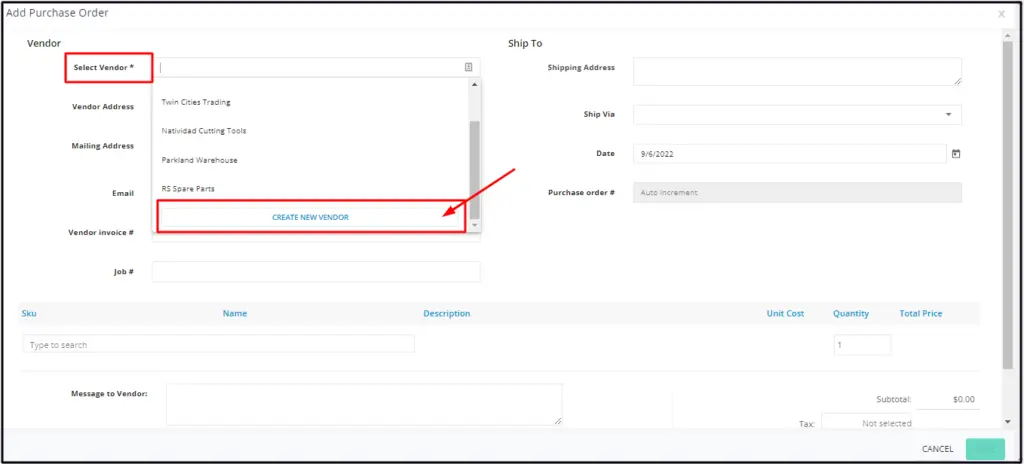
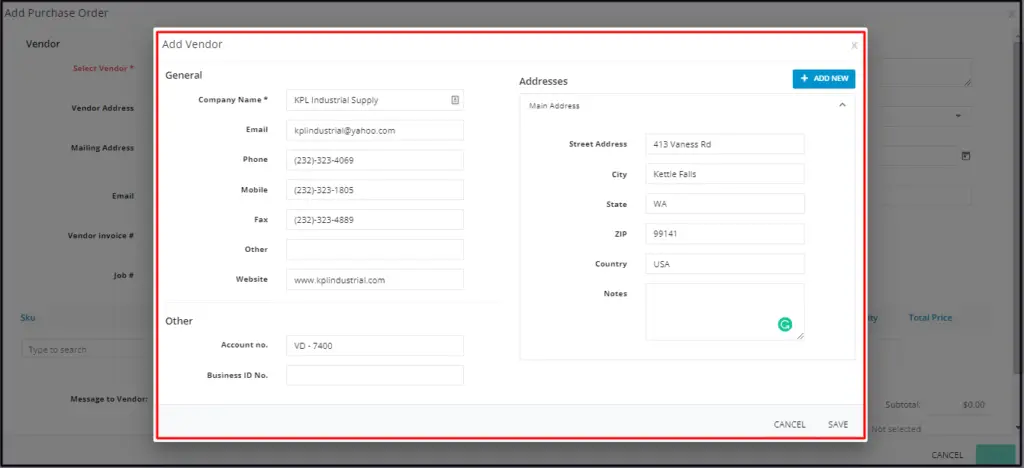
- Vendor not listed? Scroll to the bottom of the list and click Create New Vendor, fill in the Add Vendor window and save. You return to the PO with the vendor filled in. See How do I track bills and vendors?
- You can edit the mailing address on the PO, but the change isn't saved to the vendor's profile. The Vendor Address can't be edited on the PO; update the vendor's profile instead.
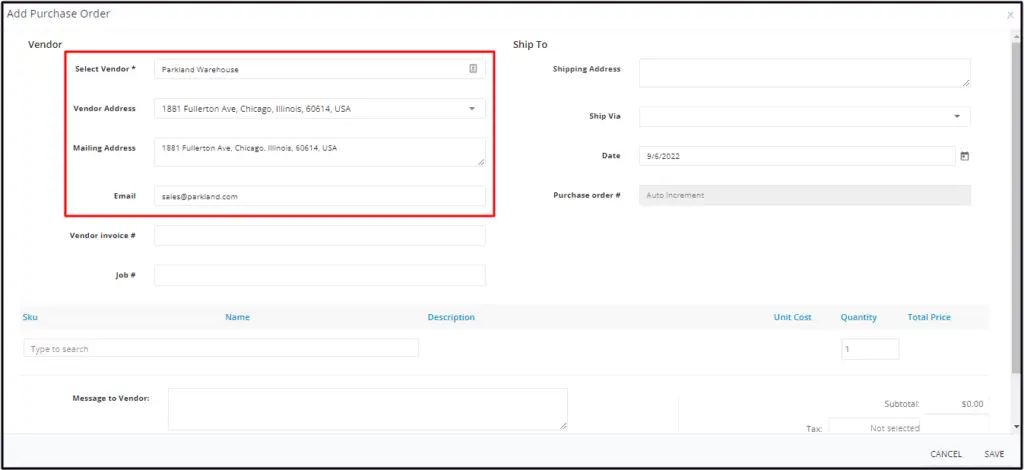
- To switch to another vendor, click the 2-arrows icon next to the address.
-
Ship To: shows the warehouse address where the items should be delivered. To switch to another warehouse, click the 2-arrows icon.
-
General information:
- Due Date: when the order should be fulfilled. Defaults to today.
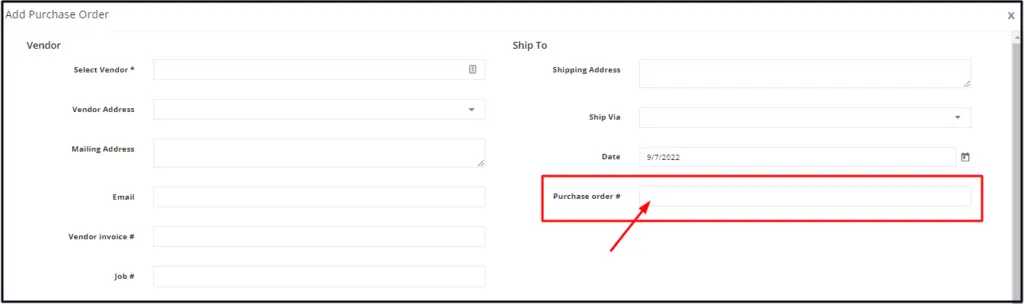
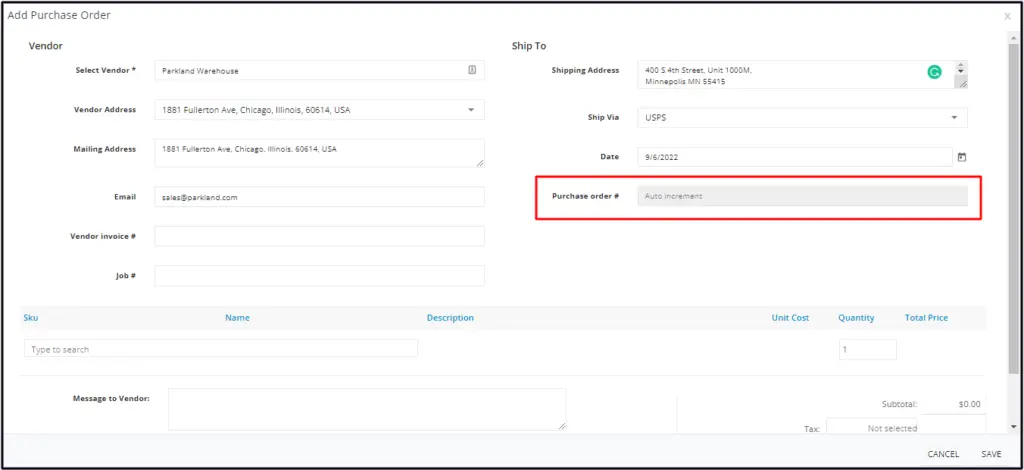
- Purchase Order #: type the PO number. If purchase order auto-increment is set up, the field is disabled and the number is assigned automatically when you save.
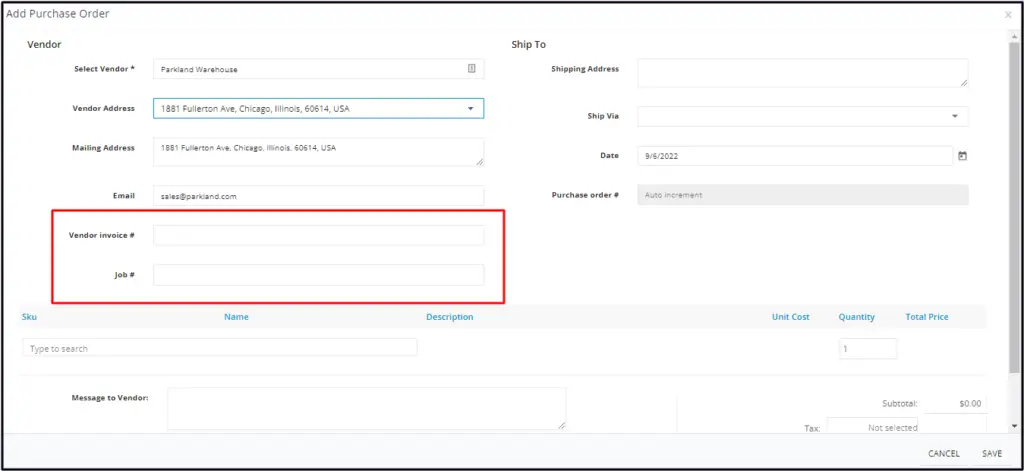
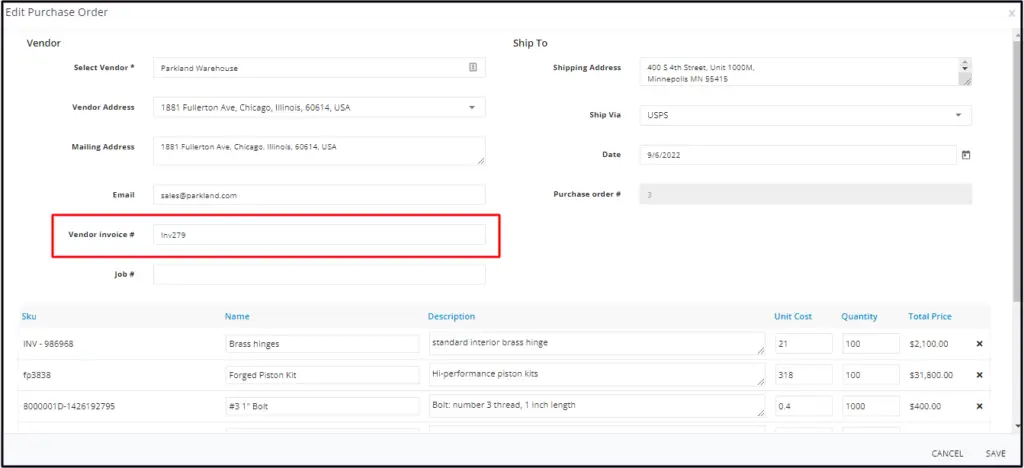
- Vendor Invoice # (optional): add it now or when you receive the vendor's invoice.
- Job #: link the PO to a customer job, if it's for one.
-
Add the items. For each line:
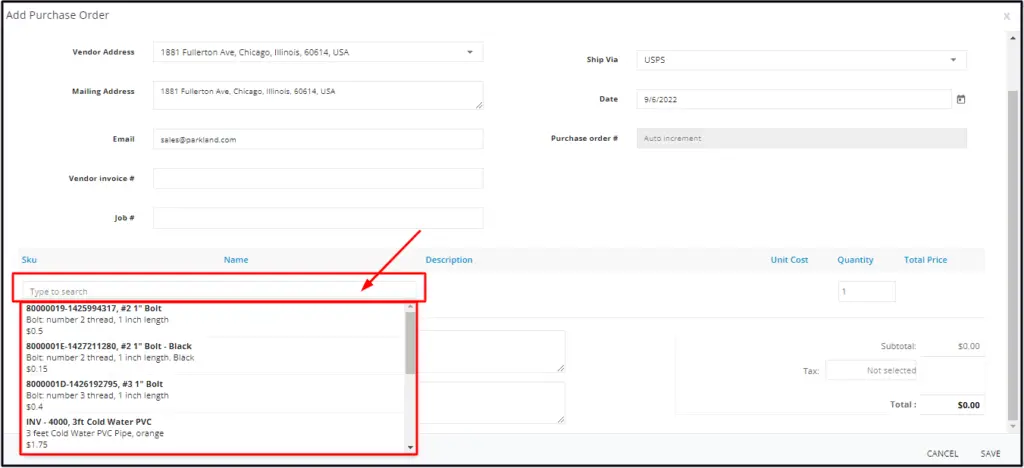
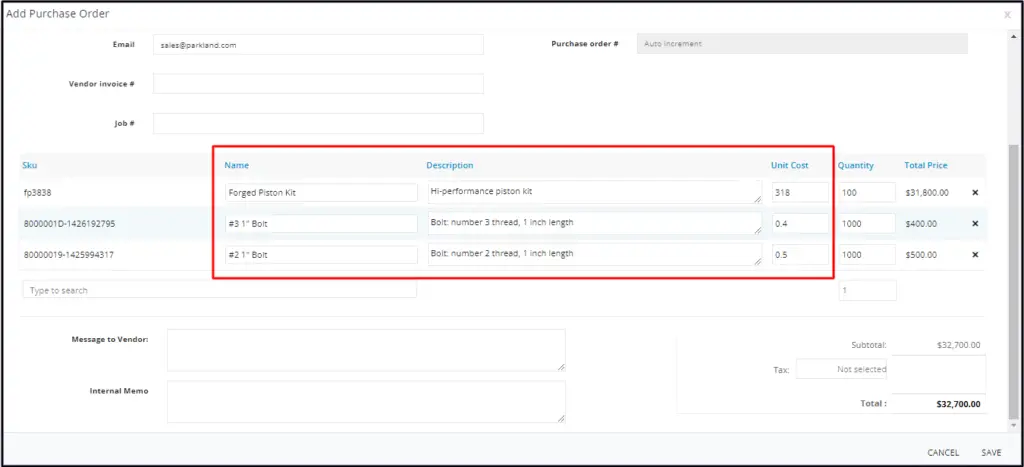
- Pick the item by SKU or name. The list shows inventory and non-inventory items; purchase orders aren't used to buy equipment. The Name, Description and Unit Cost fill in.
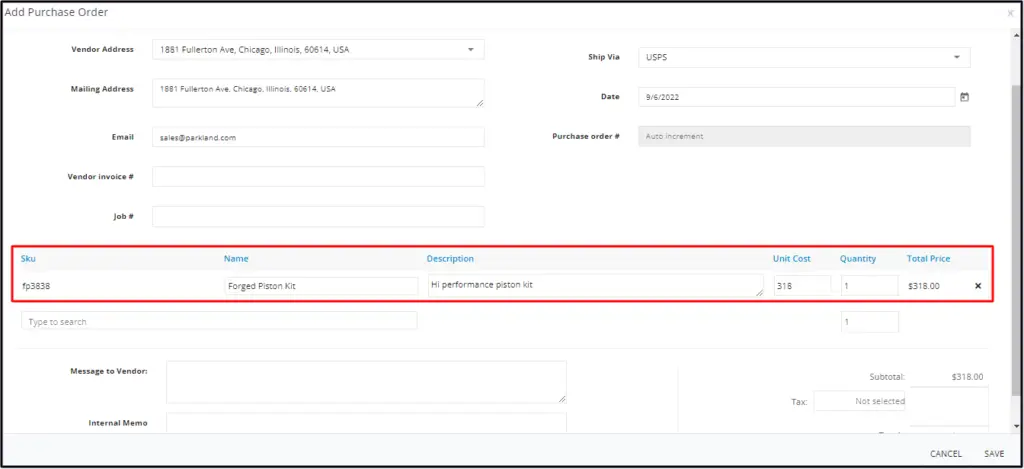
- Mfr. SKU: the manufacturer's code.
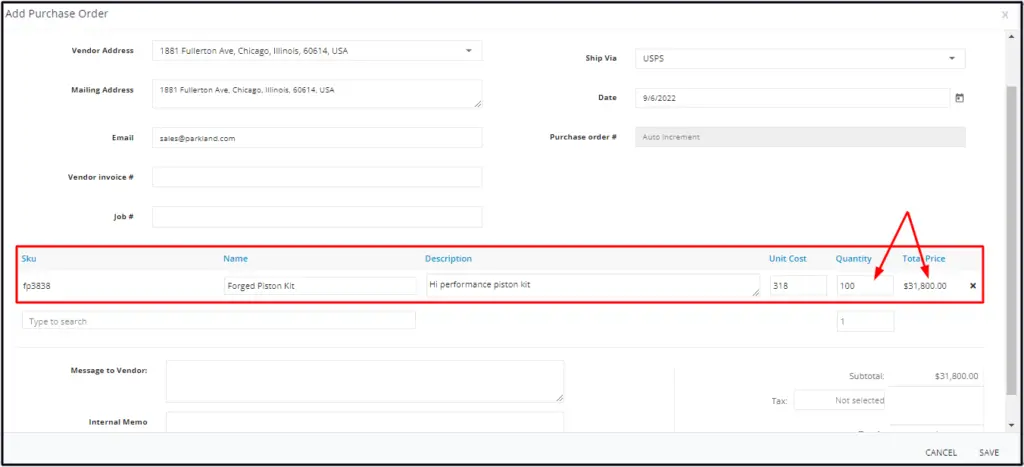
- Enter the Quantity (default 1). The Total Price is calculated, and the order total shows at the bottom.
- Quantity Received: leave it for now; it's filled in when the items arrive.
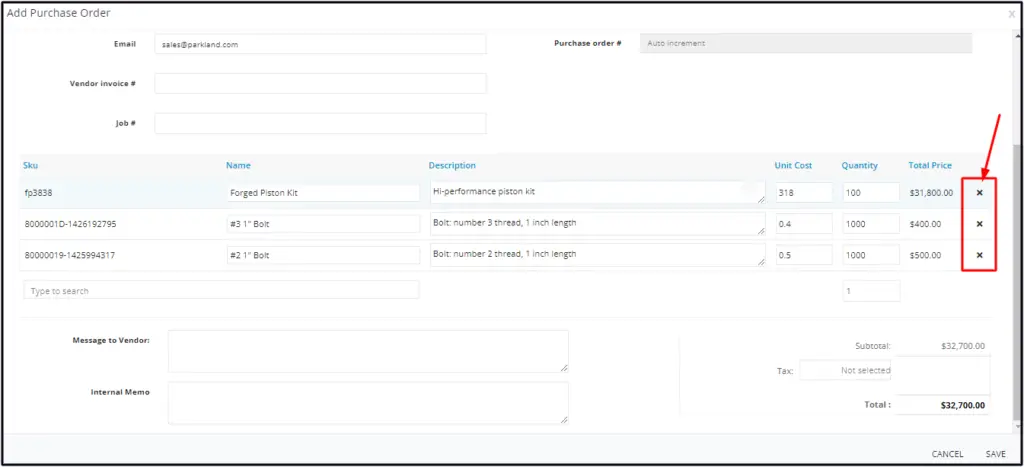
- To remove a line, click its X. An item can only be on the list once.
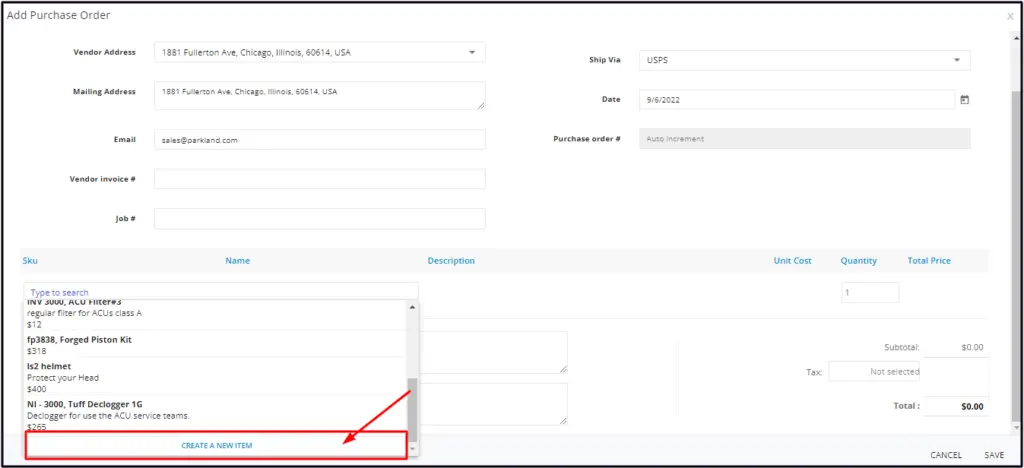
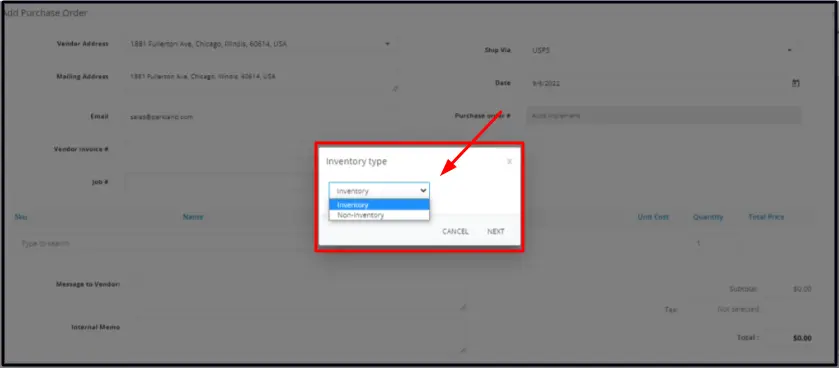
- Item not listed? Scroll to the bottom and click Create a New Item, choose Inventory or Non-Inventory, click Next, fill in the item and save.
- You can change the description and unit cost on the PO, but the change isn't saved to the item.
-
Add notes:
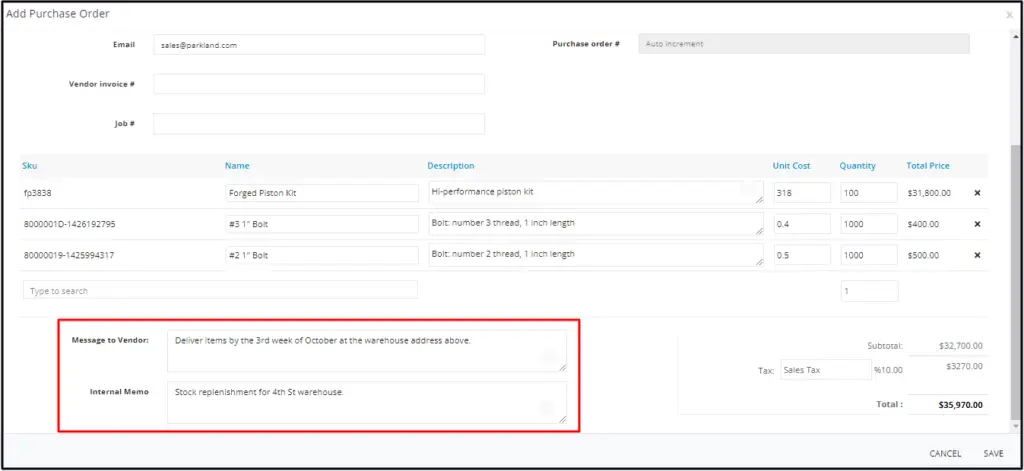
- Message to Vendor: instructions for the vendor, such as "rush order" or delivery arrangements.
- Internal Memo: notes for your team only.
-
Attachments (optional): attach supporting documents such as specifications or quotes. Maximum file size is 5 MB.
-
Click the Actions drop-down and select Save. The PO appears in the list with the status Open.
Watch: Creating and saving a purchase order 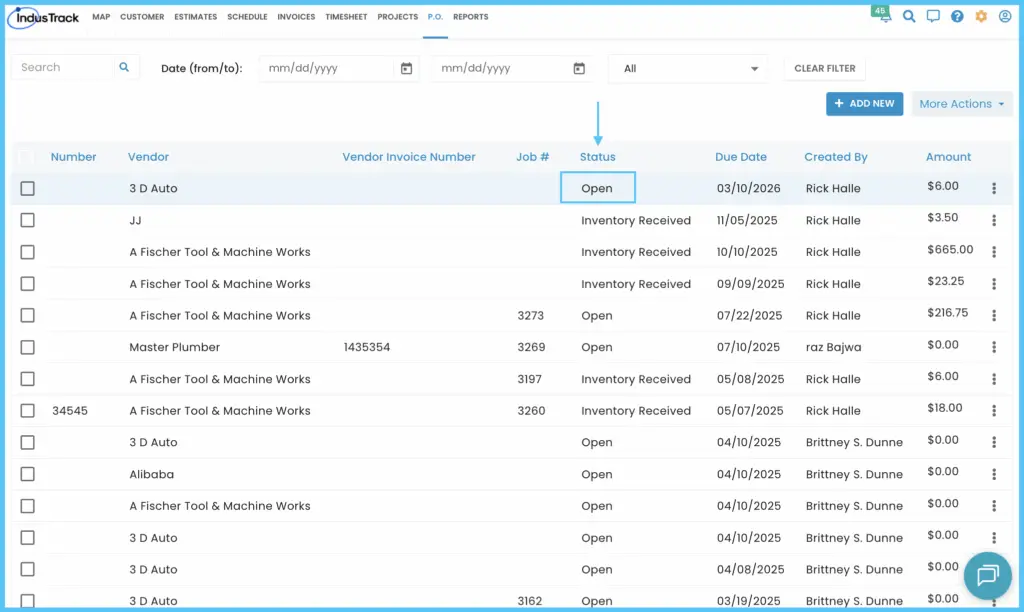
Edit, preview or print a purchase order
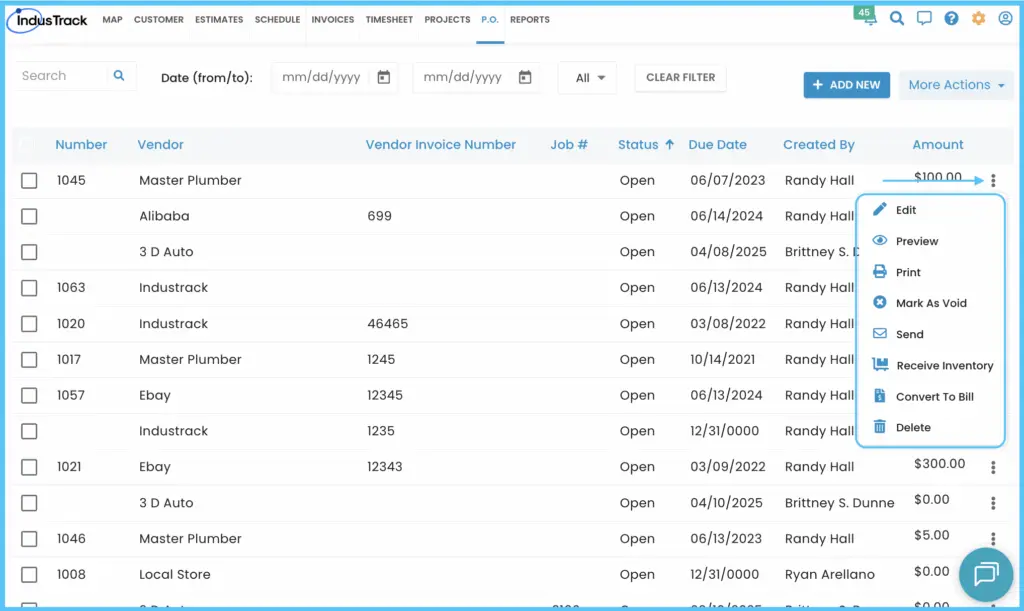
Click the 3-dot menu next to the PO:
-
Edit: change any details, add or remove items, or change quantities, then save.
-
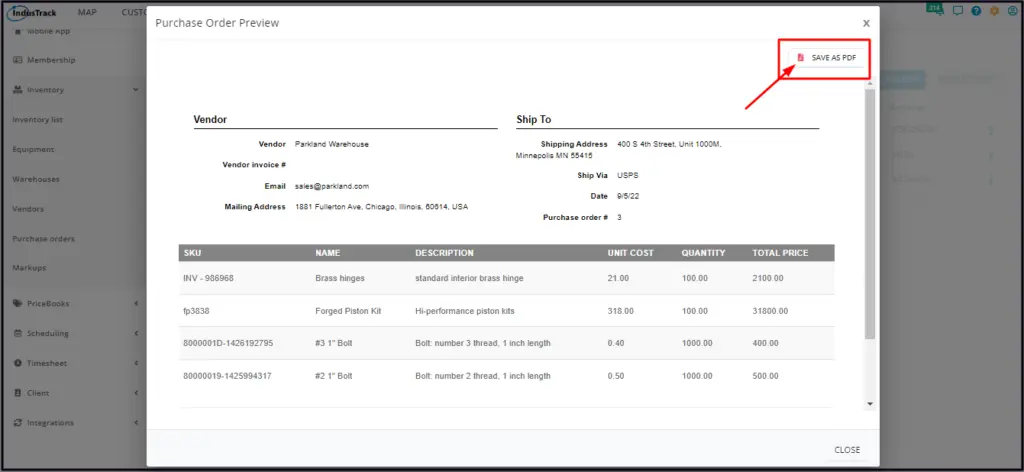
Preview: view the PO. Click Save as PDF in the upper right to download it. Close with Close or the X.
-
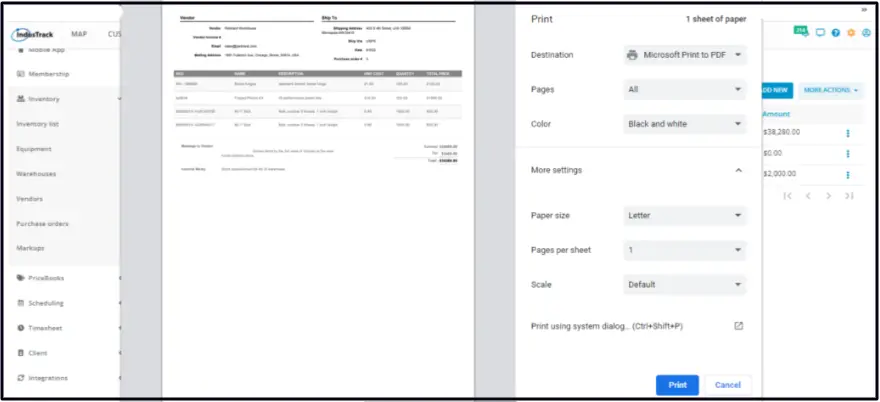
Print: opens the print preview. Choose your settings and click Print.
Send a purchase order to the vendor
-
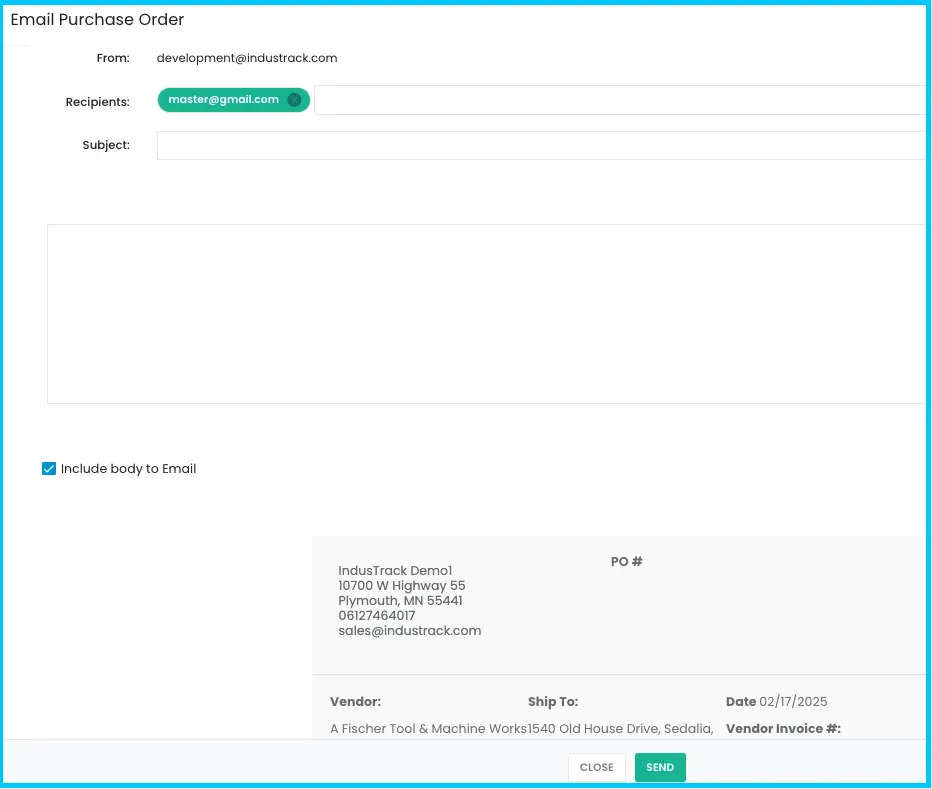
In the PO list, click the 3-dot menu next to an Open PO and select Send Mail.
-
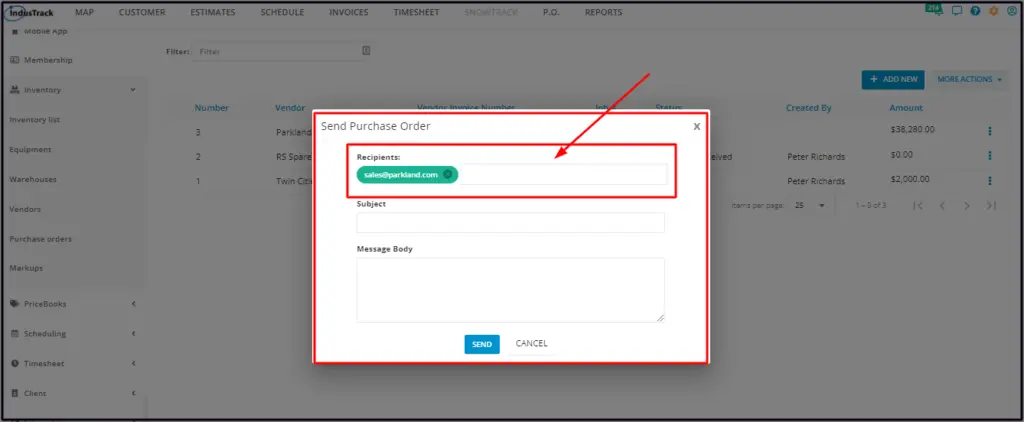
The vendor's email is already in Recipients. Add other addresses if needed.
-
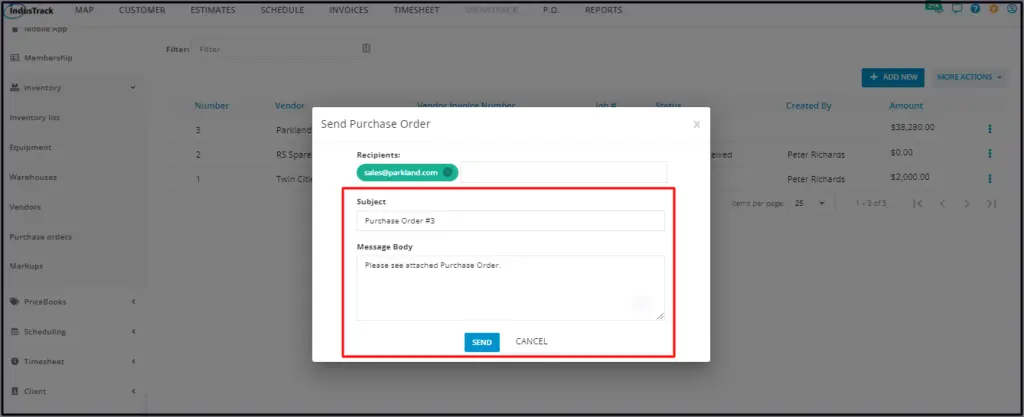
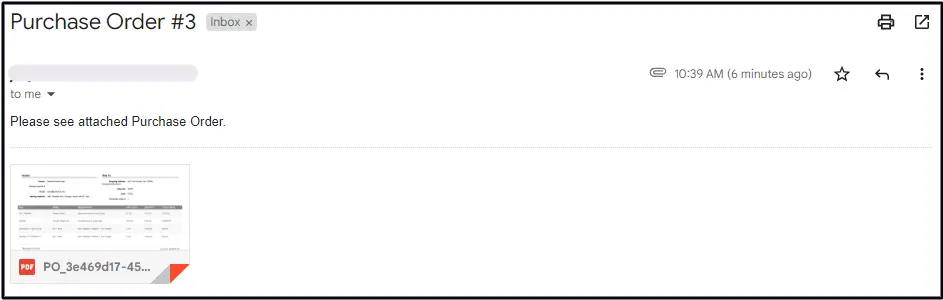
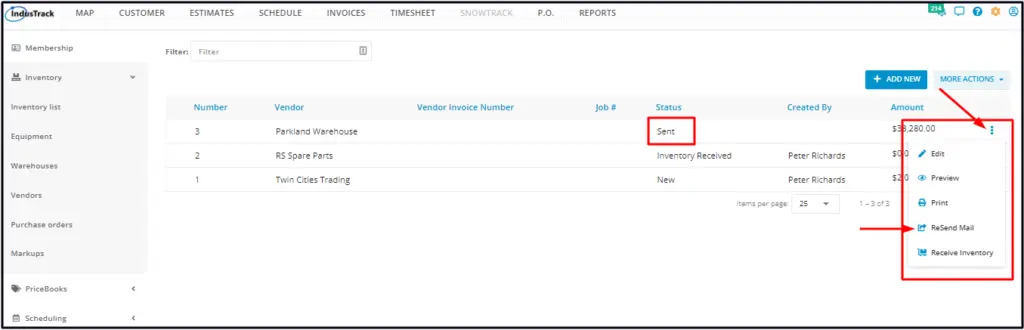
Enter the Subject and Message, and send. The vendor gets the PO as a PDF attachment, and the status changes to Sent.
To send it again, choose Resend Mail from the 3-dot menu (only for Sent POs).
Receive inventory
-
Check the delivery against the PO and the vendor's invoice.
-
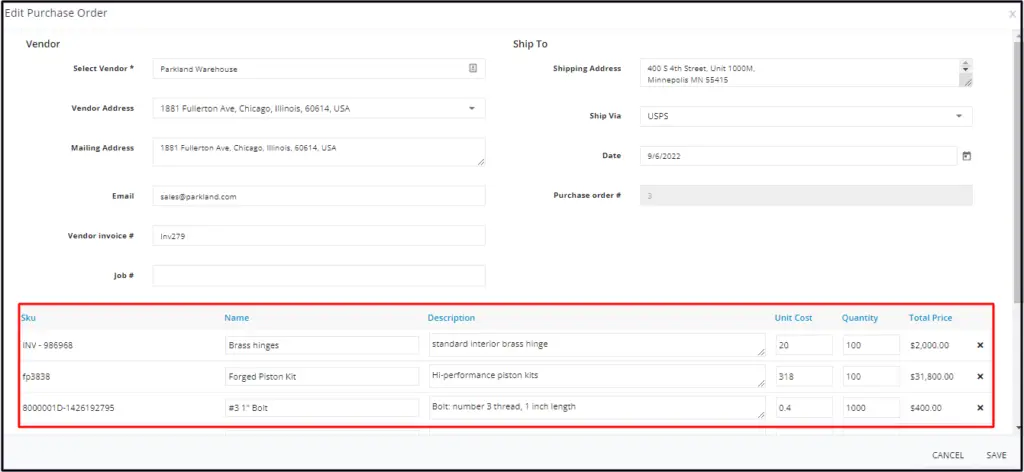
Open the PO with Edit. Enter the Vendor Invoice #. If your company allows changes after delivery, update the unit cost or quantity and note the change in Internal Memo. Save.
-
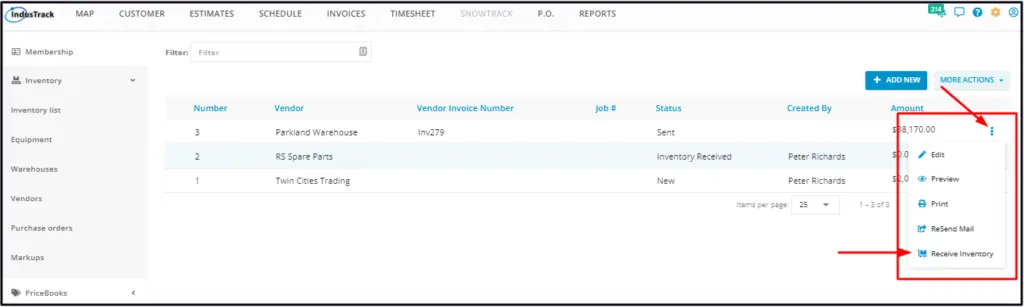
In the PO list, click the 3-dot menu and select Receive Inventory.
-
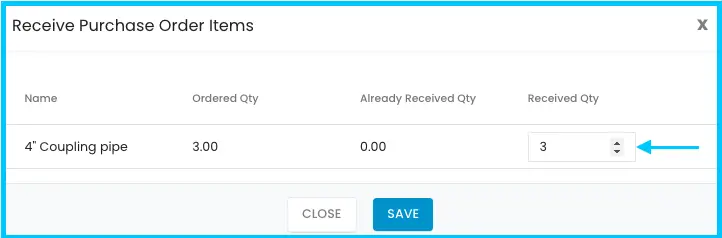
Enter the quantity received for each item in the Received Qty column. If only part of the order arrived, enter just the quantity you received; you can receive the rest later.
-
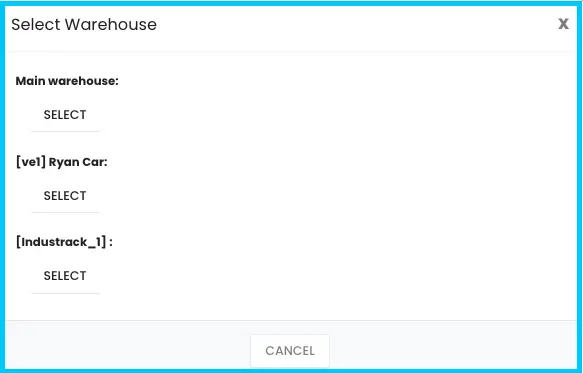
Choose the warehouse where the items were delivered, or that is responsible for them (for example, if they were shipped to a job site), and click Select. If the warehouse isn't set up yet, add it first; see How do I manage warehouses and stock?
-
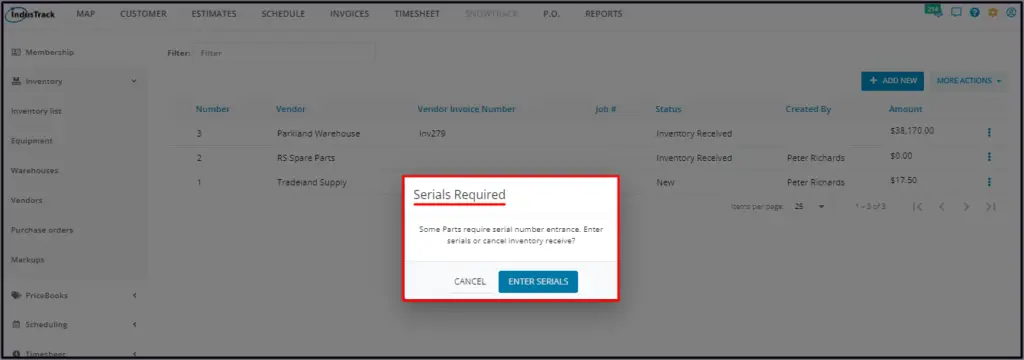
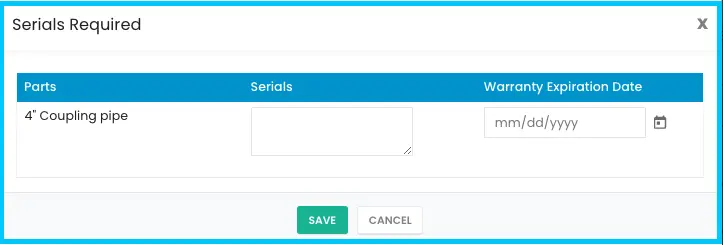
If items need serial numbers, a Serials Required window opens. Click Enter Serial (or Cancel to stop), type the serials in Serials separated by commas, and add the Warranty Expiration Date if it applies.
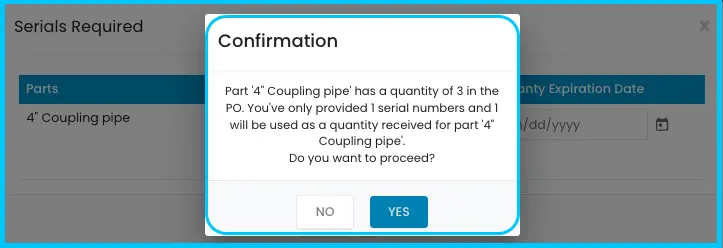
- If the number of serials doesn't match the PO quantity, click Yes to use the serial count as the quantity received (this overrides the PO quantity), or No to go back and fix them.
-
Save. A Success message confirms the items were received. Click OK.
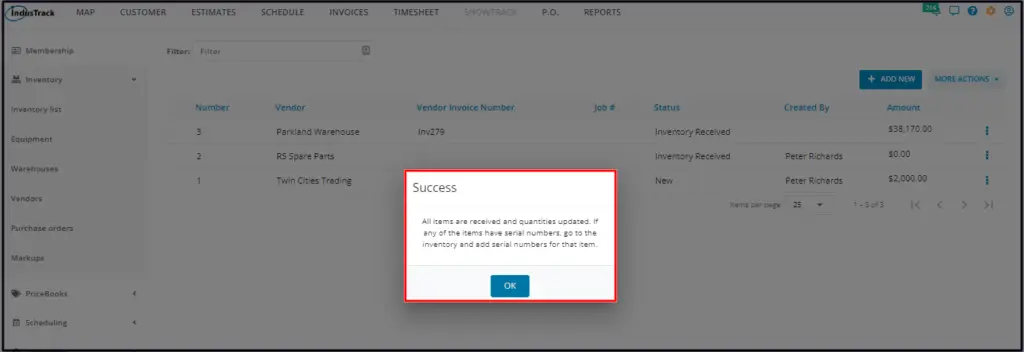
The received quantities are added to the item's Quantity on Hand at that warehouse. The PO status changes to Partially Received if only some items were received, or Inventory Received if all were.

PO statuses
| Status | Meaning |
|---|---|
| Open | Created but not sent. |
| Sent | Emailed to the vendor. |
| Partially Received | Some items received. |
| Inventory Received | All items received. |
| Billed | Converted into a bill. |
| Void | Canceled; won't be processed. |
Filter the list by status, either from the status drop-down or by clicking a status. Search by PO number, vendor, vendor invoice number or job number, and click a column header to sort.
Common questions
Can I change a PO's status by hand?
Yes, from the 3-dot menu. Mark As Void works on Open and Billed POs. Mark As Open works on Billed and Void POs. To change a Void PO to Billed, choose Convert to Bill.
Can I still receive inventory on a Void or Billed PO?
Yes. Receive Inventory is available for Open, Sent, Billed, Void and Partially Received POs. Receiving some items sets the status to Partially Received; receiving all sets it to Inventory Received.
How do I turn a PO into a bill?
Choose Convert to Bill from the 3-dot menu. The PO status changes to Billed. See How do I track bills and vendors?
Can I delete or print labels for several POs at once?
Yes. Check the POs, then click More Actions and choose Delete or Print Labels.
Can I create a PO from a job?
Yes. When adding a new job, open the Purchase Order tab and click Create. Create the PO as usual and save it. It's linked to the job automatically.
Do purchase orders sync to QuickBooks?
Was this article helpful?
Contact support