How do techs work jobs in the app?
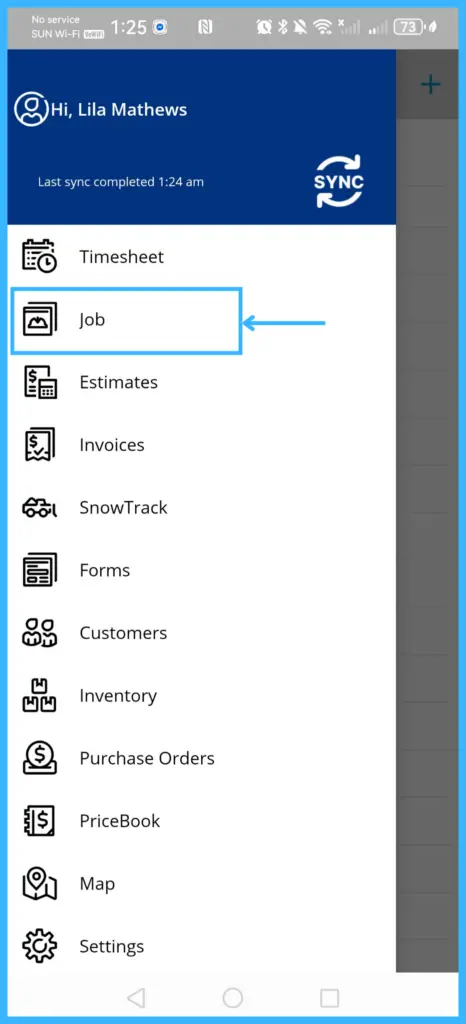
In the IndusTrack mobile app, tap the menu icon (three bars, top left) and select Job. Tap Start Shift, open a job, then use Start Travel, End Travel and Start Job as you go, and tap Done when you're finished.
Techs get a notification in the app when a new job is assigned to them and when any change is made to one of their jobs. How the office creates and dispatches jobs is covered in How do I create and schedule a job?
Work a job from start to finish
-
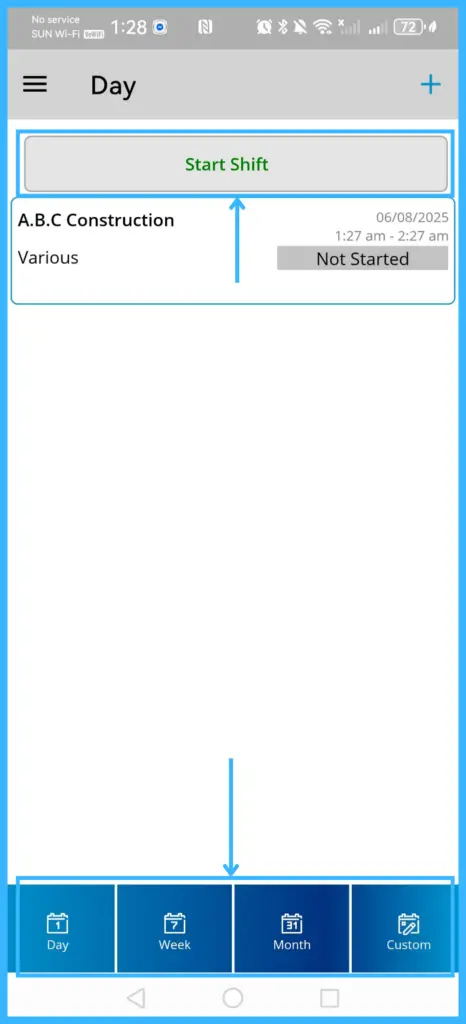
Tap the menu icon and select Job. Choose a view: Day, Week, Month or Custom.
-
Tap Start Shift. Your status changes to On Duty.
-
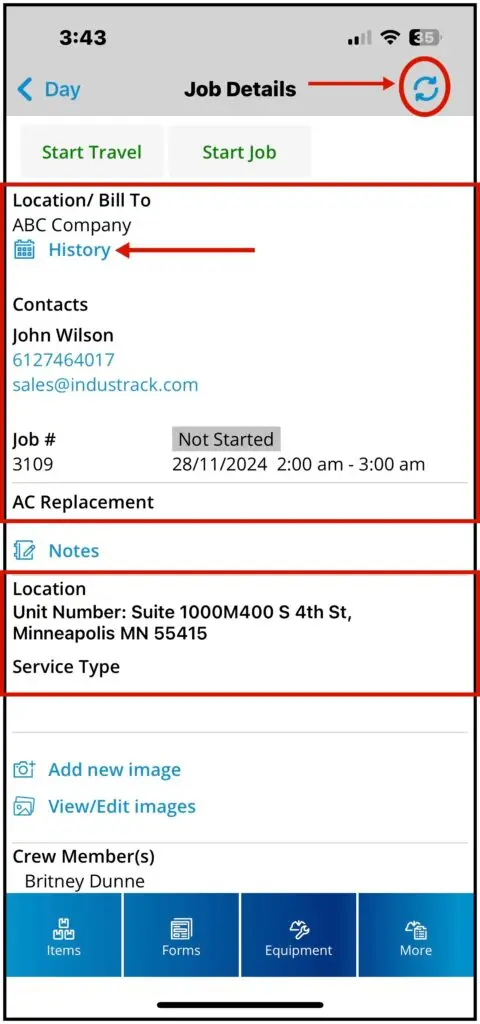
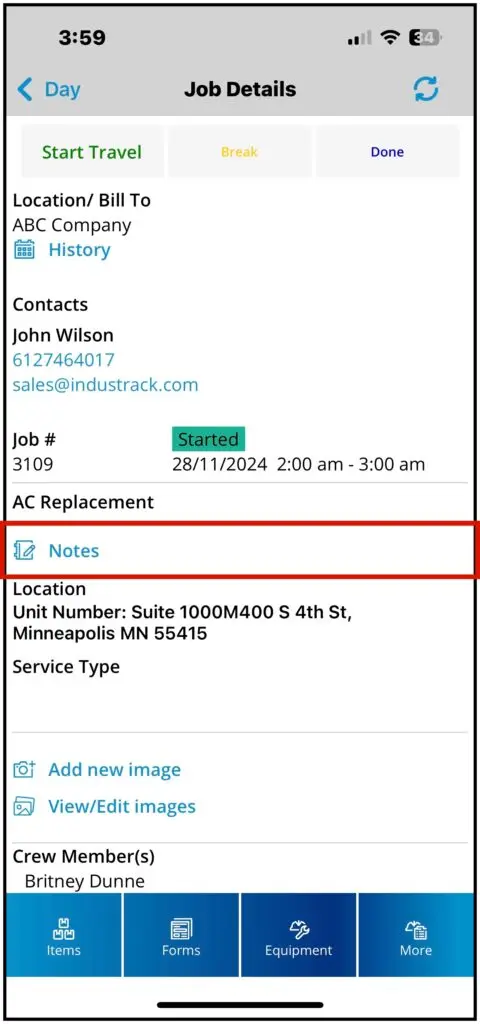
Tap a job to open its details: customer name and contact details, location, description and crew. Tap the sync icon on this page to send your changes to the office.
-
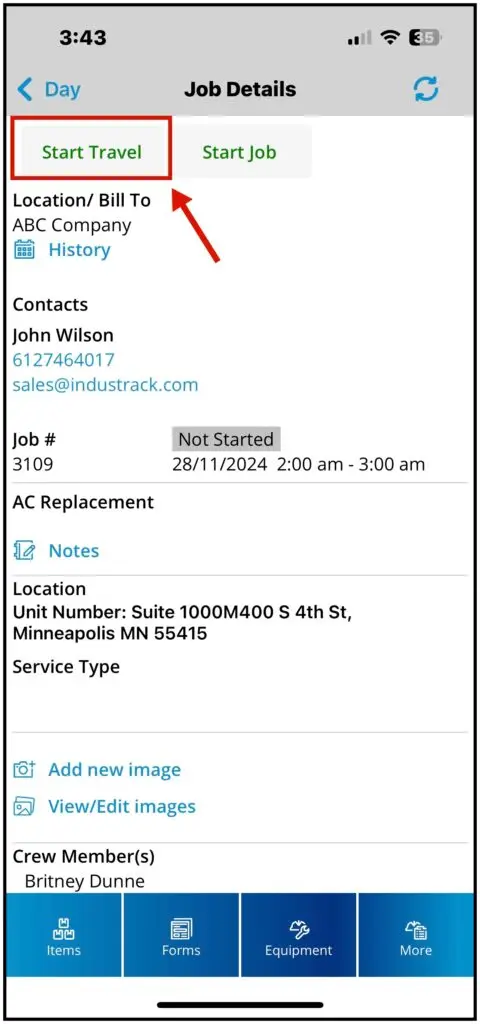
Tap Start Travel when you set off. The job status changes to On Travel, so the office knows you're on the way. Tap the address to open Google Maps with directions.
-
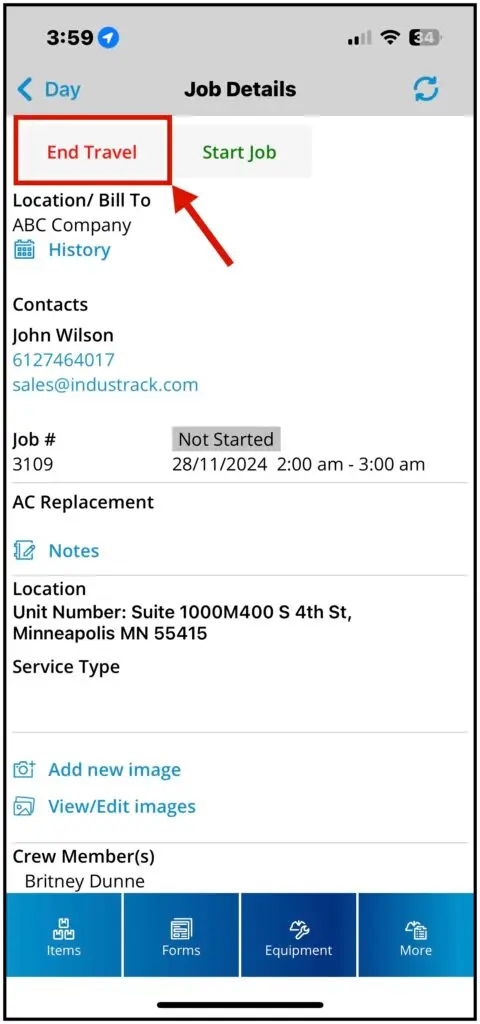
Tap End Travel when you arrive. (Your office can set travel to end automatically when you start the job.)
-
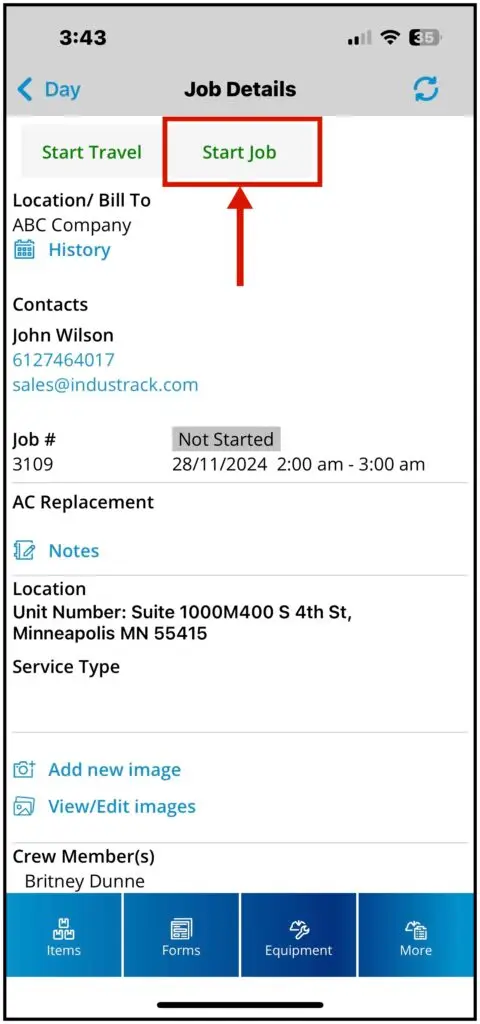
On the Details tab, tap Start Job. The job status next to the Job # changes to Started (green), and a Break button appears.
-
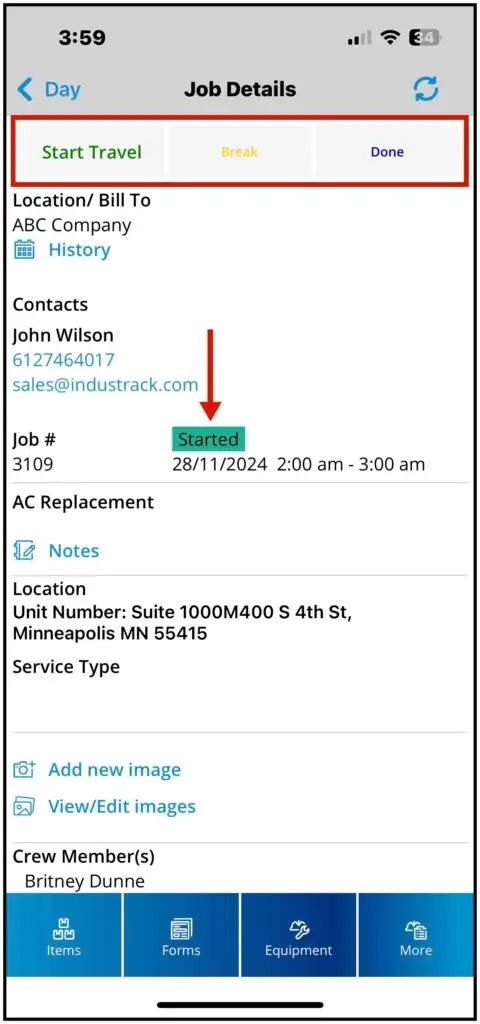
To take a break, tap Break. The job status changes to Paused (yellow).
-
Do the work: add notes, photos, items, equipment, forms and tasks as needed (see the sections below).
-
Tap Done and choose what happens next (see Finish a job).
-
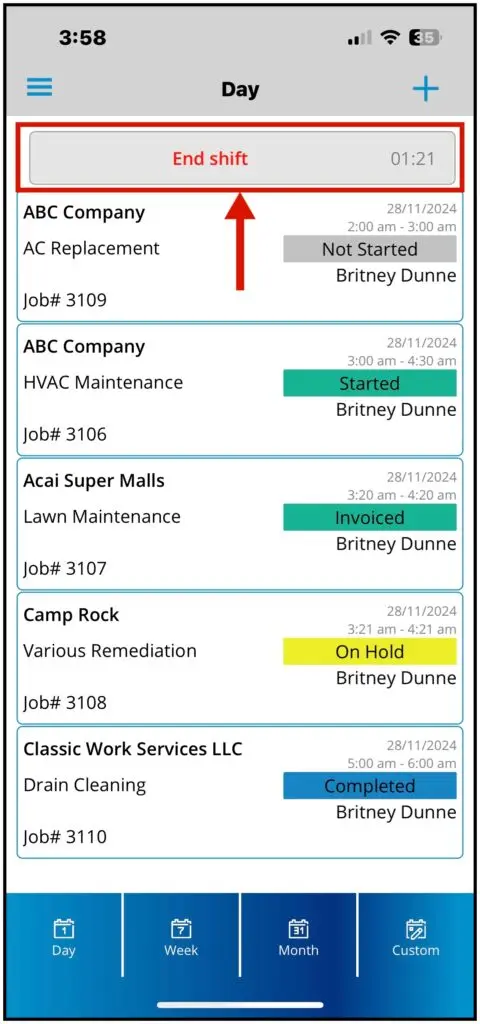
At the end of the day, tap End Shift. Your data is sent to the office automatically as long as you have a network connection or Wi-Fi.
Job notes
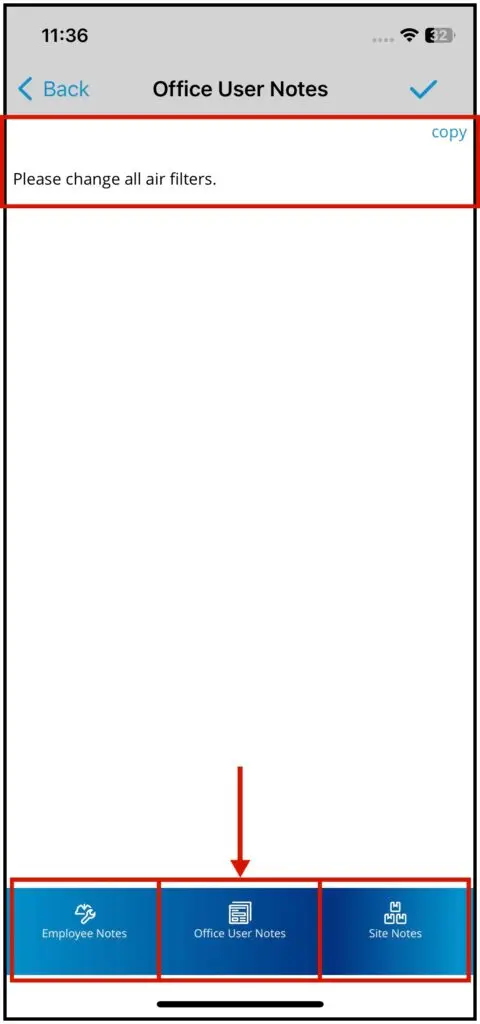
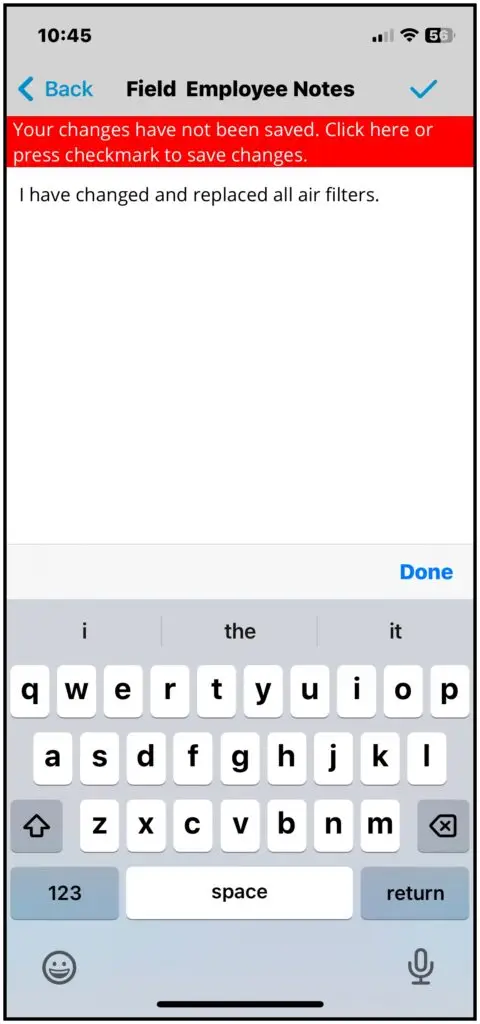
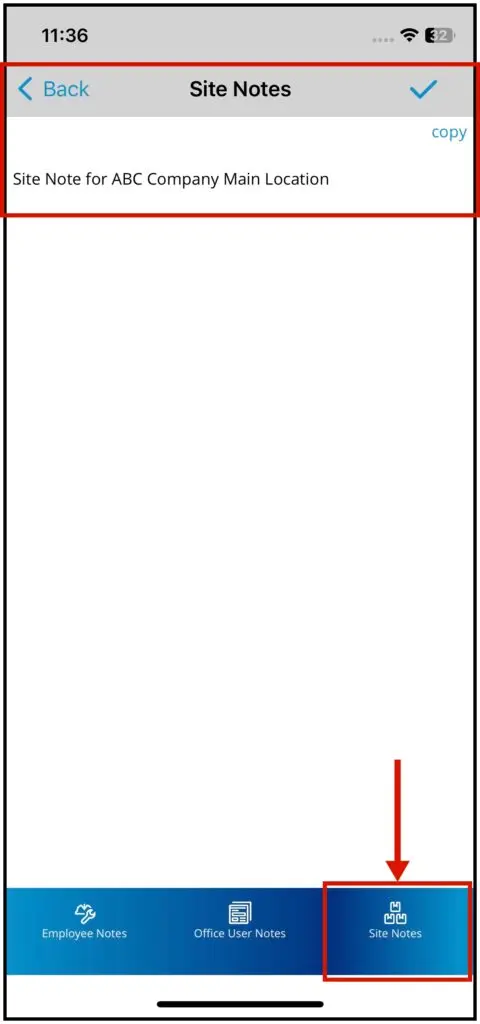
Tap the Notes icon. There are three tabs at the bottom:
| Tab | What it's for |
|---|---|
| Office Notes | Instructions from the office. You can copy them but not edit them. |
| Field Notes | Your own notes. You can edit them anytime; the office can see them, and they show on the job details page. Notes aren't saved automatically: tap the red warning or the checkmark to save. |
| Site Notes | Notes pinned to this customer and service location. Tap the check icon to save and go back to the job. |
Photos
-
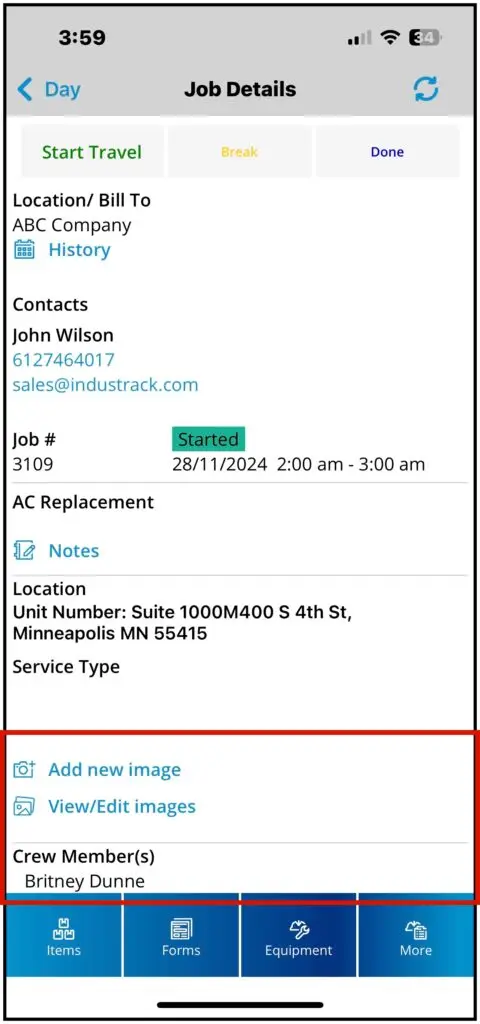
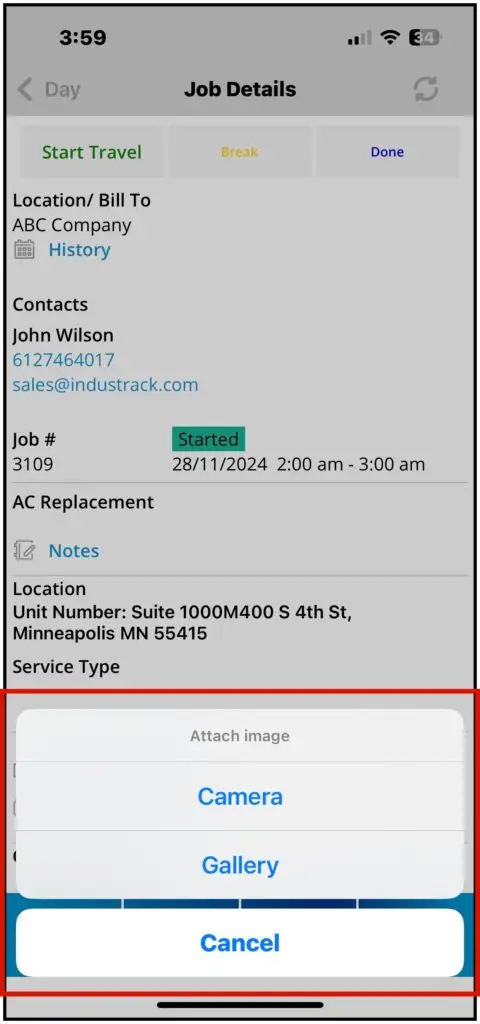
Add New Image: take a photo or pick one from your gallery.
-
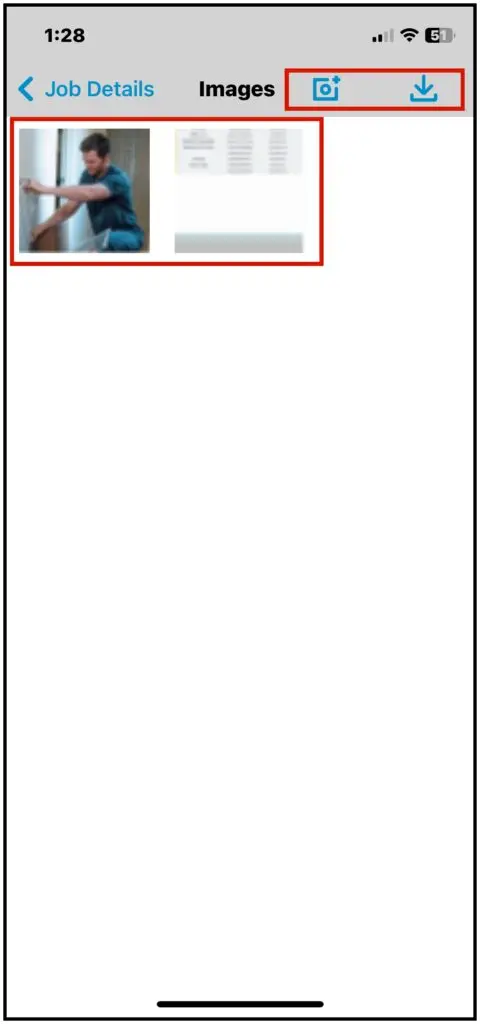
View/Edit Images: see all the job's images. Tap an image to view, edit or delete it. Tap the camera icon to add more, or the download icon to download images the office attached.
Use JPEG, PNG or another common format. HEIC/HEIF photos may not open in Chrome at the office.
Crew members
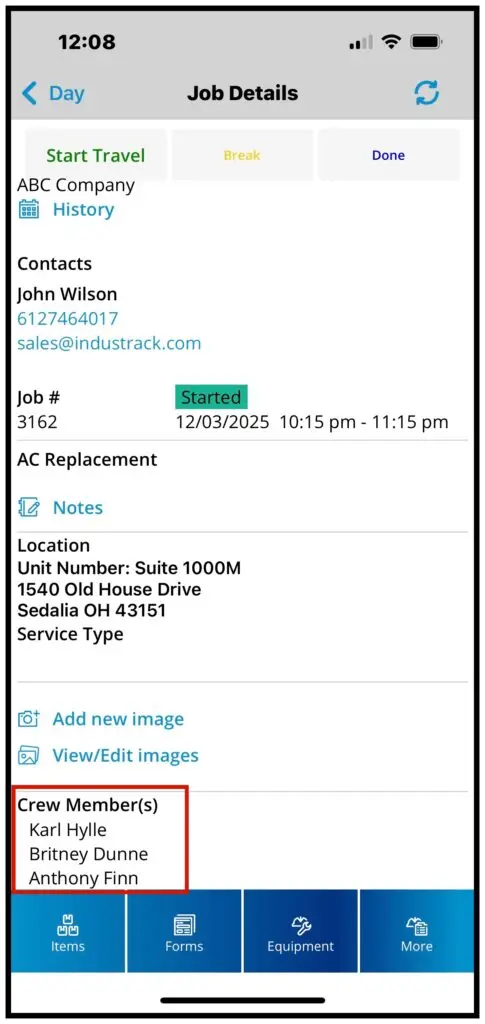
Tap Crew Members to see who's on the job.
-
Without supervisor access, you can only manage your own shift and job time.
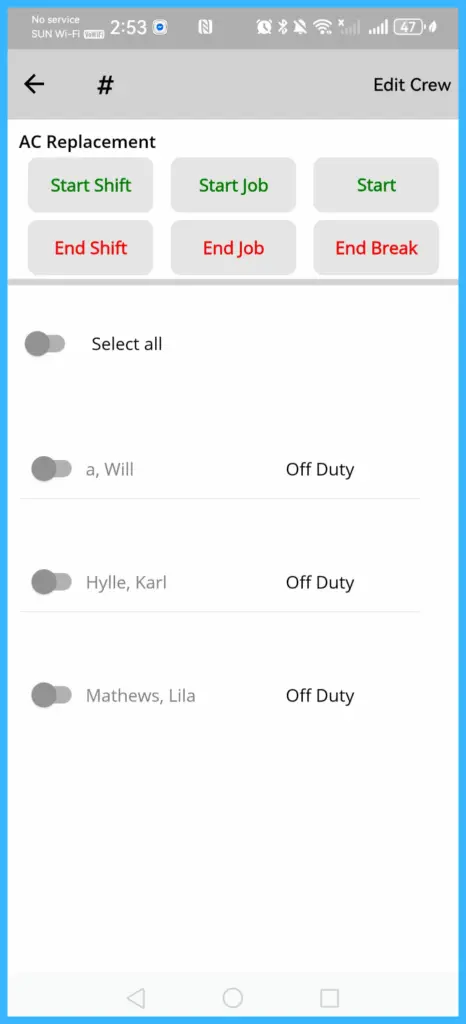
-
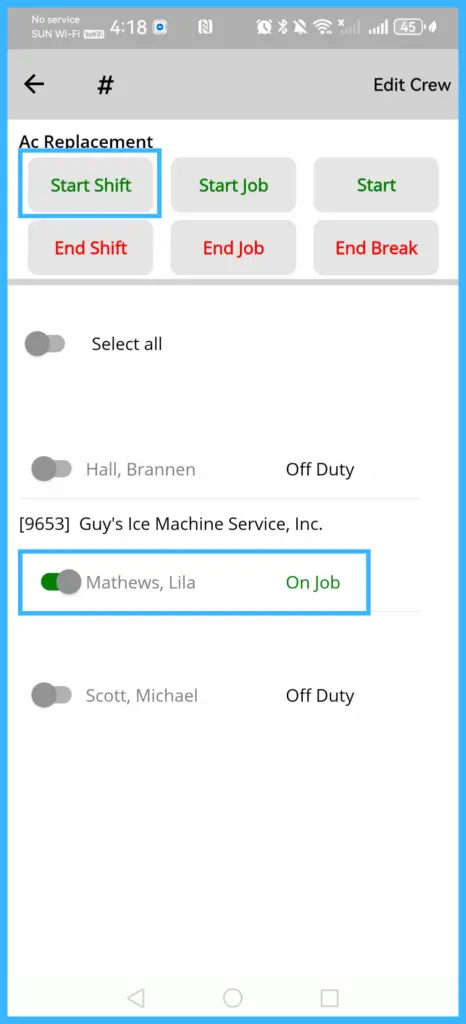
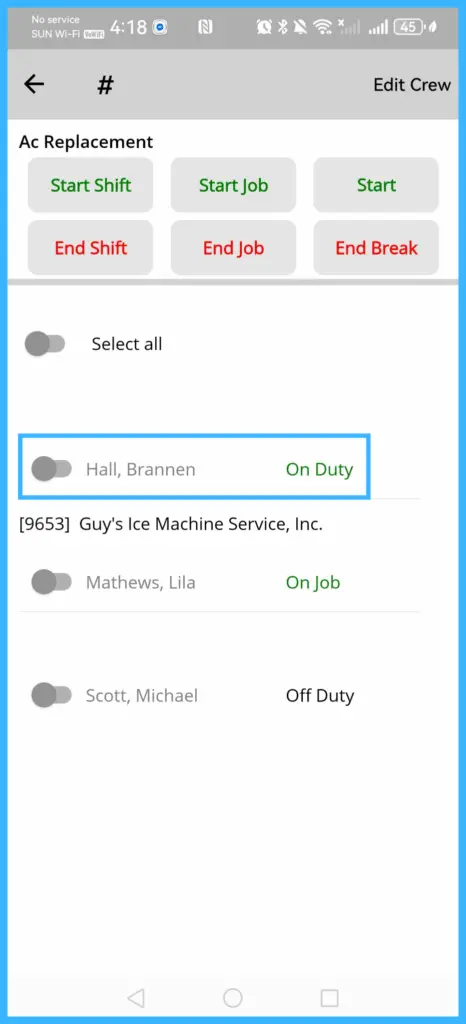
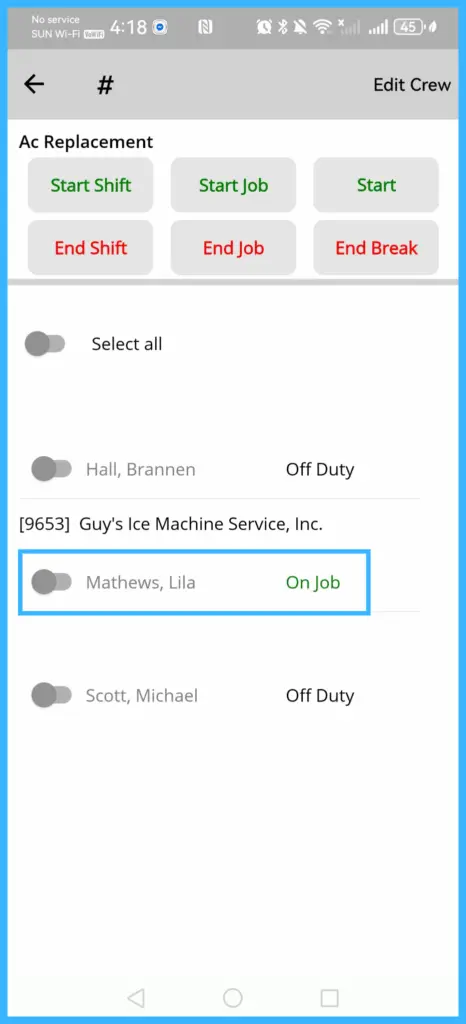
With supervisor access, you can manage time for other crew members too. Toggle one or more names (or everyone on the job), then tap Start Shift, Start Job or Start Break. Their status changes to On Duty, On Job or On Break.
Items and equipment
-
Items tab: shows parts, services and equipment the office attached. Change a quantity, or turn the toggle off to remove an item. To add items:
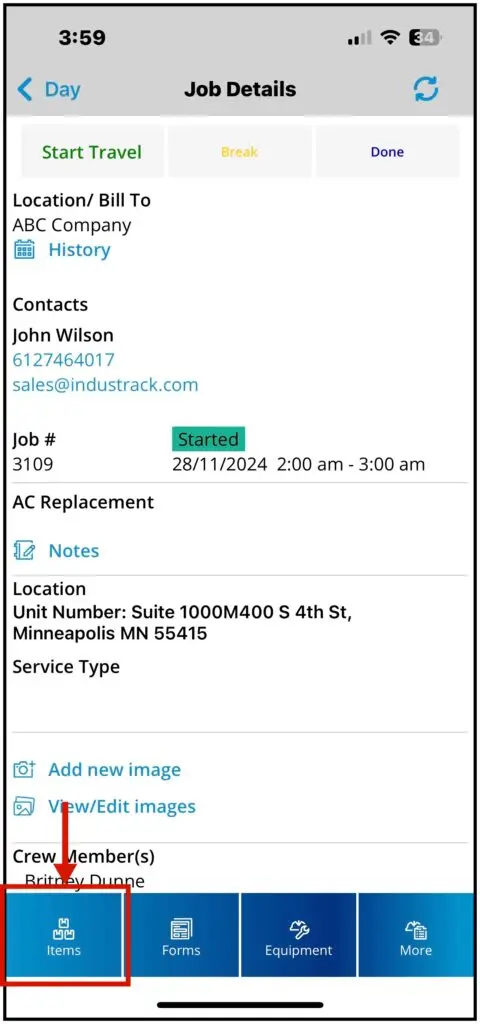
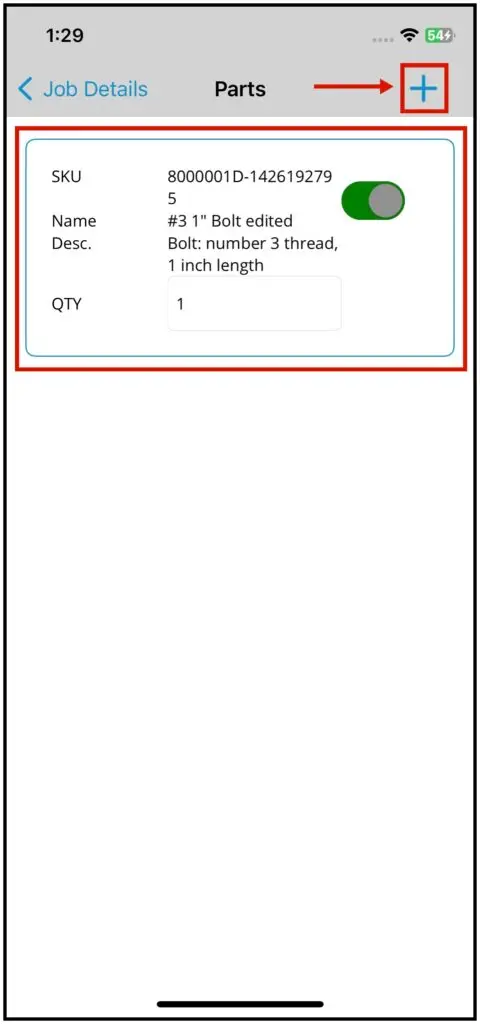
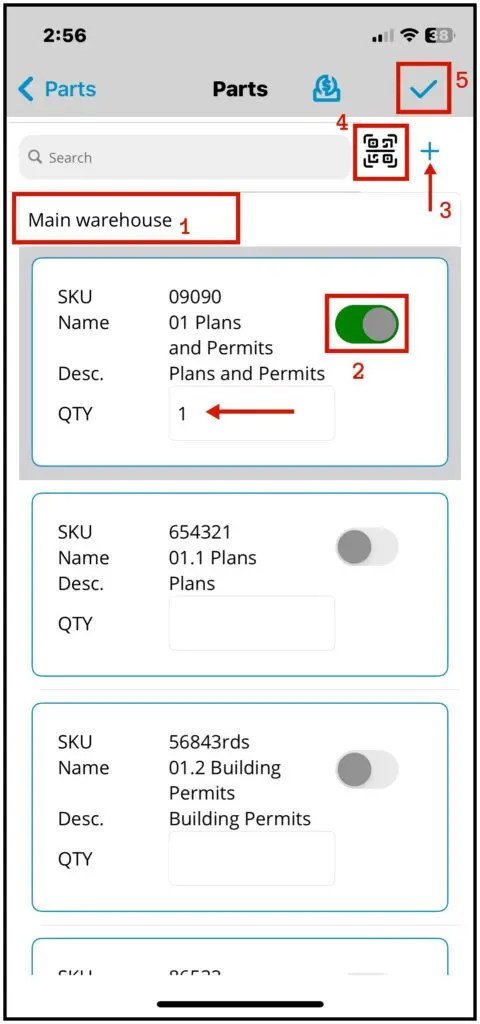
- Tap the plus icon.
- Select the warehouse to take the item from.
- Search for items and turn on the toggle next to each one; change the QTY if needed. Tap Scan (top right) to scan a barcode, or tap the plus icon to create an item that isn't in the list.
- Tap the arrow (top right). The items are added to the job.
-
Equipment tab: shows the customer's existing equipment and its service history. Search for equipment, tap Scan Existing to scan its code, or turn on its toggle to assign it to the job. A toggle that's already on means the equipment is already assigned.
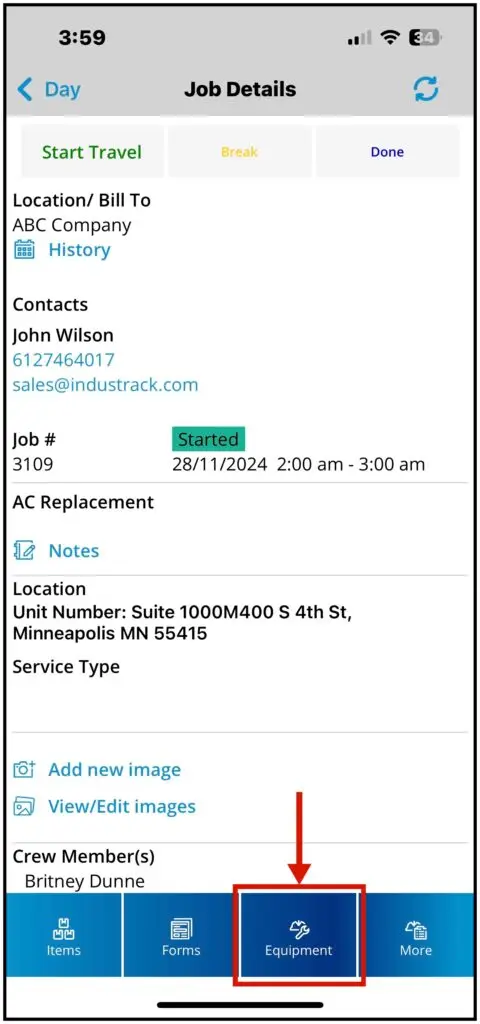
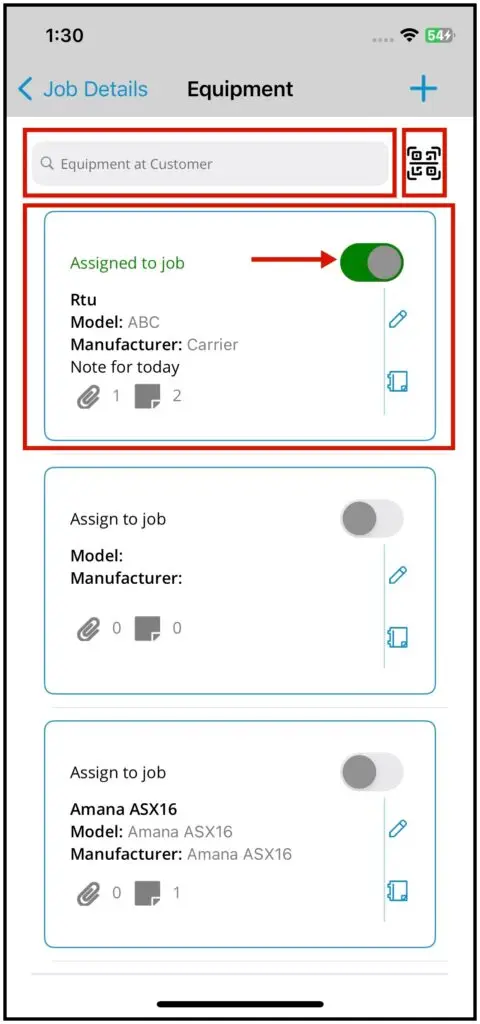
When you complete a job that includes equipment with a serial number, the equipment is added to the customer's Equipment tab automatically, unless that serial number is already saved under any customer.
Forms
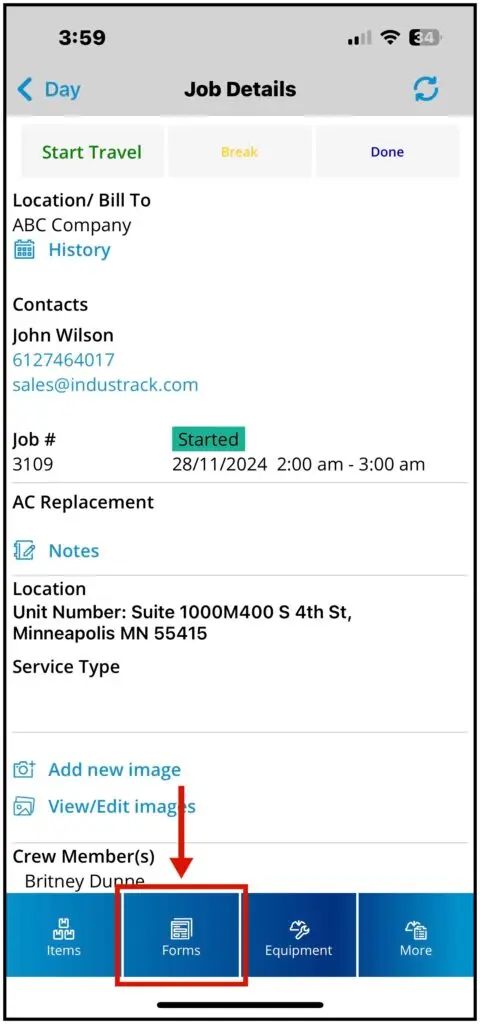
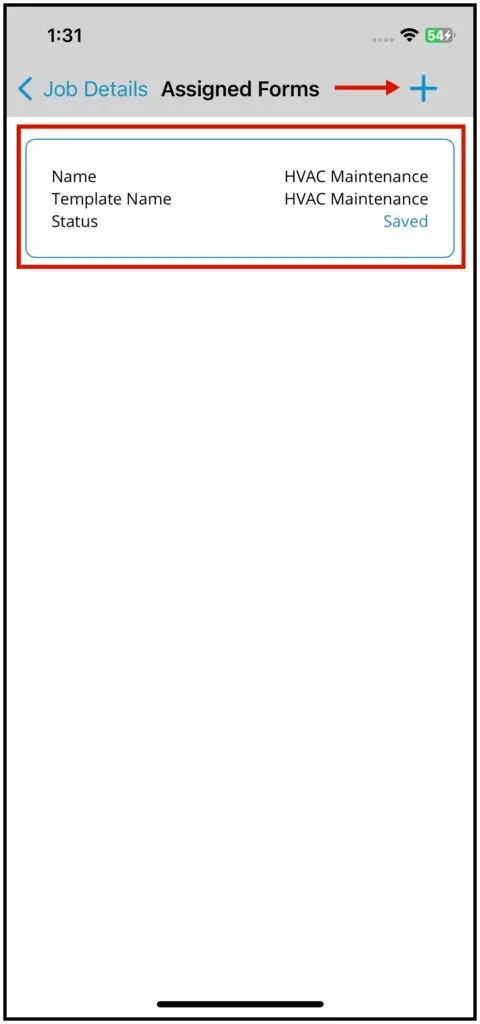
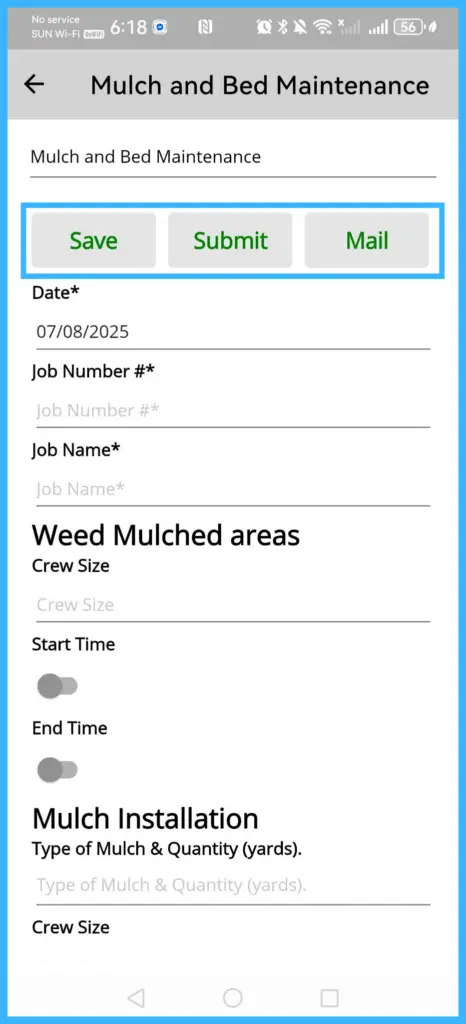
The Forms tab lists the forms assigned to the job. Tap the plus icon to pick another form; it's assigned to the job too. You or the customer can fill a form in, then:
| Button | What happens |
|---|---|
| Save | Saves your entries. You can come back and edit the form. |
| Submit | Saves the form and sends it to the office. You can't edit it after this. |
| Asks for an email address and sends the form there. |
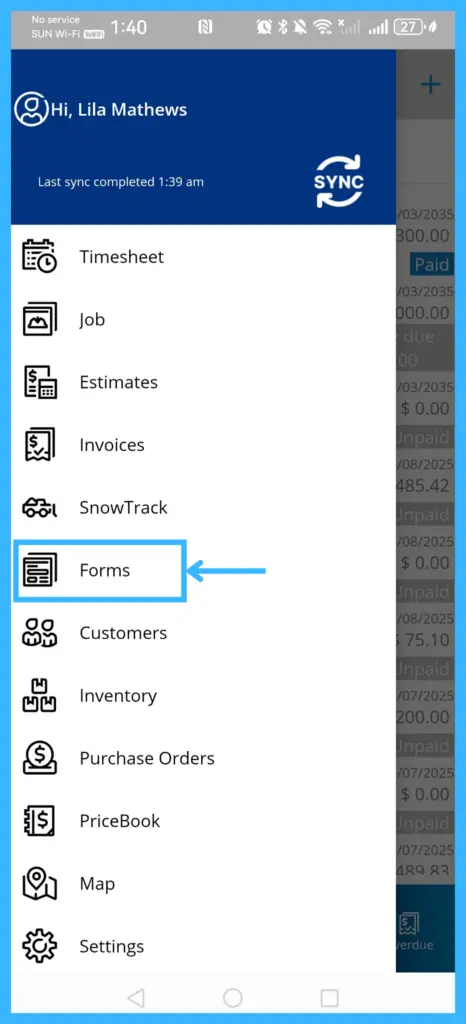
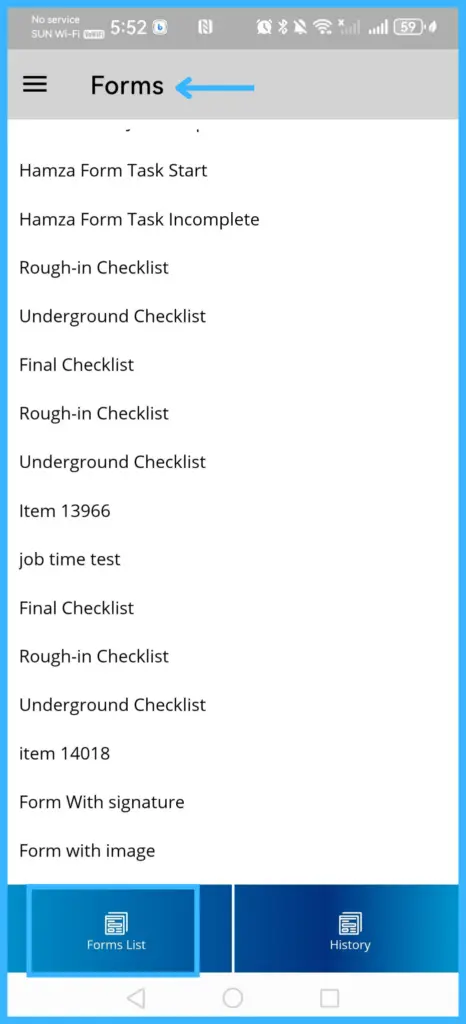
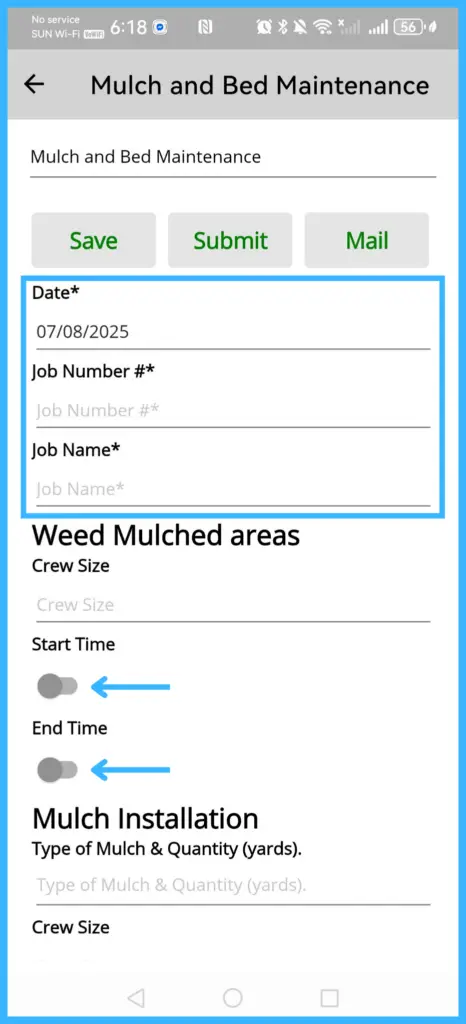
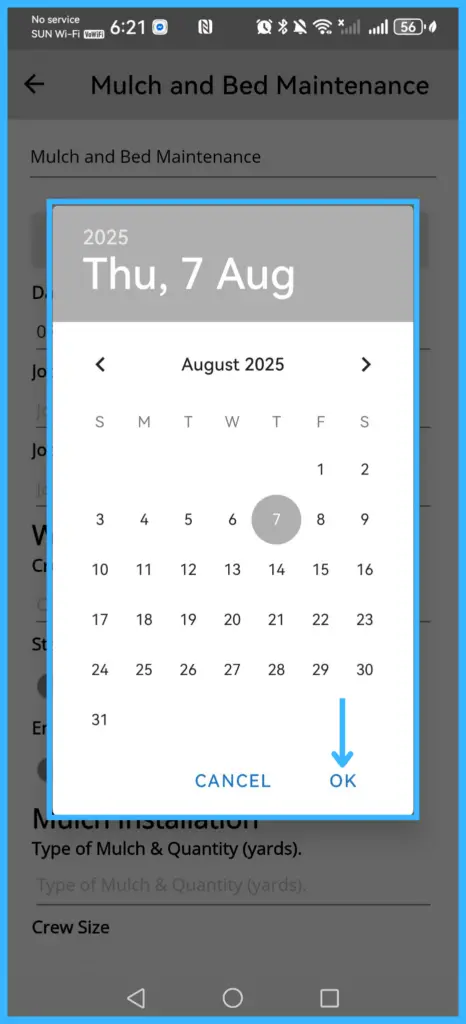
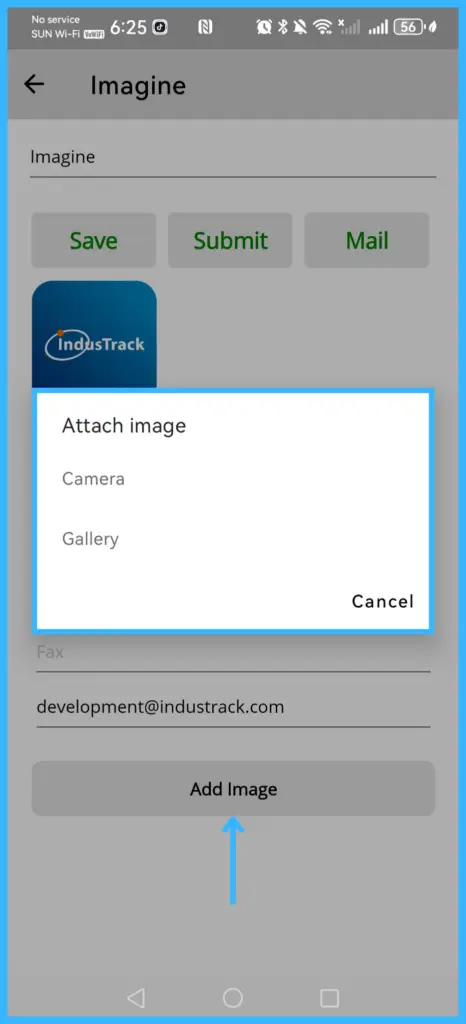
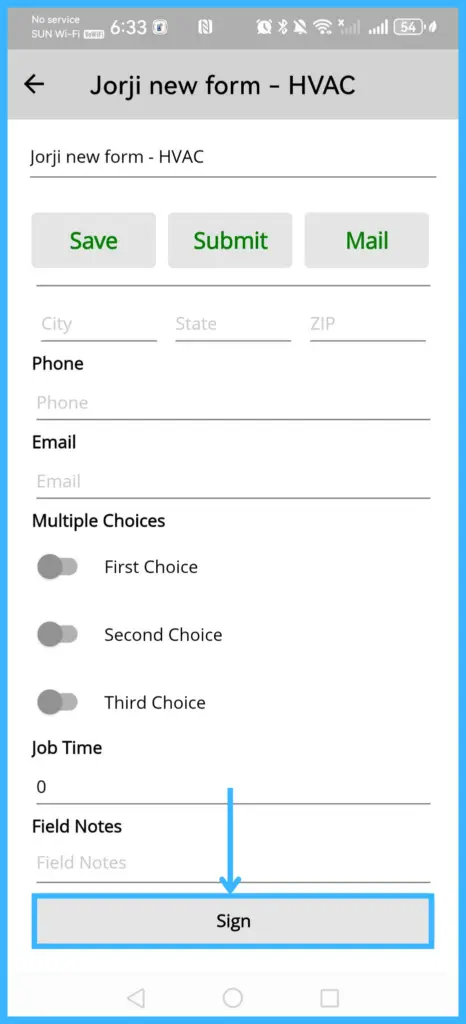
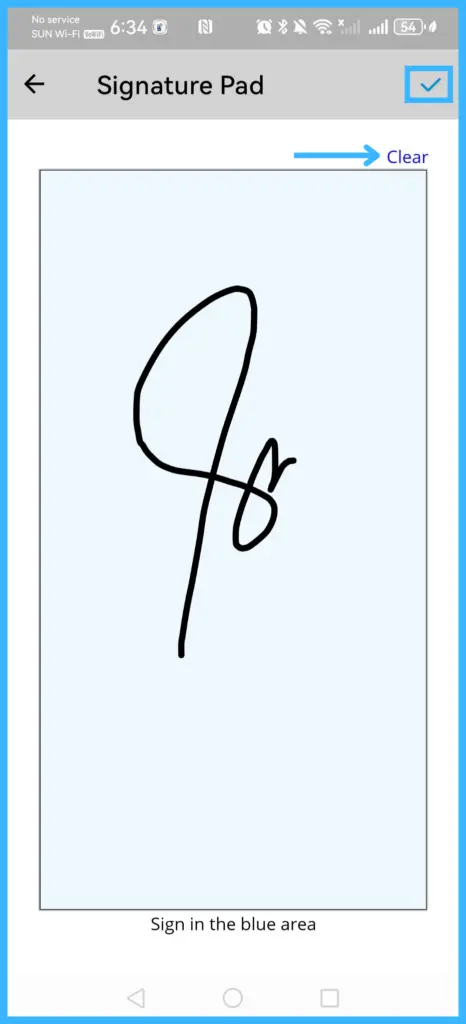
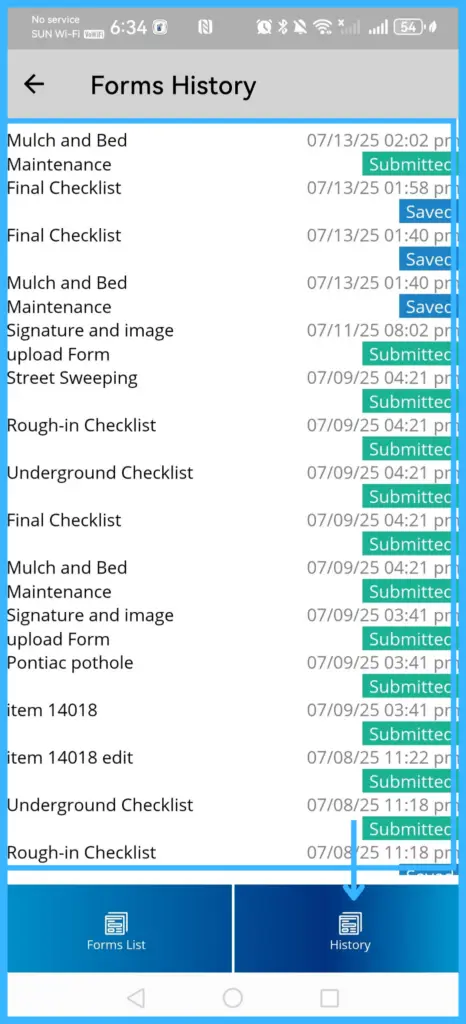
To fill in a form that isn't tied to a job, tap the menu icon and select Forms, then tap the form. Some fields have a slider; tap it to turn the field on. Tap a date box to pick a date, Add Image to add a photo (tap it again to change the photo), and Sign to capture a signature (Clear to redo it, Save to keep it). The History tab lists your saved and submitted forms.
Tasks
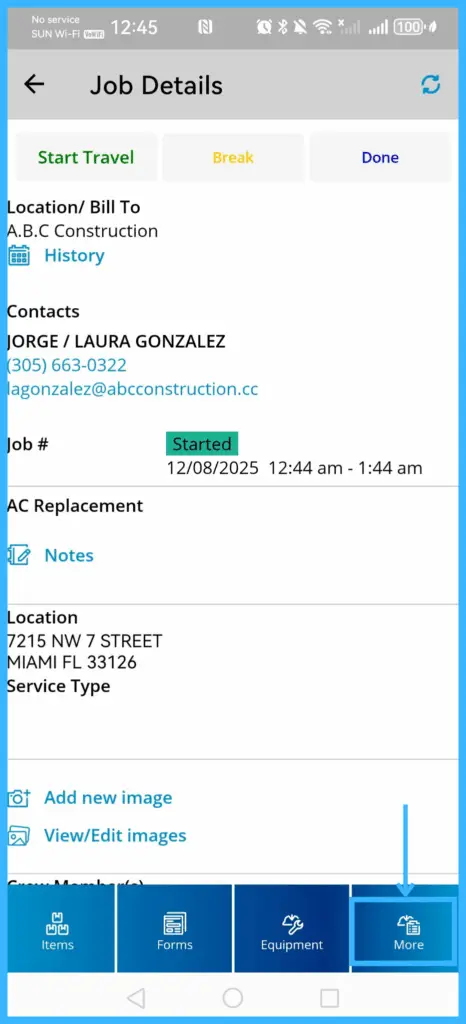
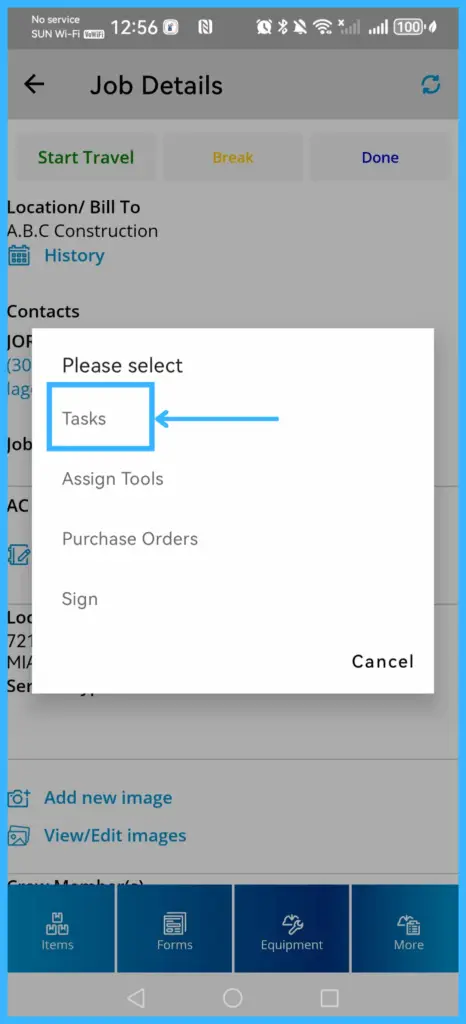
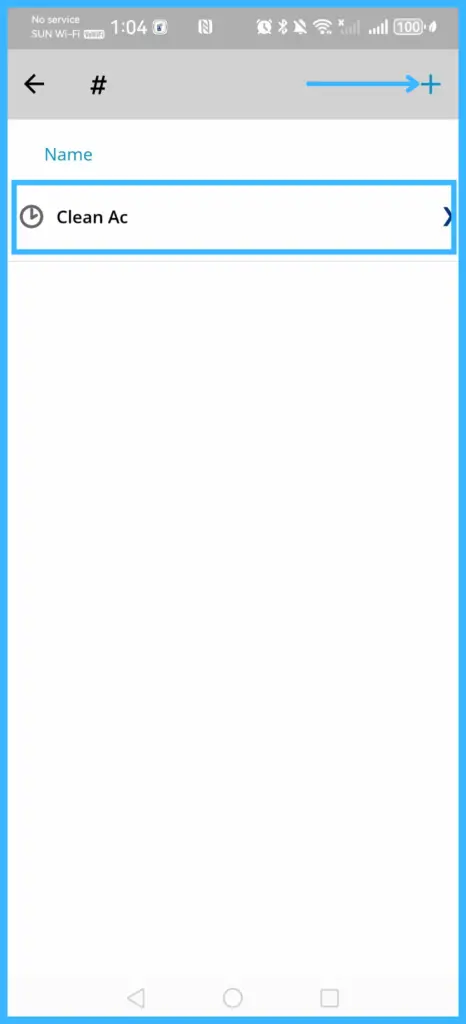
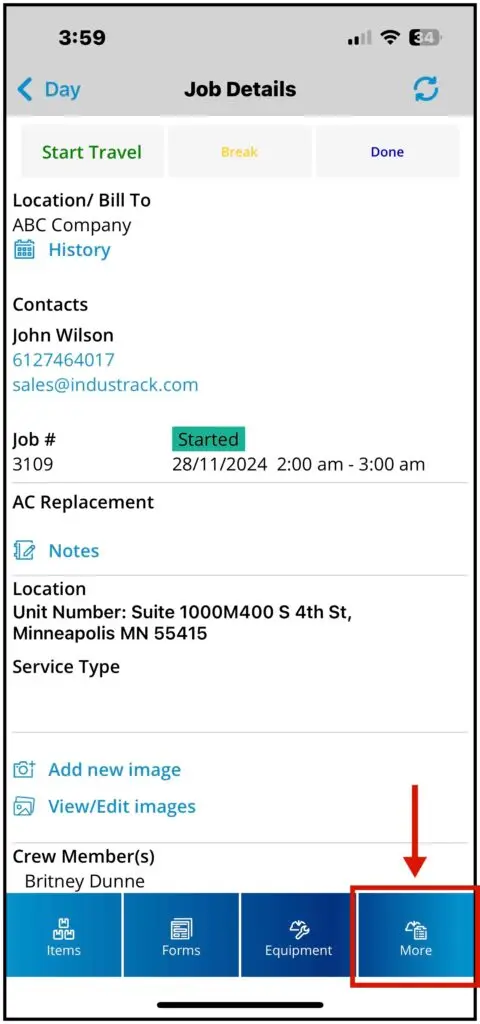
Tasks break a job into smaller steps. Tap More and select Tasks. Tasks the office added appear automatically.
-
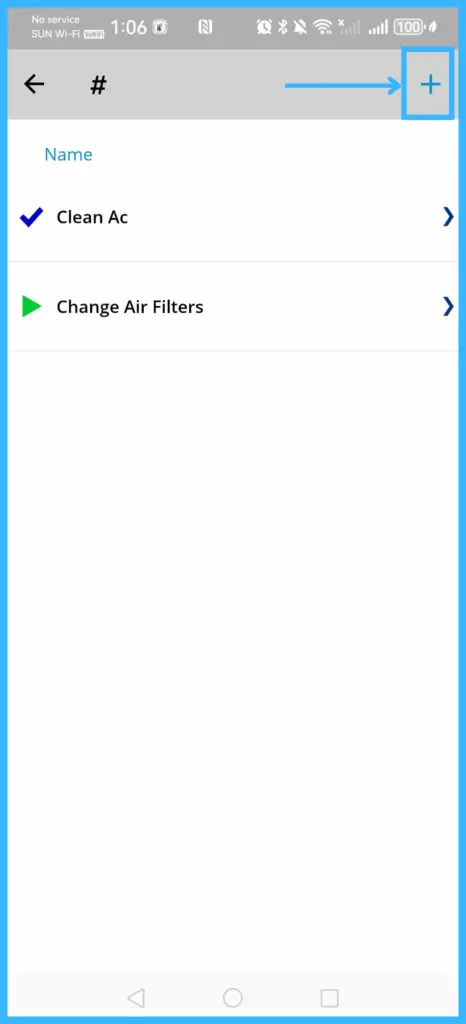
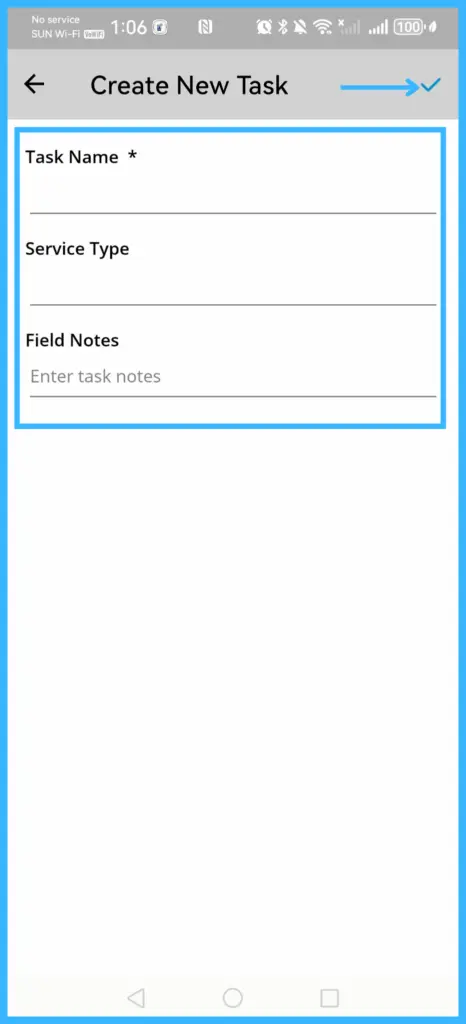
To add a task, tap the plus icon, enter the Task Name, optionally a Service Type and notes, and tap the check icon.
-
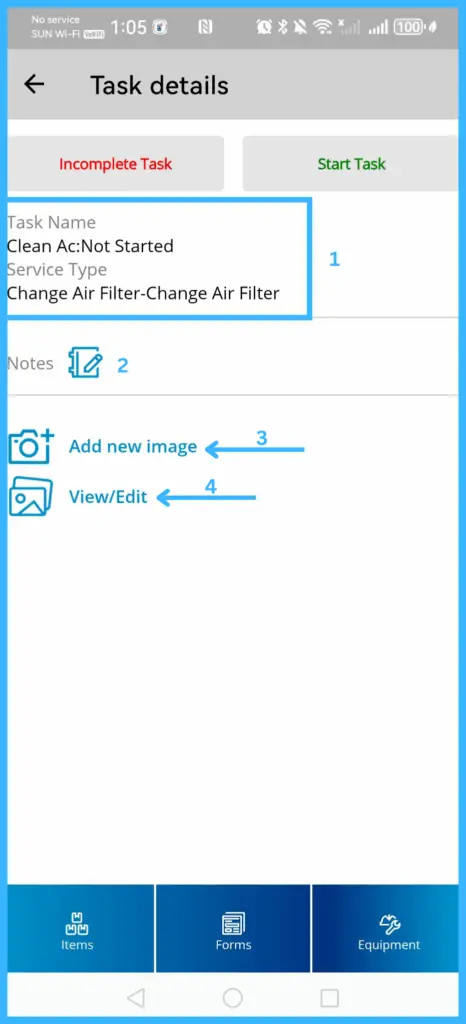
Tap a task to open it. You can add a Field Note, attach photos, and add or view Inventory Items, Forms or Equipment for the task.
-
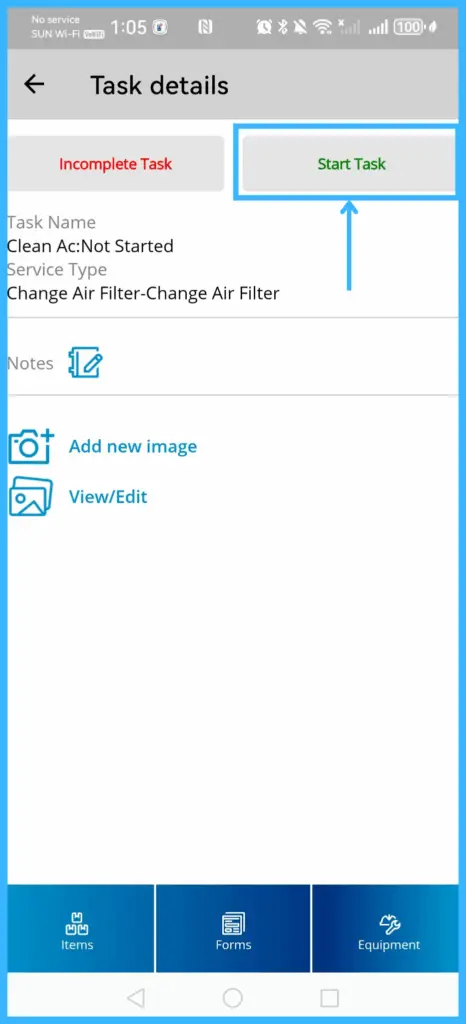
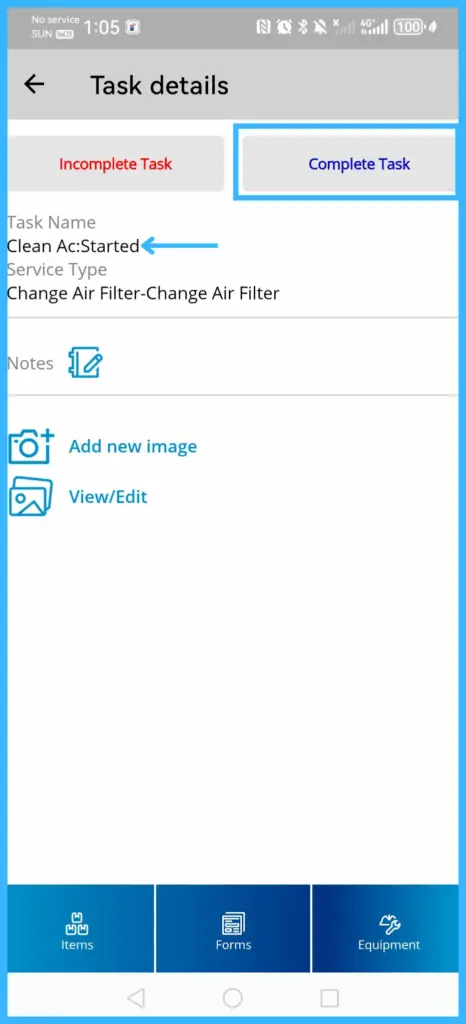
Tap Start Task. The status changes to Started and the button changes to Complete Task.
-
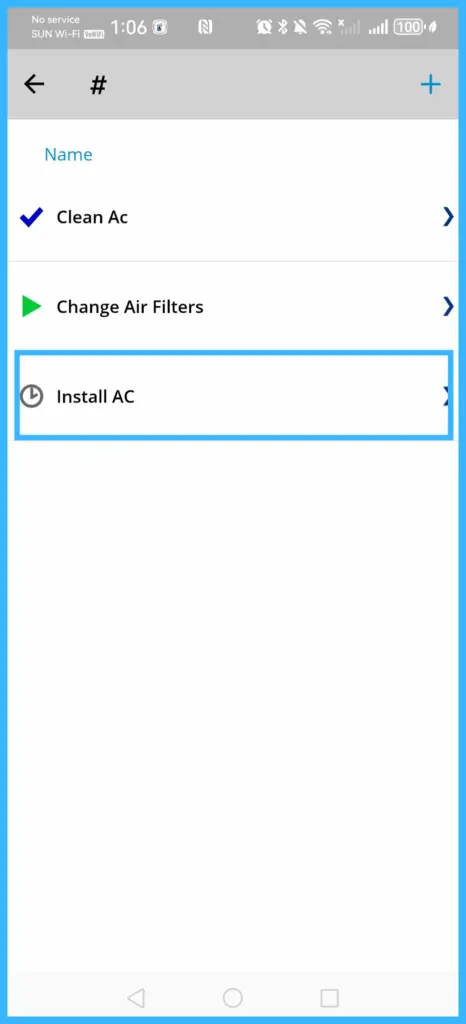
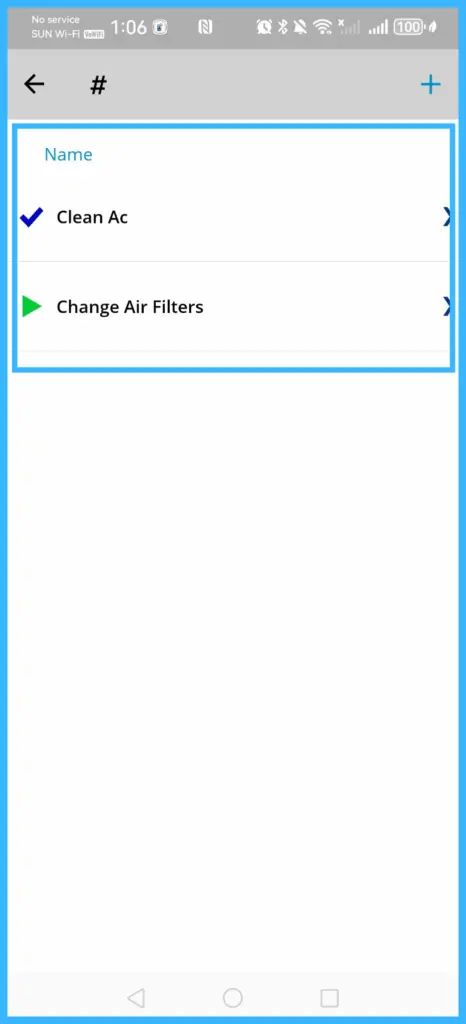
Tap Complete Task when you're done. In the task list, a check mark means completed and a play icon means started or in progress.
-
If you can't finish today, tap Incomplete Task. Tap Start Task again when you come back to it.
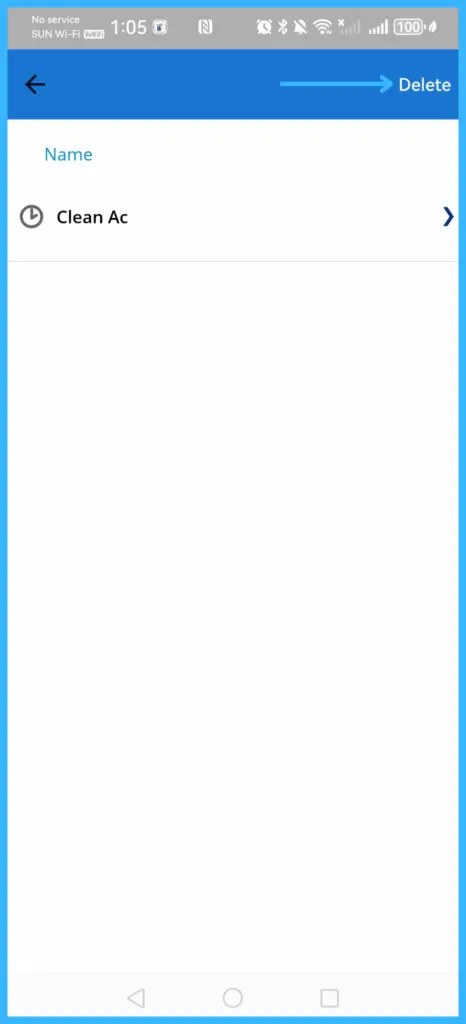
To delete a task, swipe right on it (iOS) or tap and hold it (Android).
Tools and purchase orders
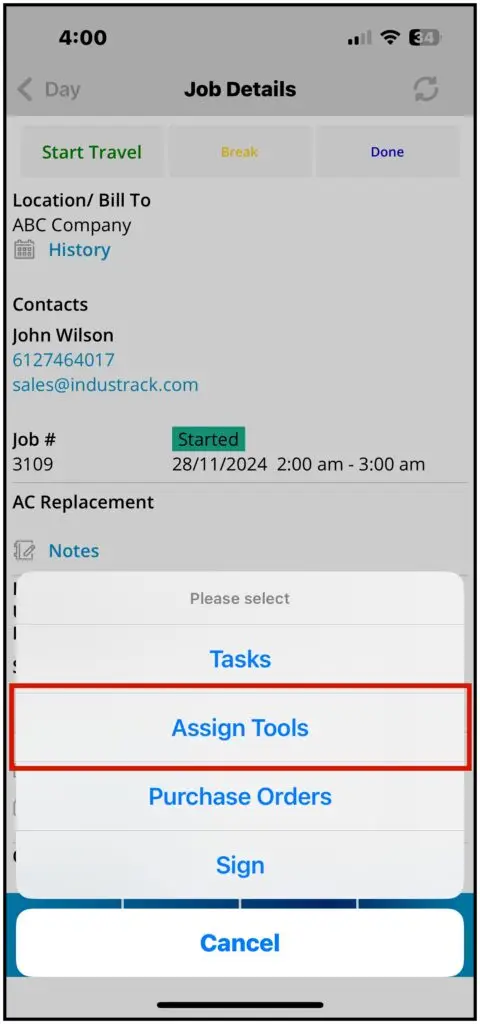
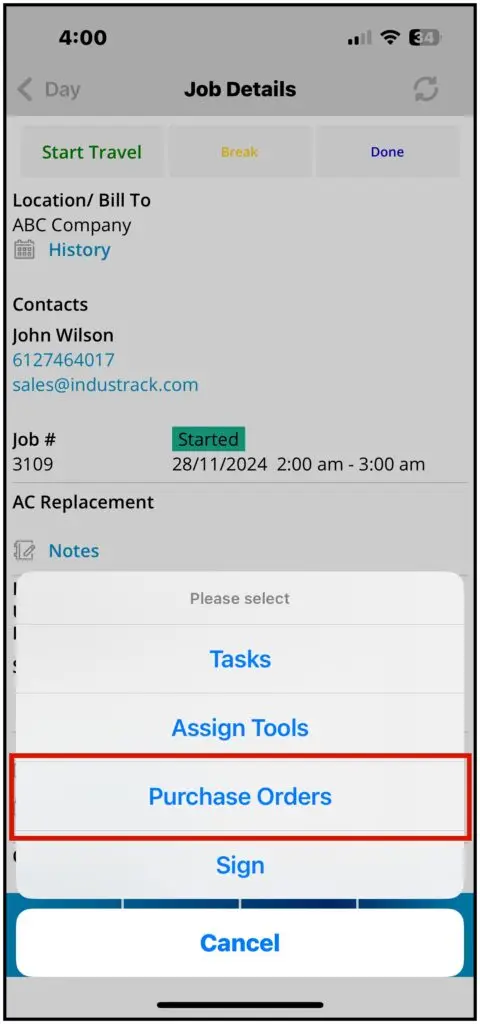
From More you can also:
-
Assign Tools: view the tools attached to the job, and check them in or out.
-
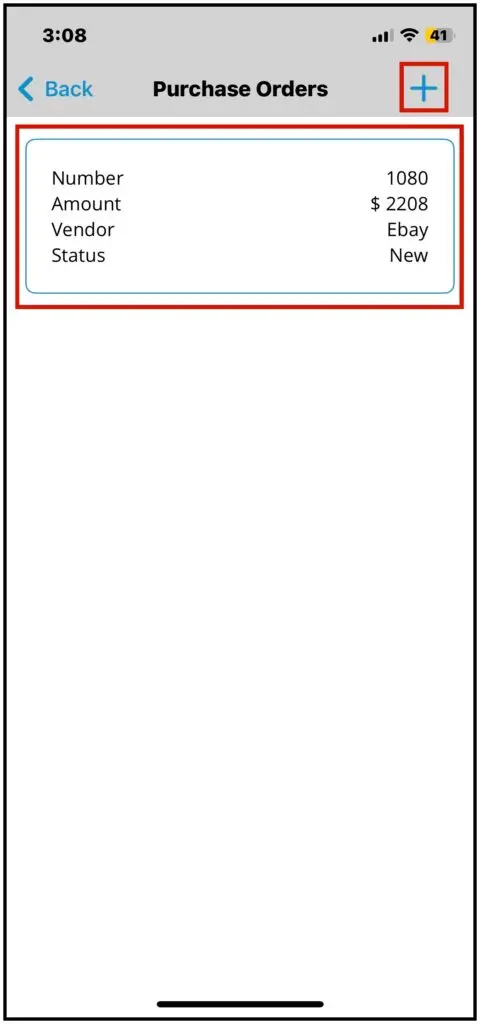
Purchase Orders: see each PO's number, amount, vendor and status. Tap the plus icon to create a new PO (for example, to buy from another vendor). Tap a PO to change the vendor, add a memo for the vendor, change the amount, add items, receive items, or add received items to the job.
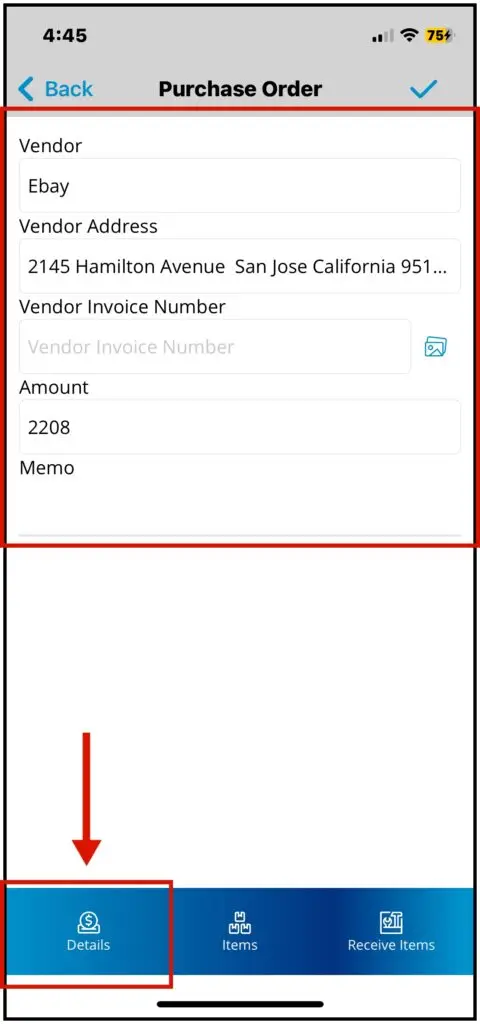
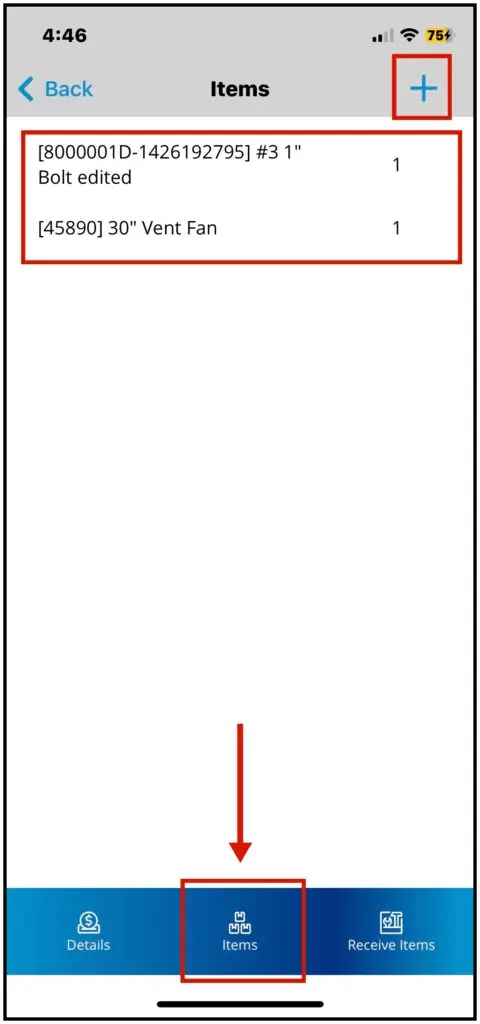
- On the PO's items, swipe left (iOS) or tap and hold (Android) for Receive item, Add to job or Delete.
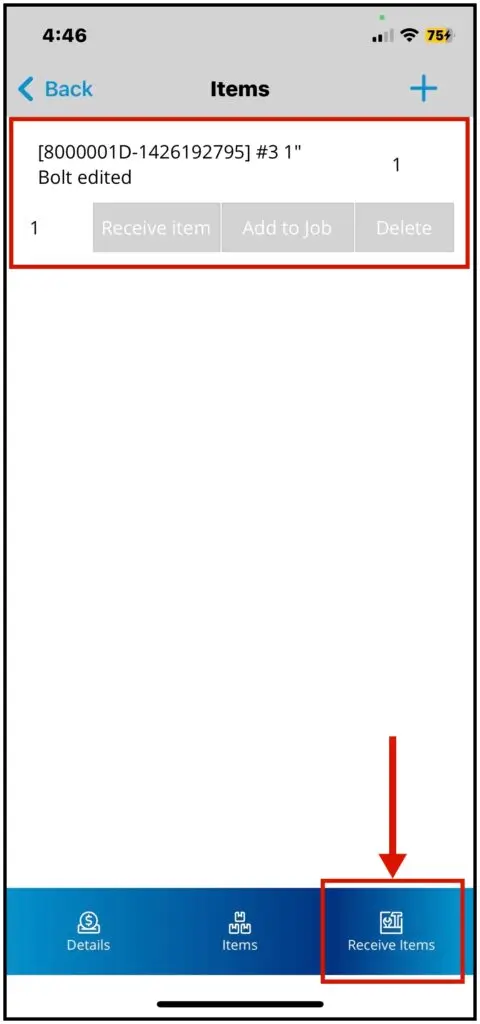
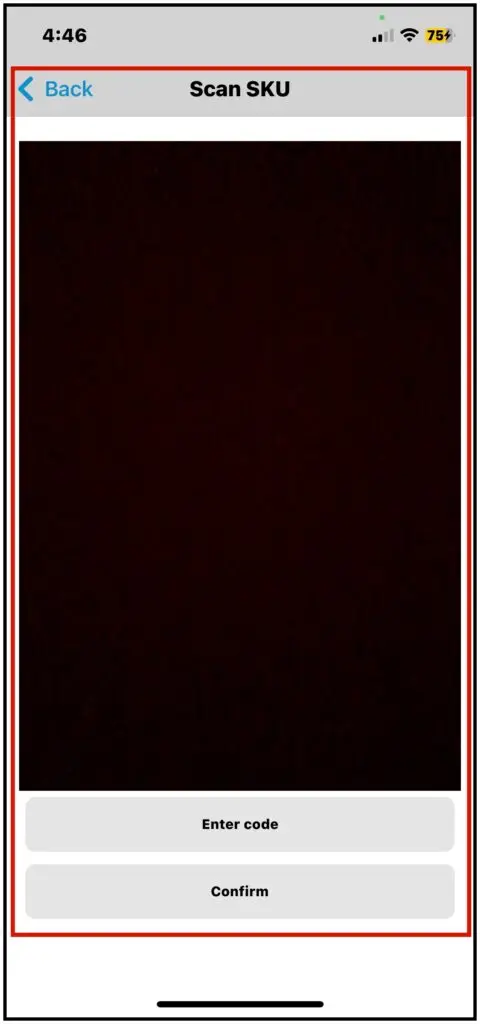
- Tap Receive Items to receive everything by scanning QR codes or barcodes, or by typing item codes.
- The PO status updates as items are received or added to the job.
See Using customers, pricebook and inventory in the app for more on tools and purchase orders.
Finish a job
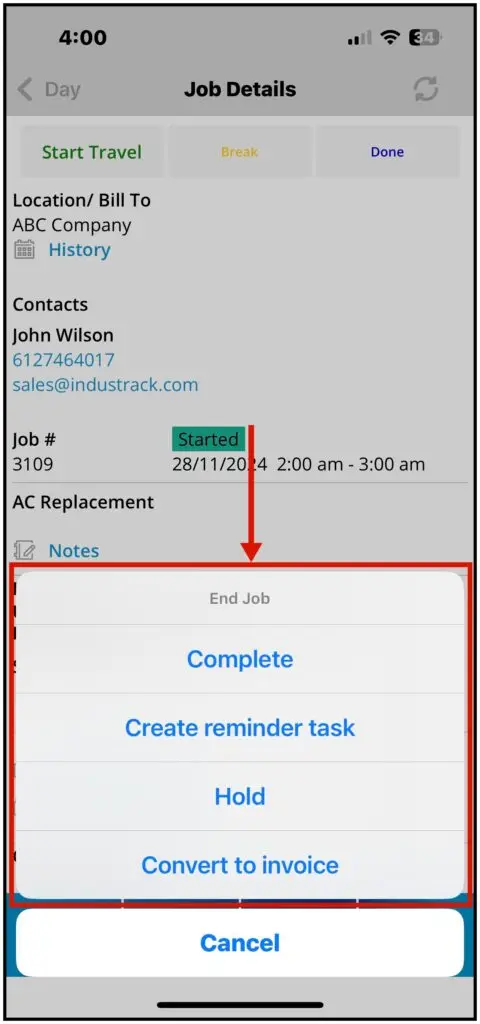
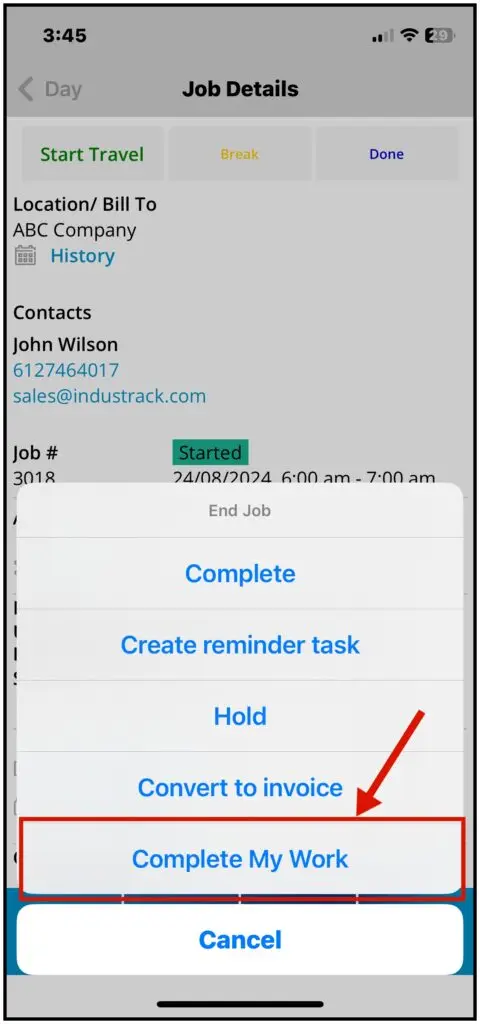
Tap Done and choose:
| Option | What happens |
|---|---|
| Complete | Marks the job finished and stops your time on it. |
| Complete My Work | Shown when several techs are on the job. Completes only your time entries; the others can keep working and complete the job themselves. |
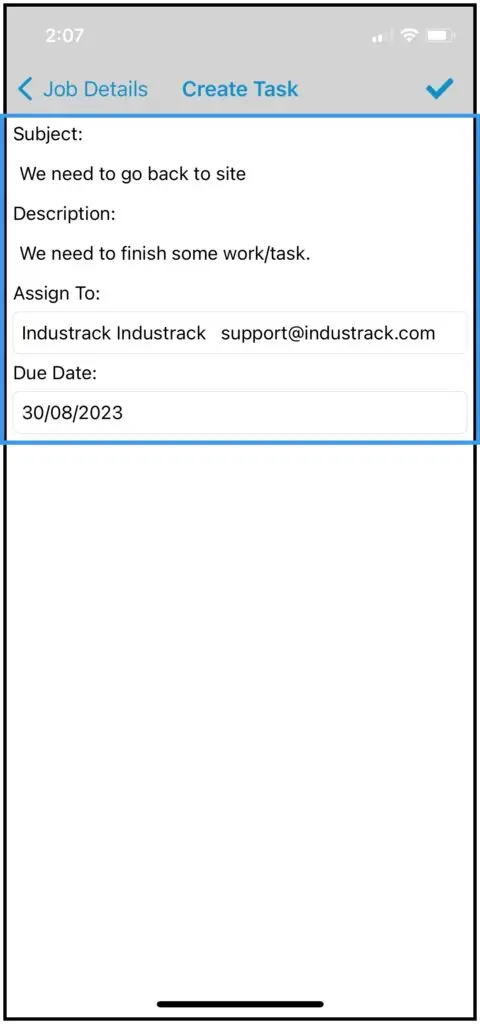
| Create Reminder Task | Sends a follow-up task to the office. Enter a subject and description, assign an office user and set a due date. That user is notified in Reminders and the notification bell, under the Task tab. |
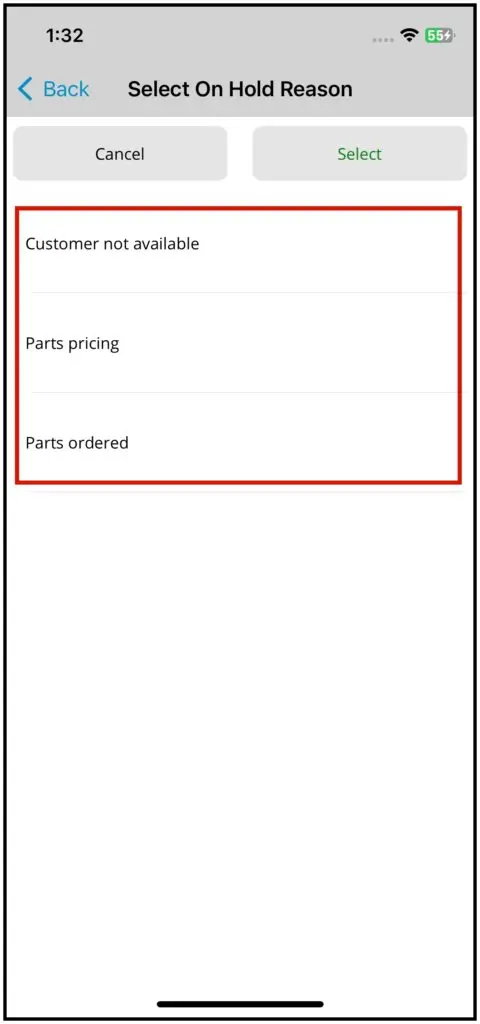
| Hold | Puts the job on hold. Pick a reason and tap Select. The status changes to HOLD. |
| Convert to Invoice | Marks the job completed and turns it into an invoice. |
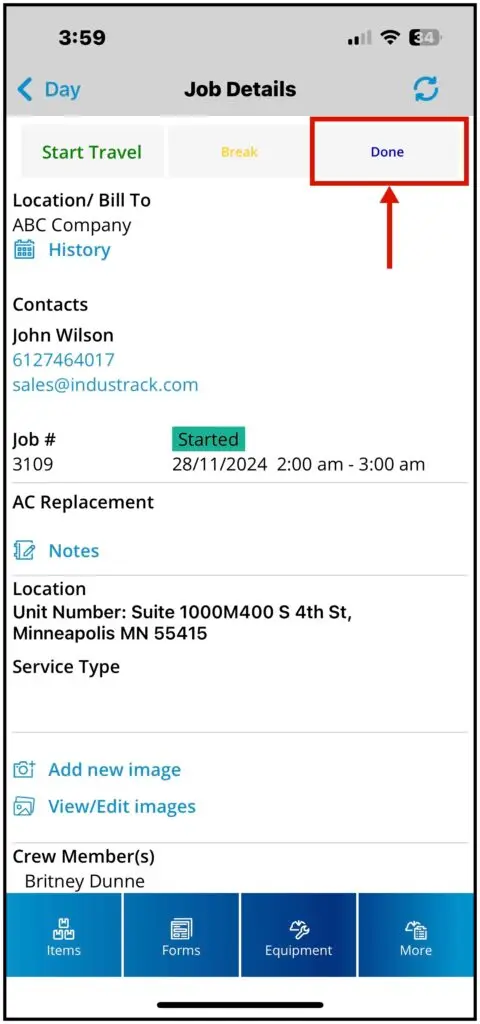
Your office controls whether techs can put jobs on hold (Allow to put the Job on hold) and create reminder tasks (Allow option to create reminder task); see How do I set up the mobile app for my team? (office settings)
Get a signature
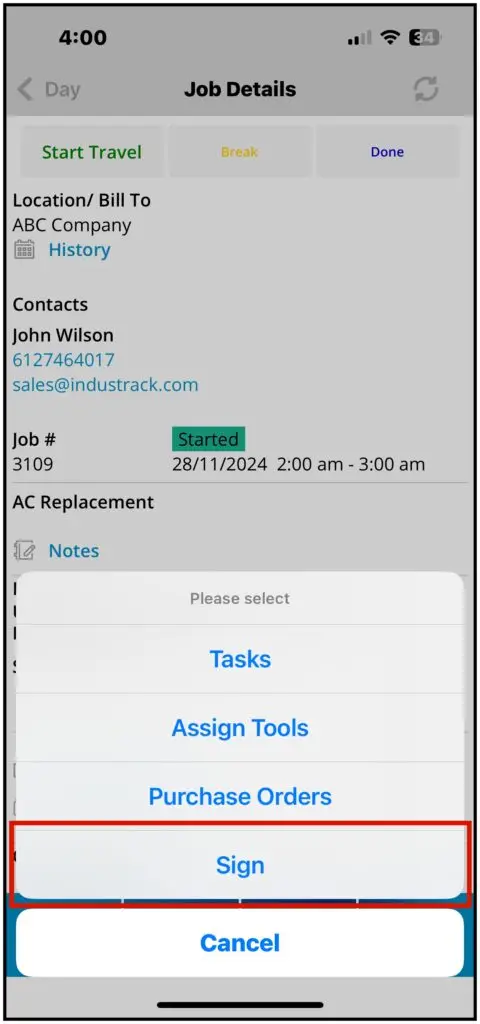
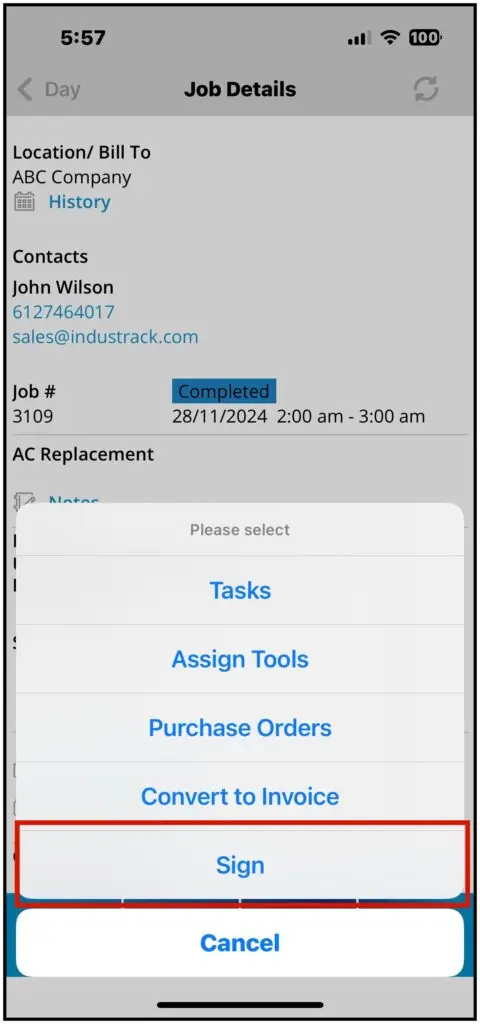
Before you complete the job, tap More and select Sign. Sign on the signature pad or have the customer sign, then tap Save.
Create a job in the app
-
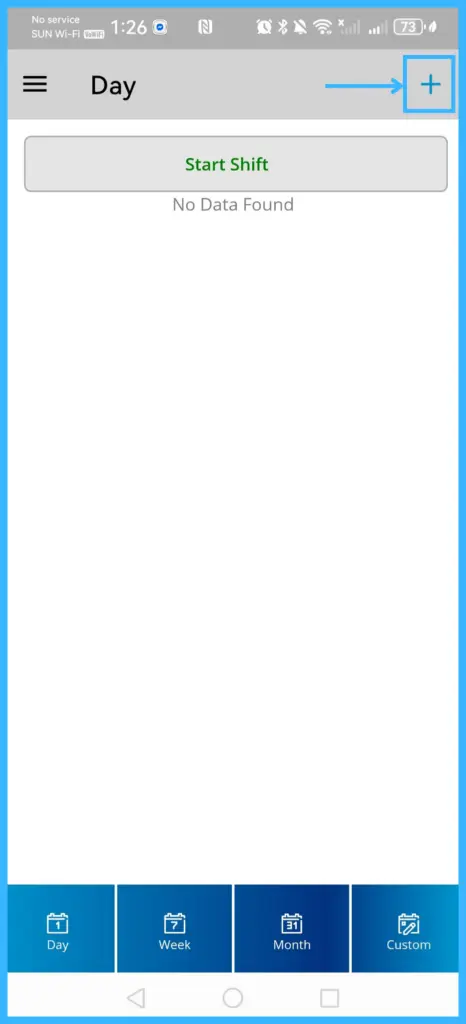
Tap the menu icon and select Job.
-
Tap the + icon (top right).
-
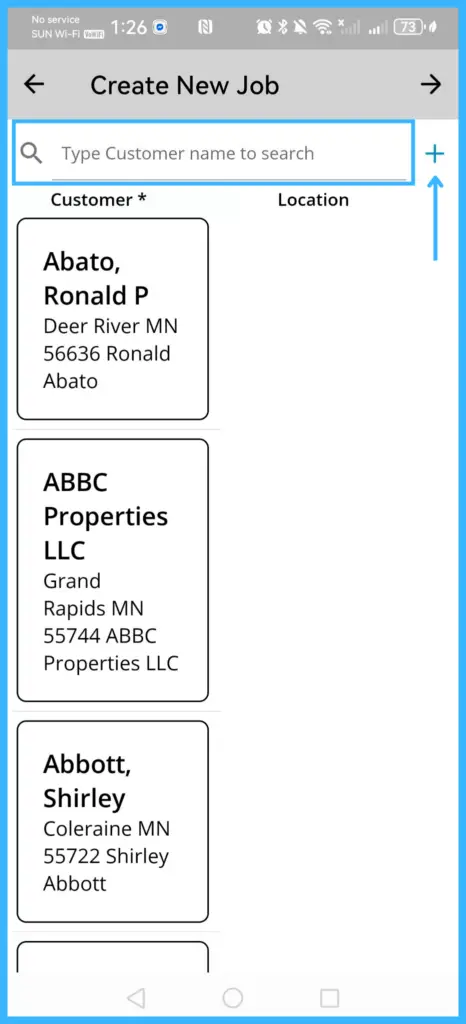
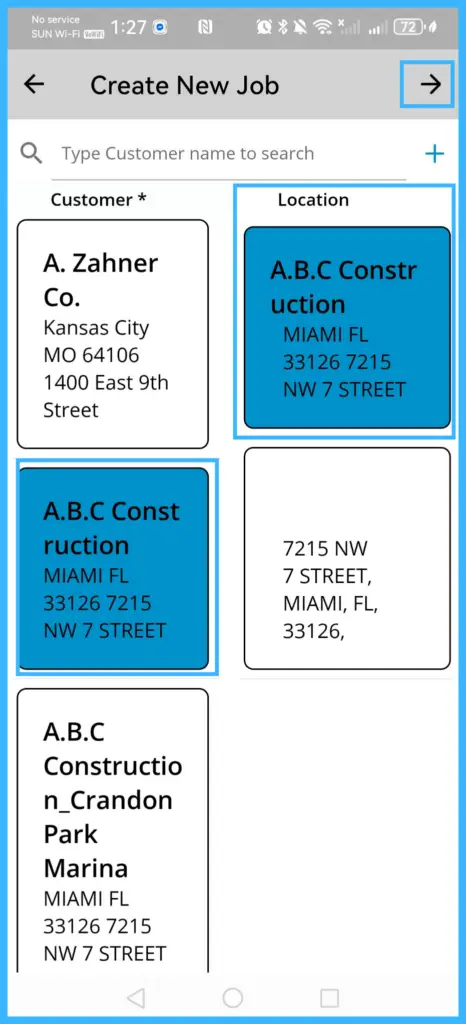
Search for the customer and tap their name. If they're not listed, tap the + icon to add them.
-
If the customer has more than one location, tap the right one, then tap the arrow icon (top right).
-
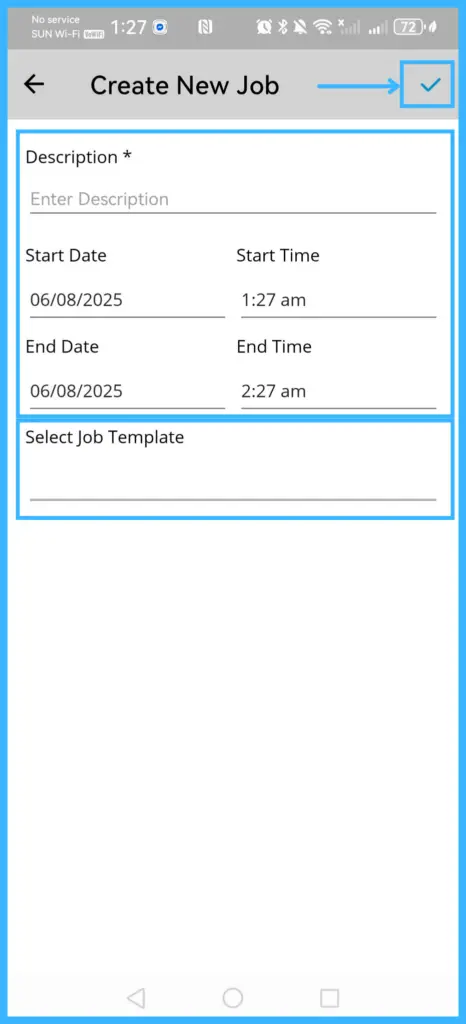
Enter the job details:
- Job Description: a short description of the job.
- Job Number (optional). A number is assigned automatically once the app syncs.
- Estimated Date & Time: start and end.
- Job Template: pick one if your office has set them up.
-
Tap the checkmark icon (top right). The job appears in your job list.
Common questions
Why can't I complete the job?
A job can't be completed until every task on it is either completed or marked incomplete.
Can I see a customer's past jobs?
Yes. On the job details, tap Customer History to see past jobs, estimates and invoices, or tap History for records from the past 30 days, then Get History to download the latest. Your office sets how far back history goes. For customers with several locations, tap a location to see it.
Why is the app slow with photos?
Many large images, or more than 20 images on jobs, tasks and equipment, can slow the app. With more than 29 images, the image view switches from previews to a list.
Do techs get reminder tasks on their phones?
No. Reminder tasks are only visible to office users. Techs don't receive them in the mobile app.
Was this article helpful?
Contact support