Using customers, pricebook and inventory in the app
In the IndusTrack mobile app, tap the menu icon (three bars, top left) and select Customers, PriceBook, Inventory or Purchase Orders. Techs see only the modules their office has given them permission to use.
Customers
Find or add a customer
-
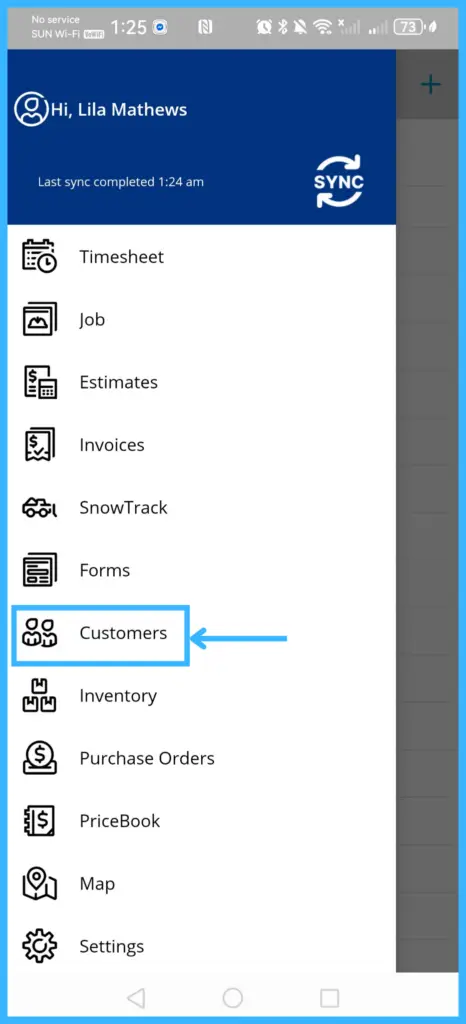
Tap the menu icon and select Customers.
-
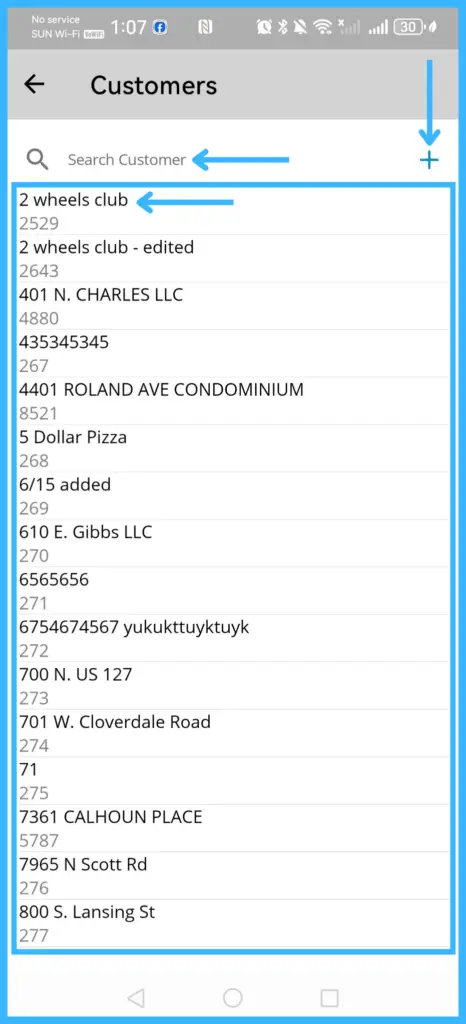
Search for the customer or scroll the list. If they have several service locations, tap the right one.
-
To add a customer, tap the + (plus) icon (top right), fill in their details and tap Save.
If a customer with the same name already exists, you'll see "It seems like you already have a customer with the same name. Do you still want to add it?" Check the list before adding a duplicate.
What's in a customer profile
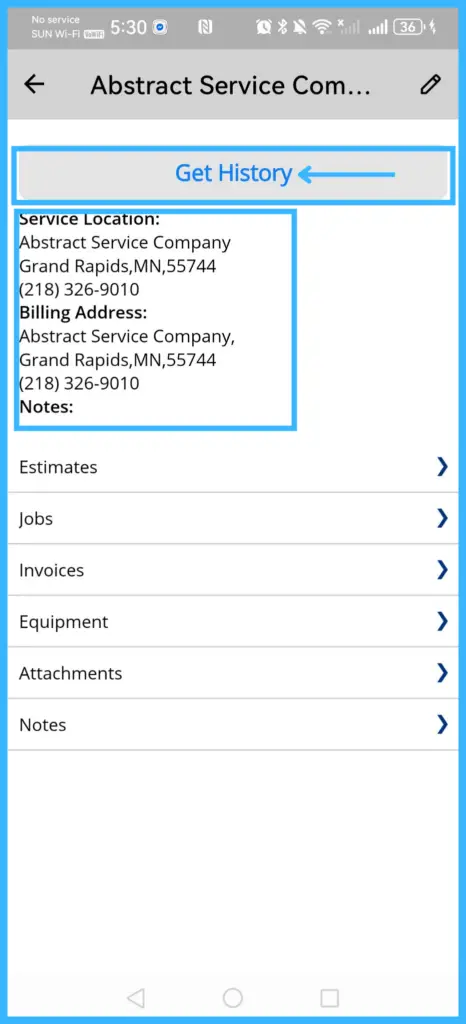
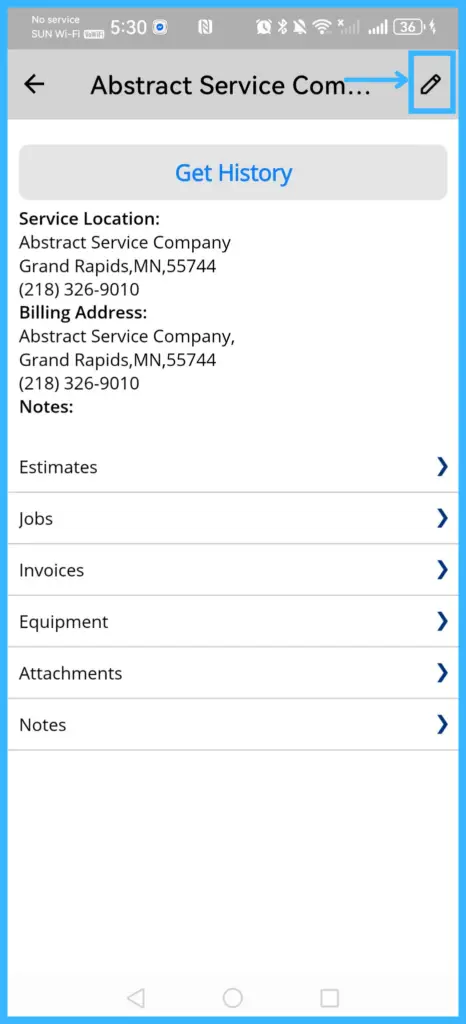
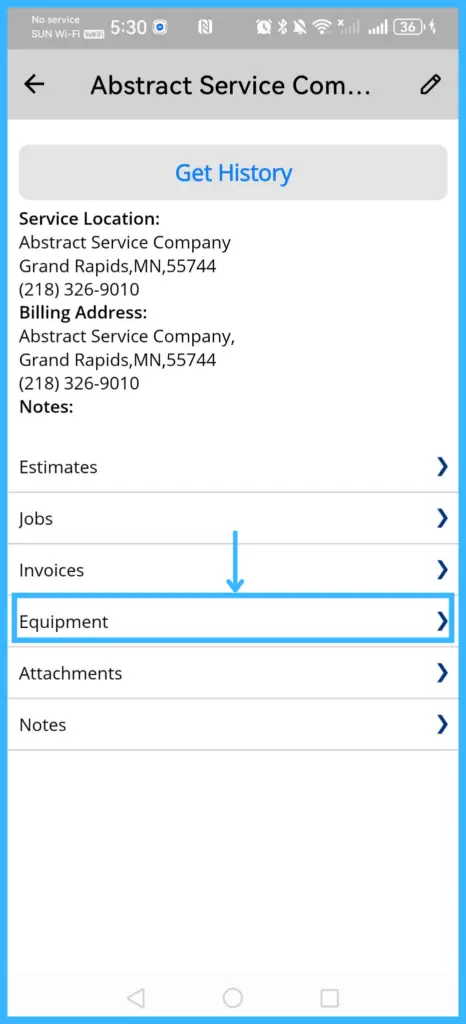
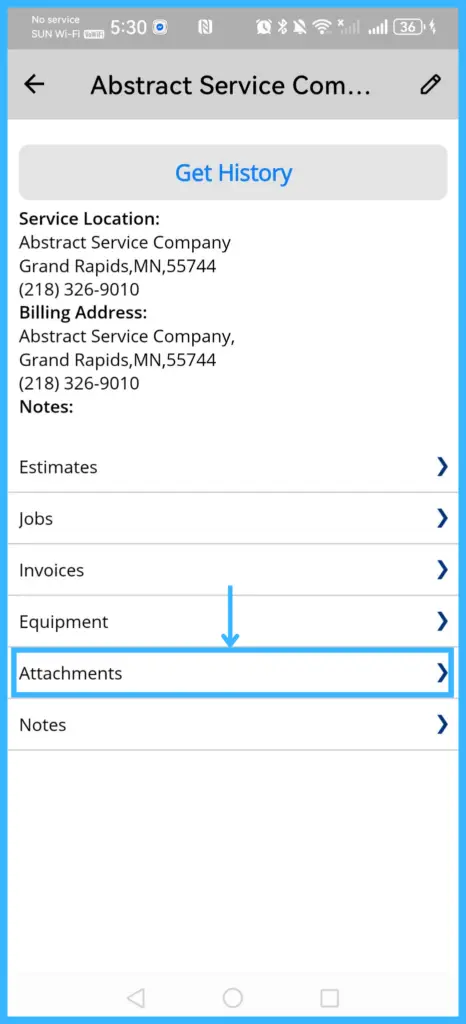
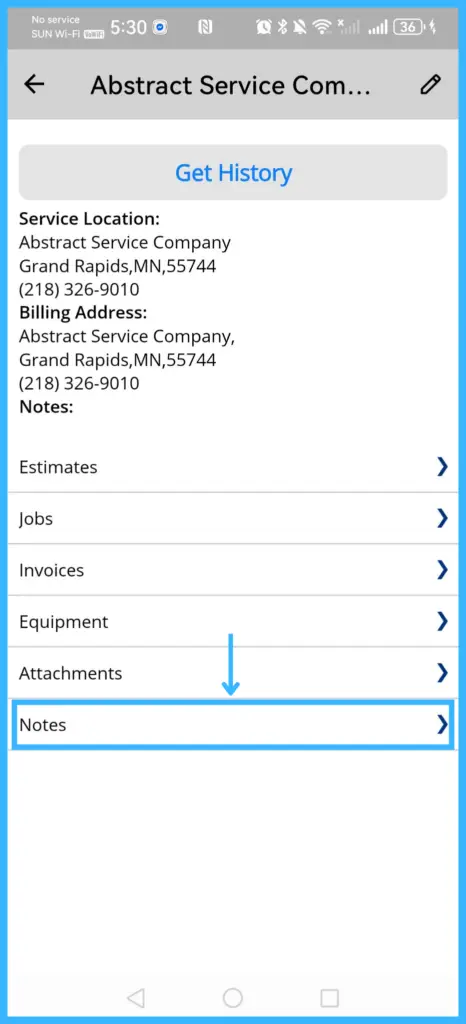
The profile shows the Service Location, Billing Address and Notes.
| Tap | To |
|---|---|
| Get History | Download the latest estimates, invoices and jobs for the customer. |
| Service Location | Open it in Google Maps and see how far it is from you. |
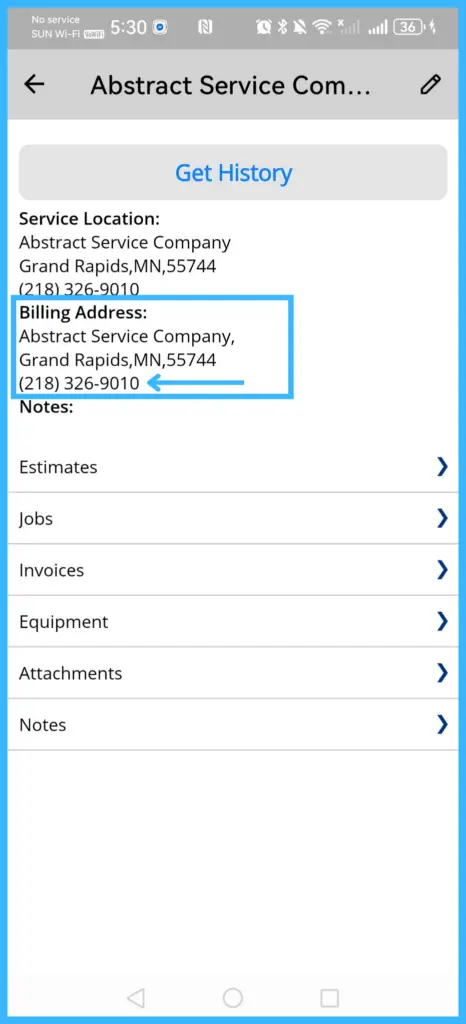
| The phone number (under the billing address) | Call or text the customer. |
| Pencil icon (top right) | Edit the billing or service address. Your office must turn on Allow edit customers. |
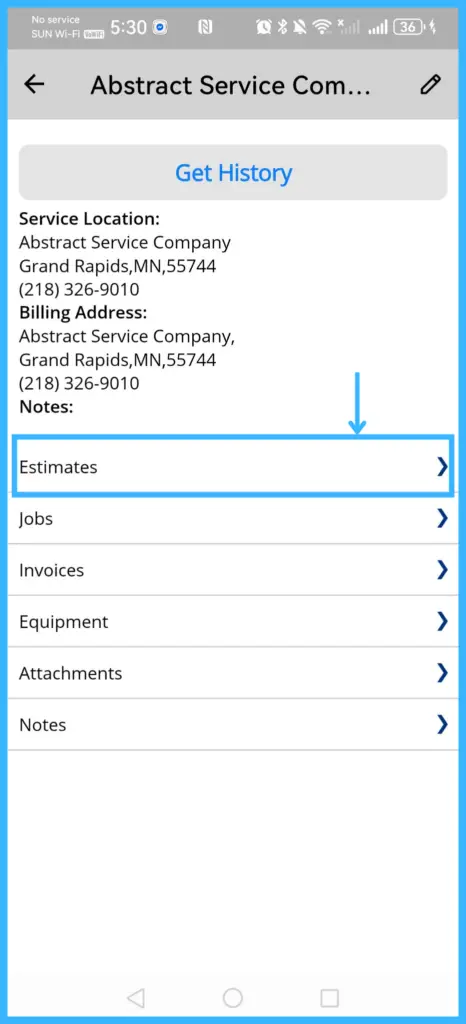
| Estimates | See the customer's estimates or create a new one. |
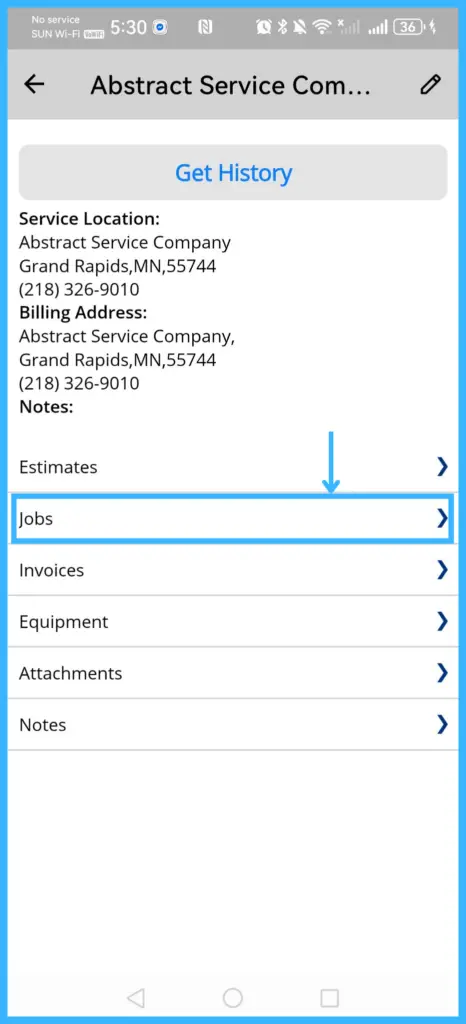
| Jobs | See past and upcoming jobs or create a new one. |
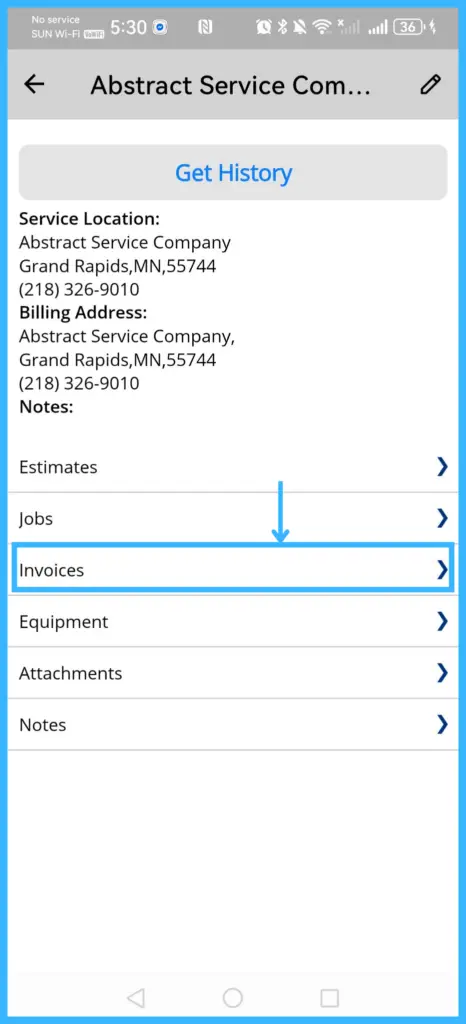
| Invoices | See invoice history and status or create a new invoice. |
| Equipment | View or update the customer's equipment, or add new equipment. |
| Attachments | See job images and documents. |
| Notes | See notes from all the customer's jobs. |
Adding a customer while offline
When you tap Save, the app tries to sync the new customer. Offline, you'll see "No Internet Connection." Until the customer syncs, you can't create an estimate, invoice or job for them; you'll see "You must sync information about this customer to server before you can create [Estimate/Invoice/Job]." Reconnect to the internet and tap Sync.
PriceBook
The PriceBook shows your flat-rate items. A flat-rate item can combine parts, services and equipment.
-
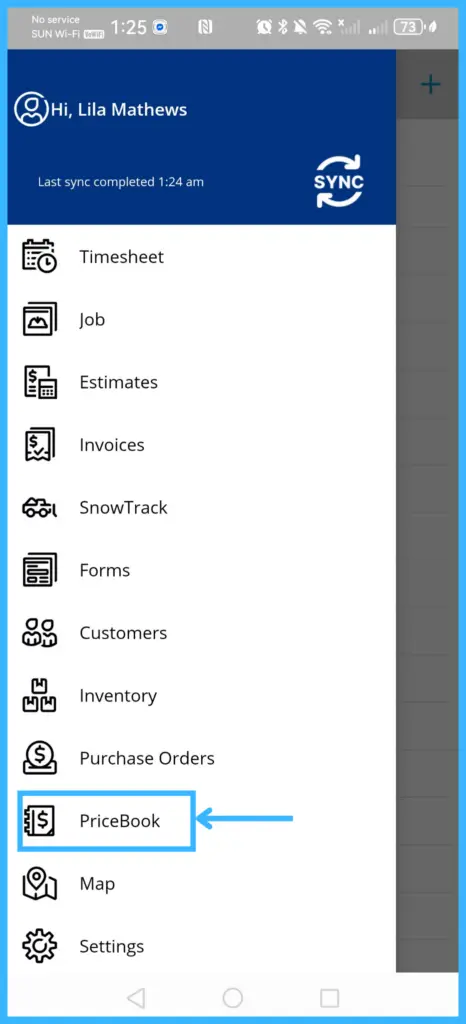
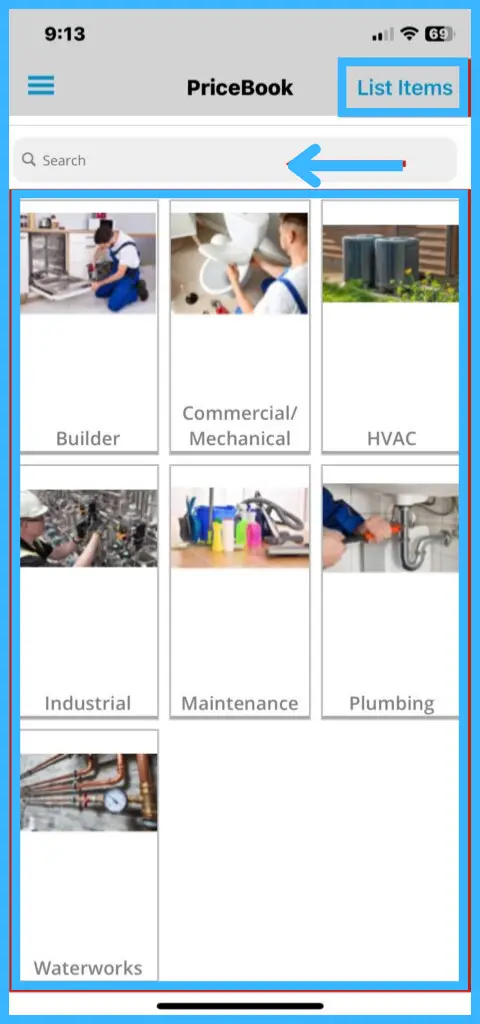
Tap the menu icon and select PriceBook. Items are grouped into main categories.
-
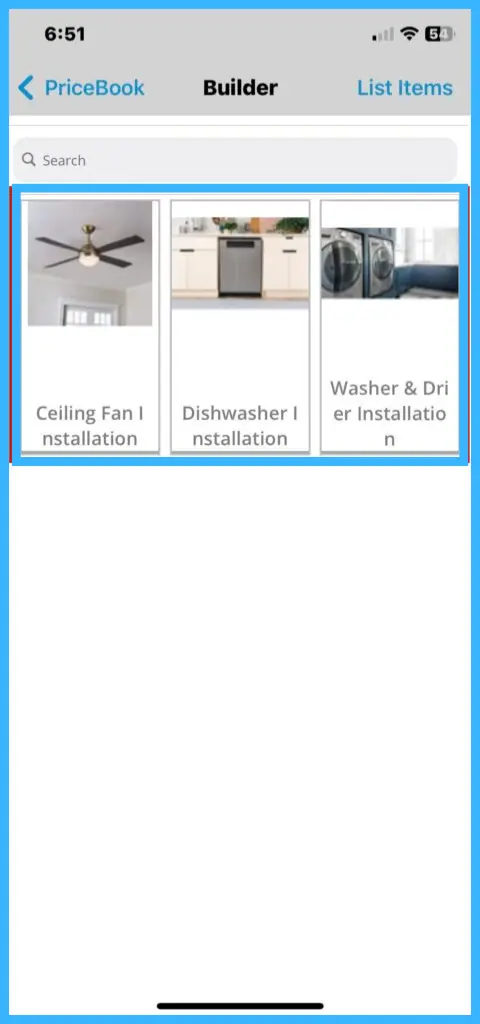
Search for a category, or tap one to open its subcategories.
-
Tap List Items to see all flat-rate items (across every category, or within the subcategories you're viewing). Tap List Categories to go back.
-
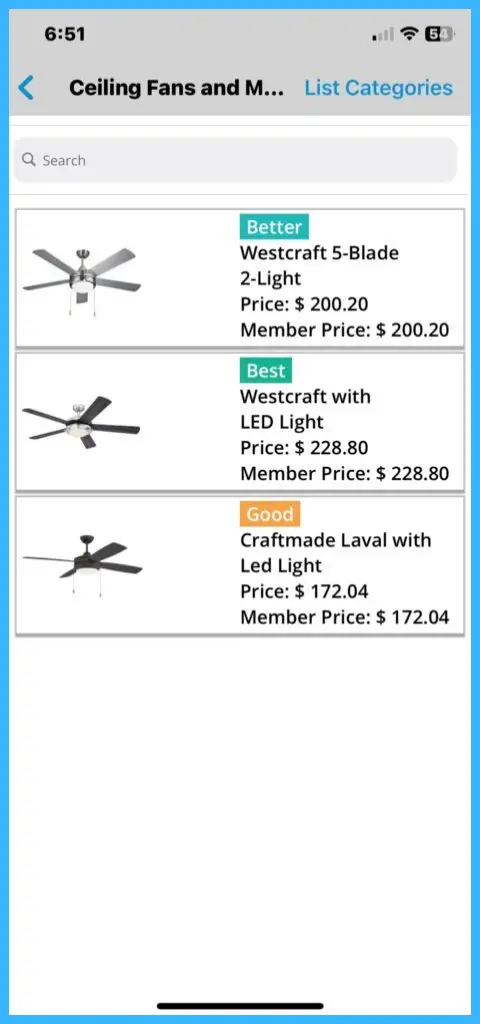
Compare items by Condition (Good, Better, Best), Price (full cost) and Member Price (discounted cost for members).
-
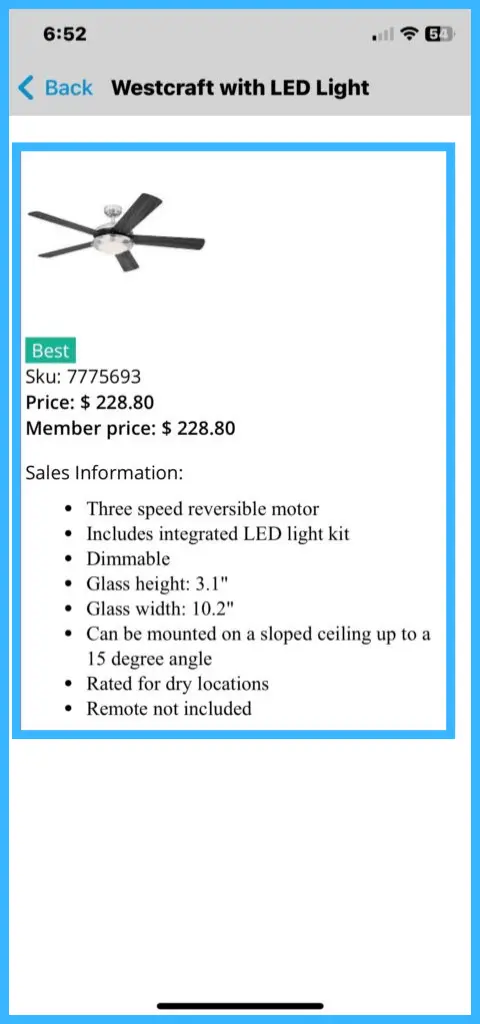
Tap an item to open its Sales Information page, with full pricing and components.
To load all pricebook category and item images onto your device, tap Download Images in the app's Settings. See How do techs set up and sync the mobile app?
Inventory
Find a part
-
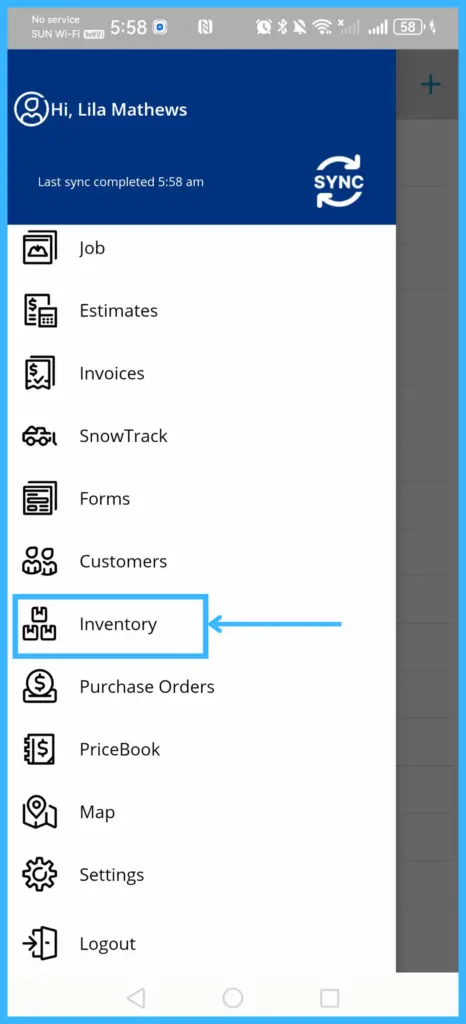
Tap the menu icon and select Inventory.
-
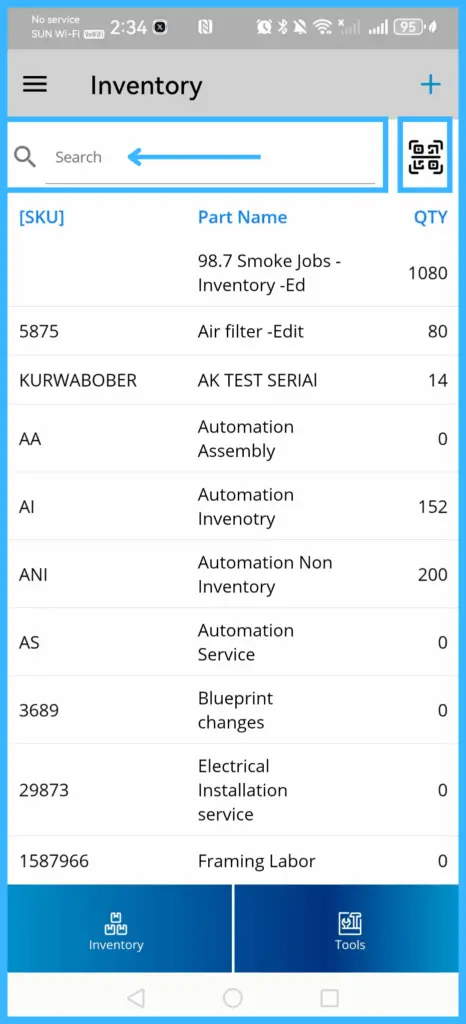
Search, scroll, or tap the barcode icon to scan a part.
-
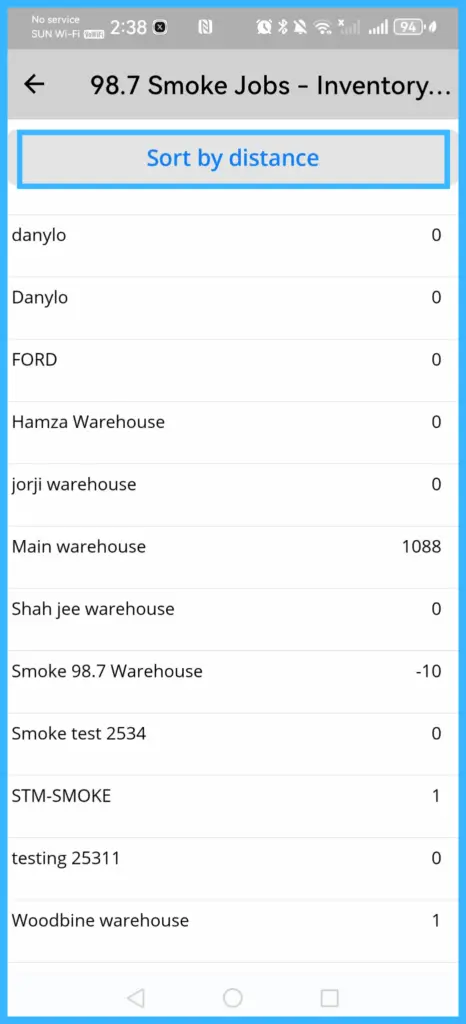
Tap the part. Part Details lists every warehouse that has it in stock. Tap Sort by Distance to see the nearest ones first.
Add a part
-
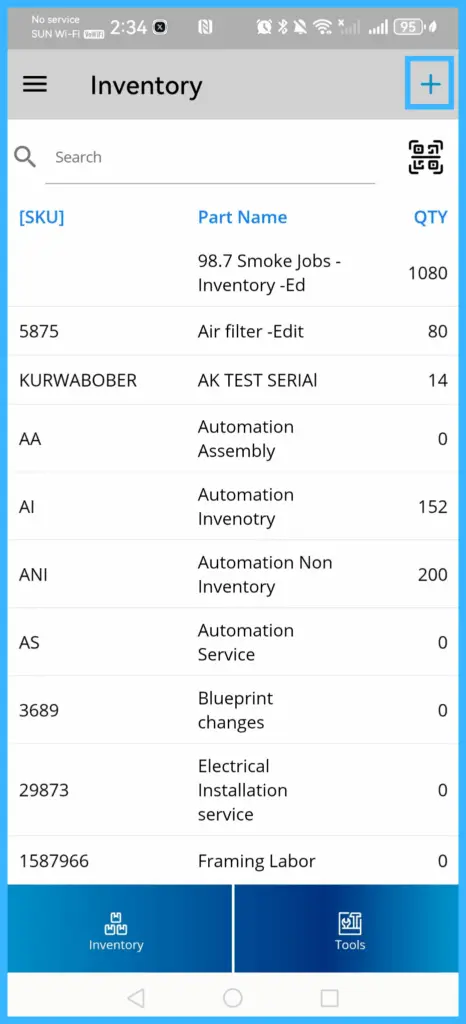
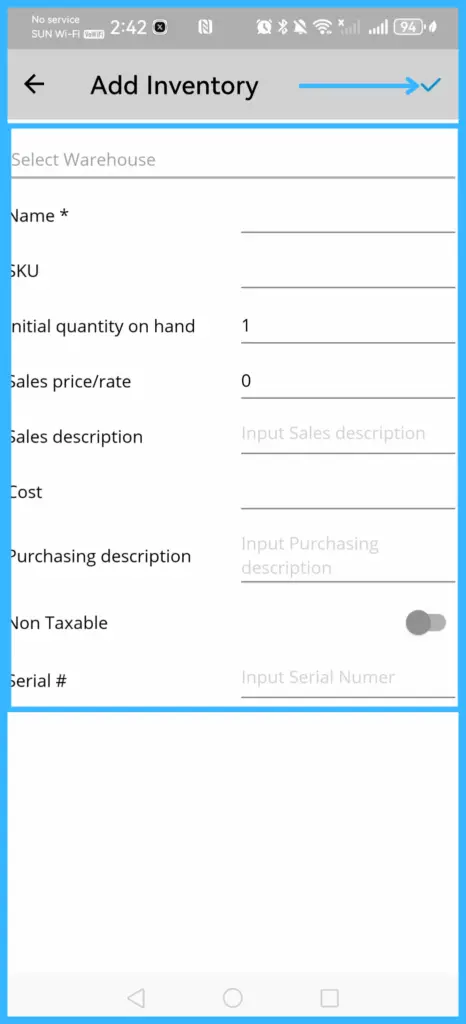
On the Inventory page, tap Add (+) (top right).
-
Select a Warehouse and fill in the required fields: Name (required), Initial Quantity on Hand (required), Sales Price (required) and Cost (required).
-
Tap the checkmark (top right).
Tools
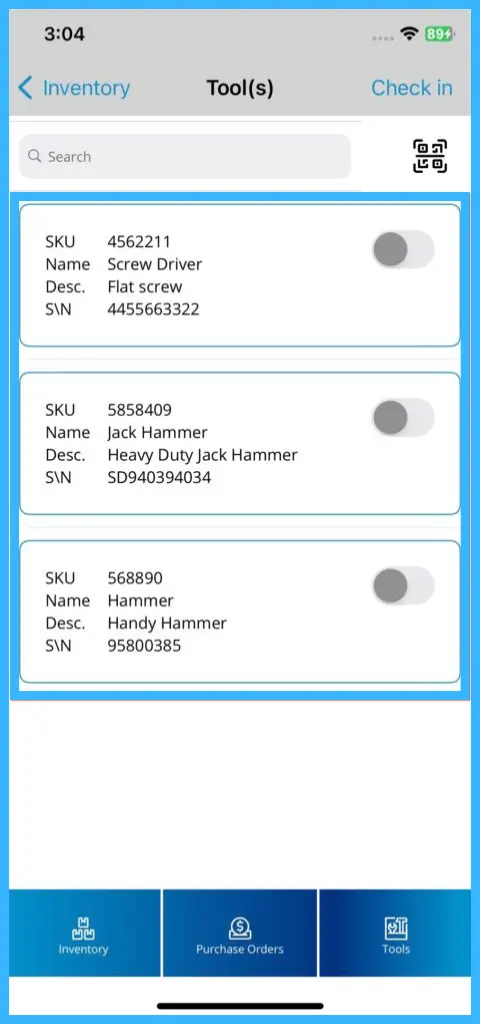
Tools are used on jobs. The office can assign tools to a job, or a tech can add them. After using a tool, check it in so the system records who used it.
-
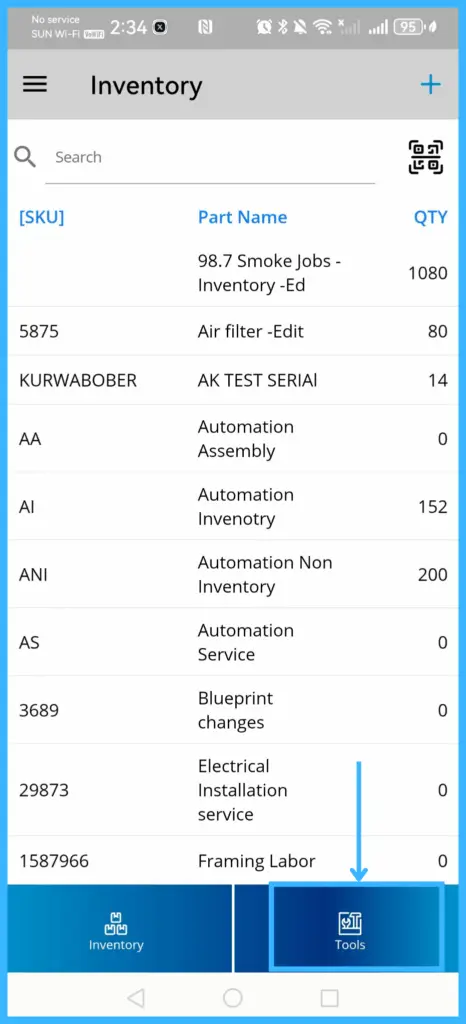
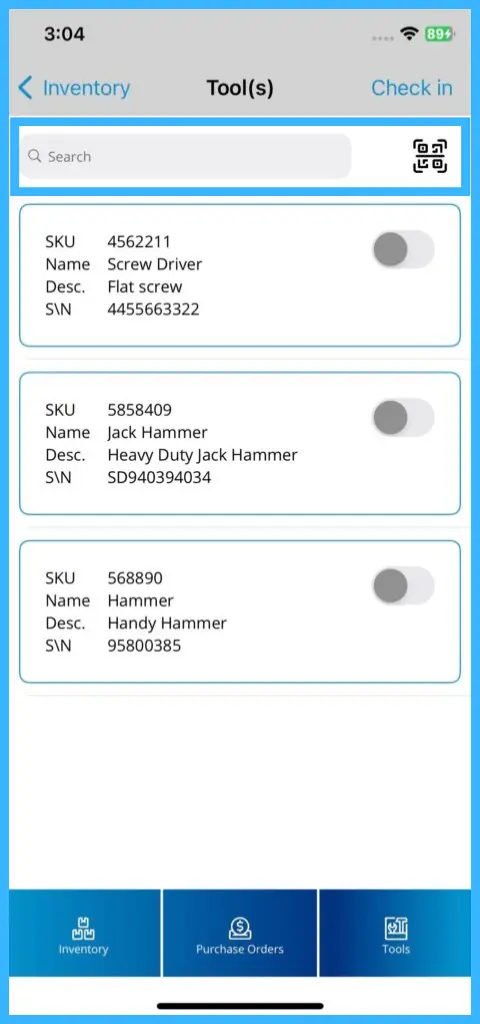
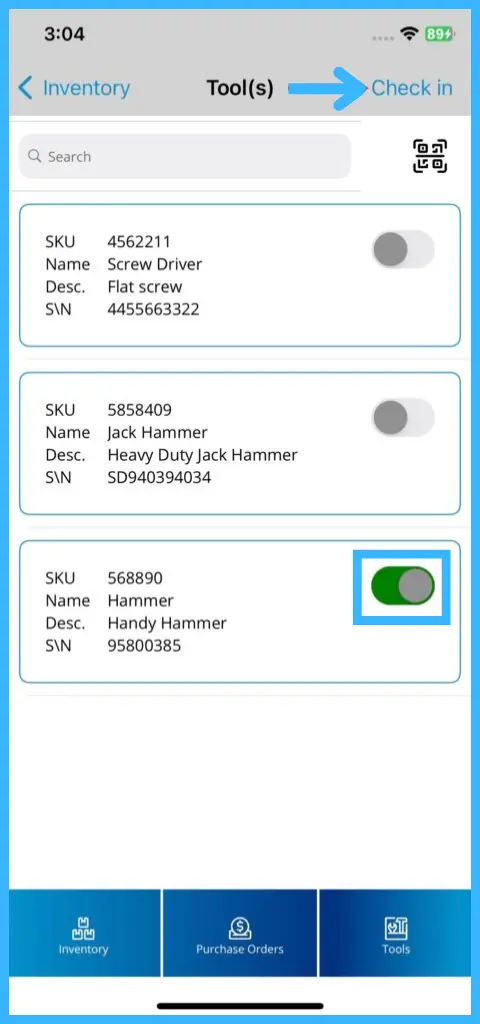
On the Inventory page, tap Tools. Search or scan a barcode to find a tool.
-
Tap the toggle next to the tool and select Check-in.
-
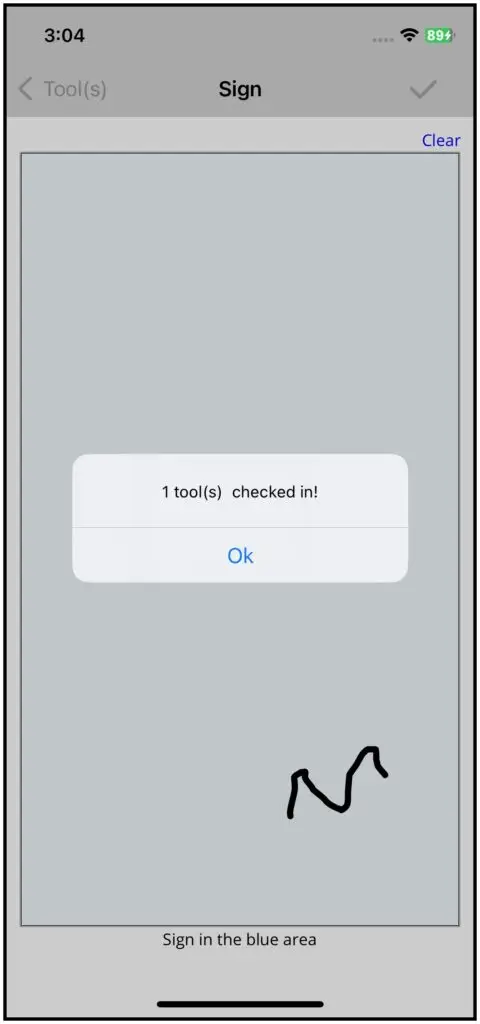
Sign on the Signature Pad so the office knows who returned it.
-
Tap Save. A confirmation shows how many tools you checked in.
To check out a tool, follow the same steps and choose check-out instead of Check-in. To check tools in or out for a specific job, open the job and tap More›Assign Tools.
Purchase orders
-
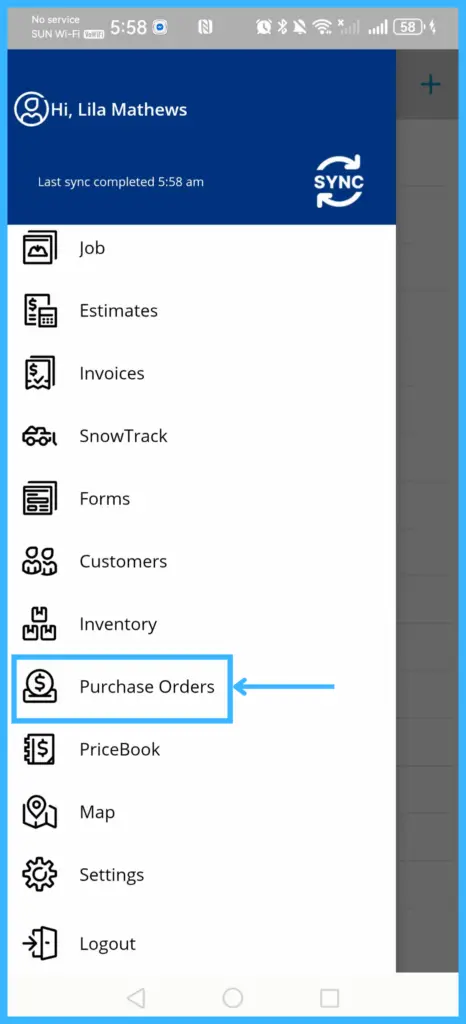
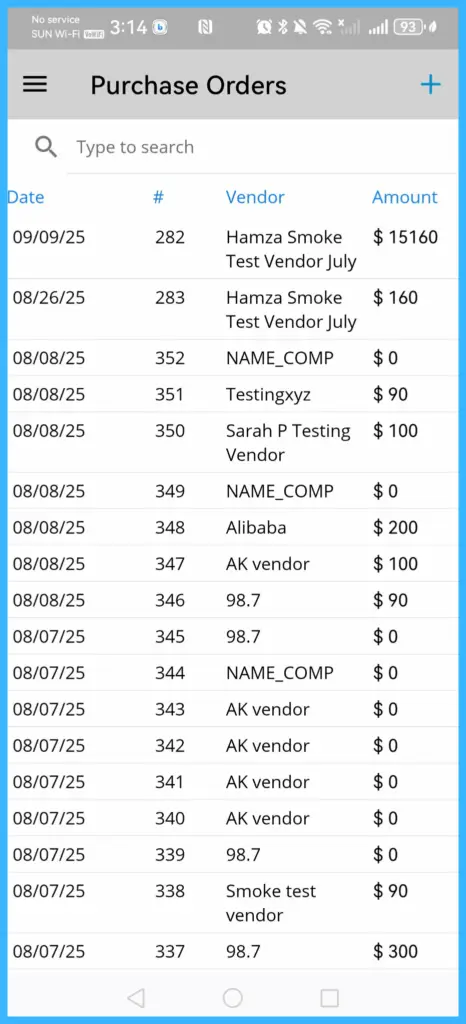
Tap the menu icon and select Purchase Orders to see all POs.
-
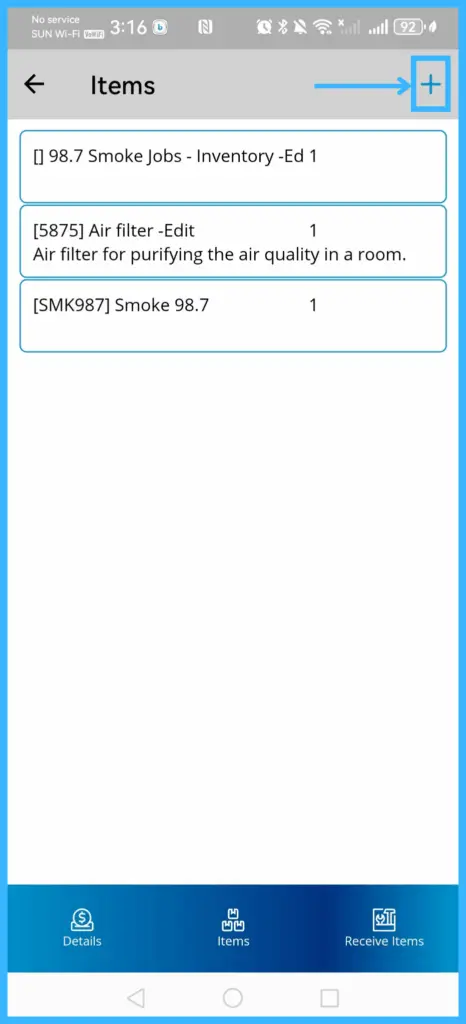
Tap a PO to view or edit it. Its items are listed.
-
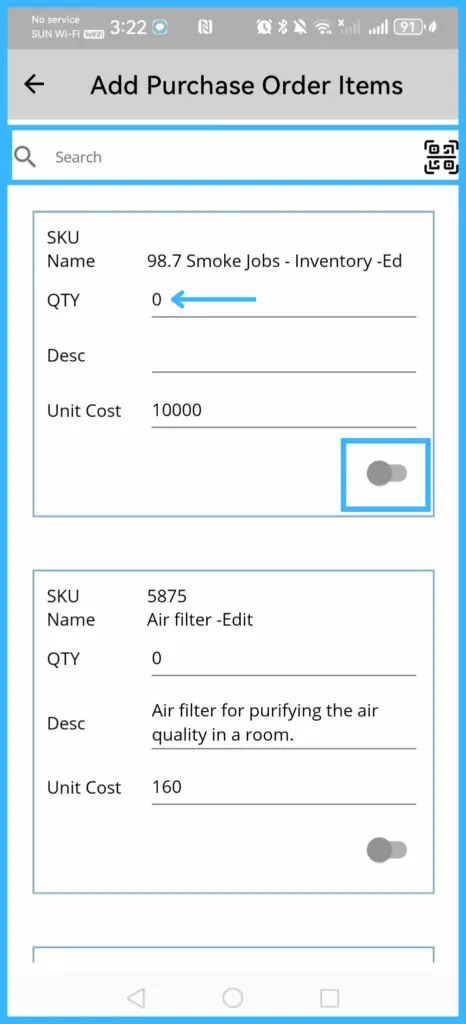
To add items, tap the Plus (+) icon, search for items or scan their barcodes, set the quantity and turn on the toggle. Go back to the item list; the new items are added.
-
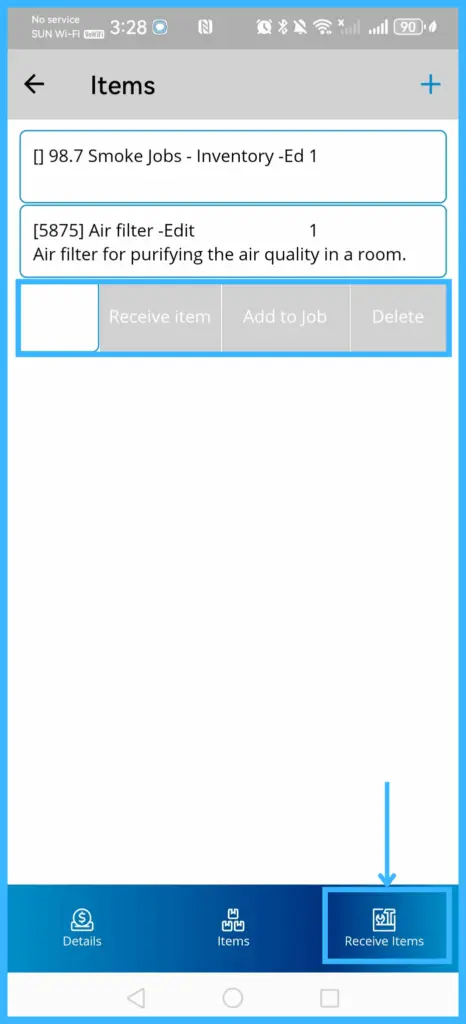
To receive one item, swipe left on it (iOS) or tap and hold it (Android), and choose:
- Receive Item: marks it received.
- Add to job: adds it to the job's item list. Only available if the PO is attached to a job.
- Delete: removes it from the PO.
-
To receive all items, open the Receive Items tab and scan the QR codes or barcodes, or type the item codes.
Techs can create a new PO from the Purchase Orders menu or from inside a job. To create one for a job, open the job, tap More›Purchase Orders and tap the plus icon. See How do techs work jobs in the app?
Common questions
Why can't I edit a customer's address?
Your office needs to turn on Allow edit customers in Settings›Mobile App.
Why can't I create a job for a customer I just added?
The customer hasn't synced yet. Reconnect and tap Sync.
Why is Add to job missing on a PO item?
That option only appears when the PO is attached to a job.
Was this article helpful?
Contact support