How do techs create estimates and invoices in the app?
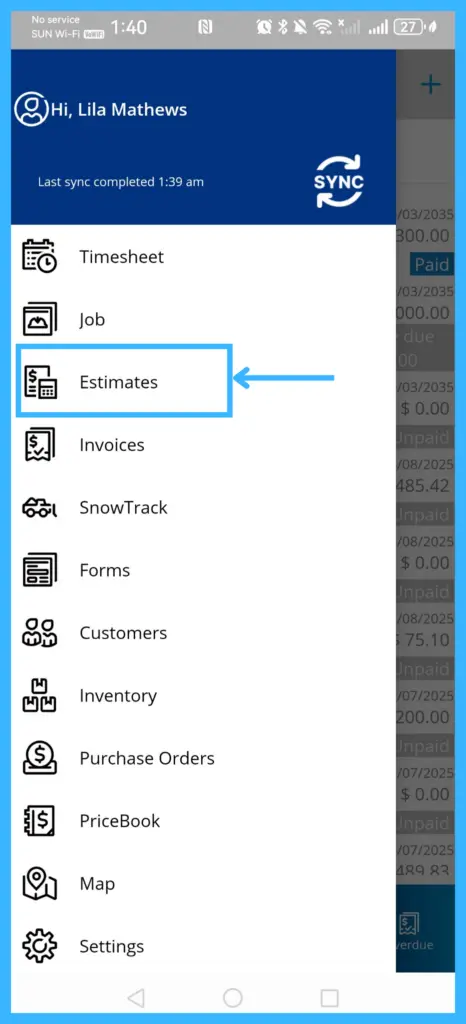
In the IndusTrack mobile app, tap the menu icon (three lines, top left) and select Estimates or Invoices, then tap + (top right). Pick the customer, add a description and items, and tap the checkmark to save.
Estimates and invoices work the same way up to the preview screen. Techs need the Estimation or Invoices permission on their employee profile; see How do I add field employees and set permissions?
Create an estimate or invoice
-
Tap the menu icon and select Estimates or Invoices.
-
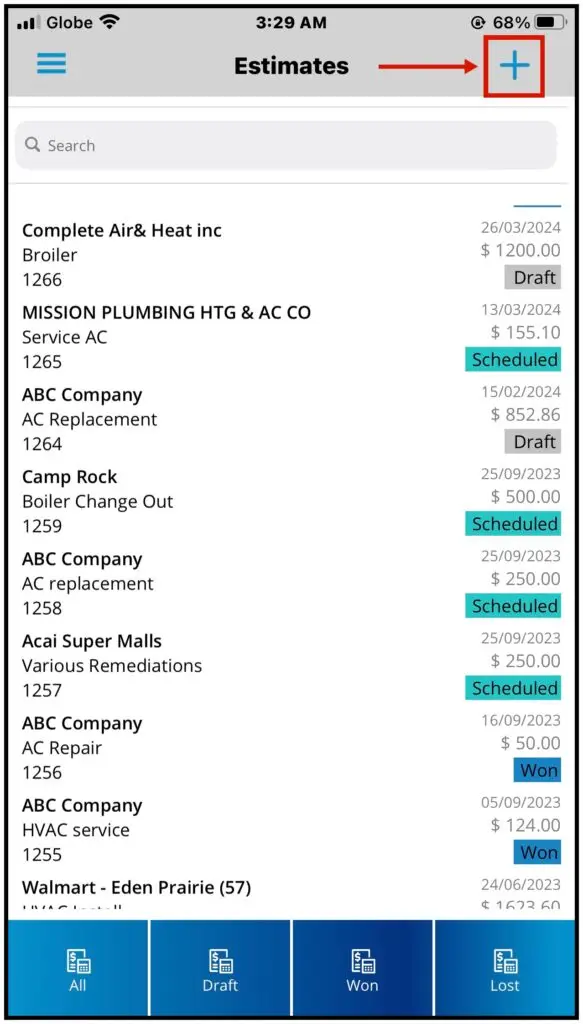
Tap + (or Add) at the top right.
-
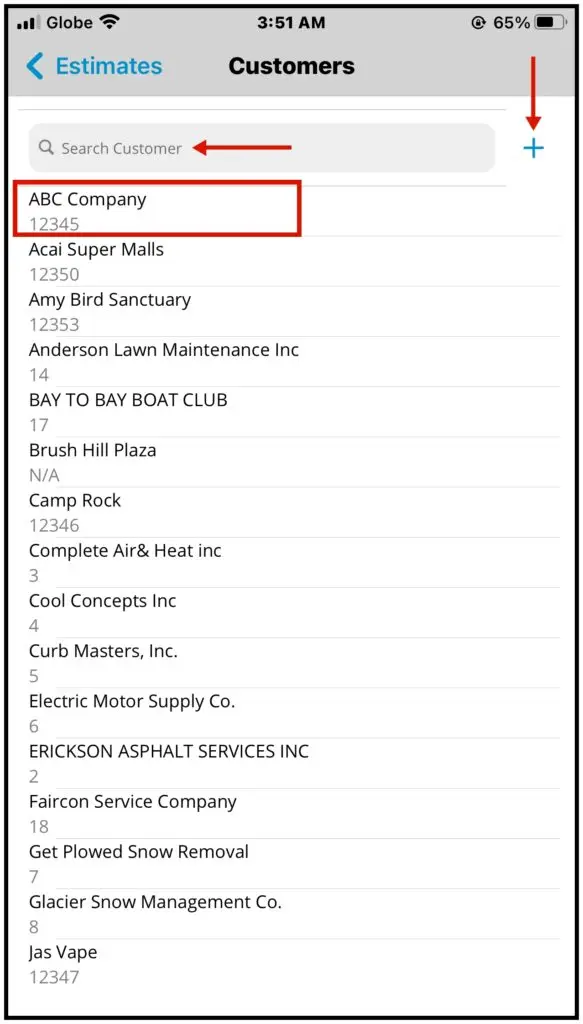
Choose the customer from the list or search for them. For a new customer, tap the + icon.
-
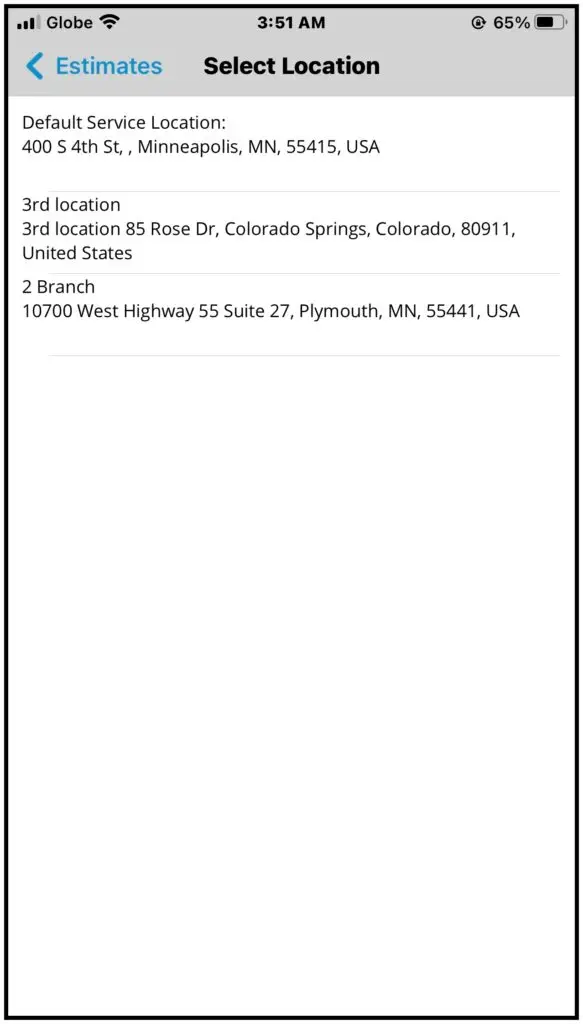
If the customer has more than one service location, select the right one.
-
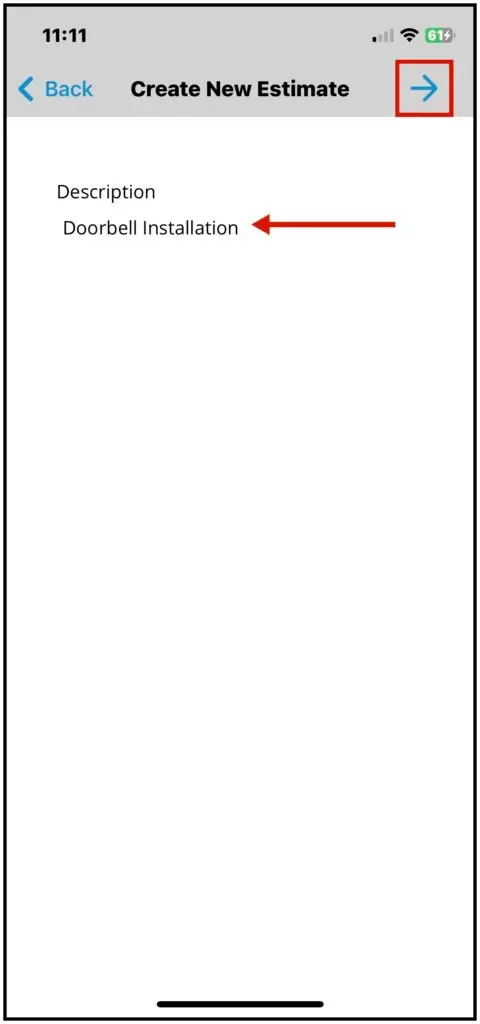
Enter a short description and tap the arrow icon.
-
Add items, either regular items or flat-rate items (see the next two sections), then tap the arrow icon.
-
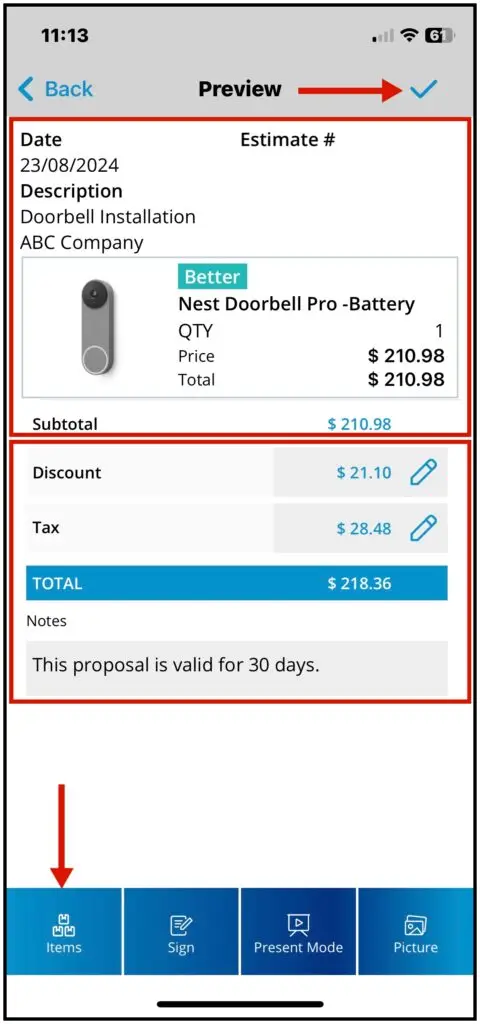
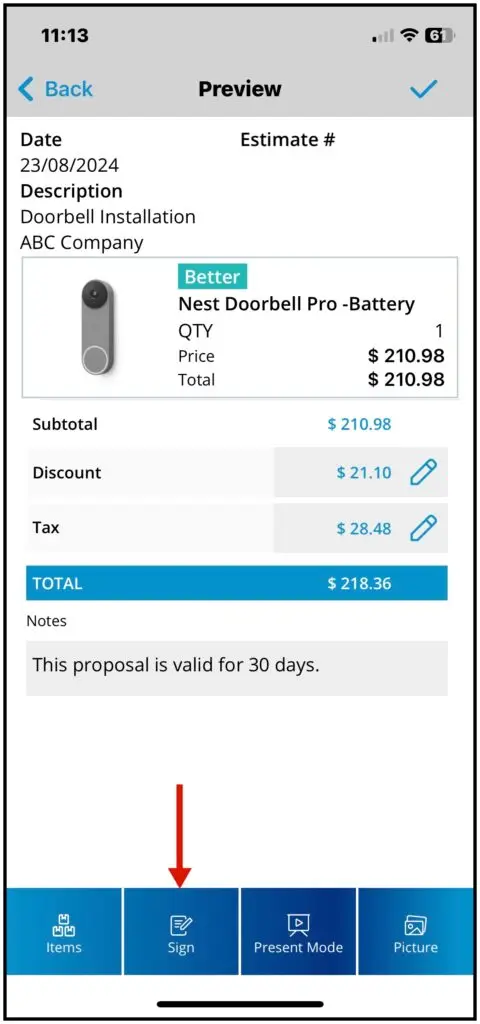
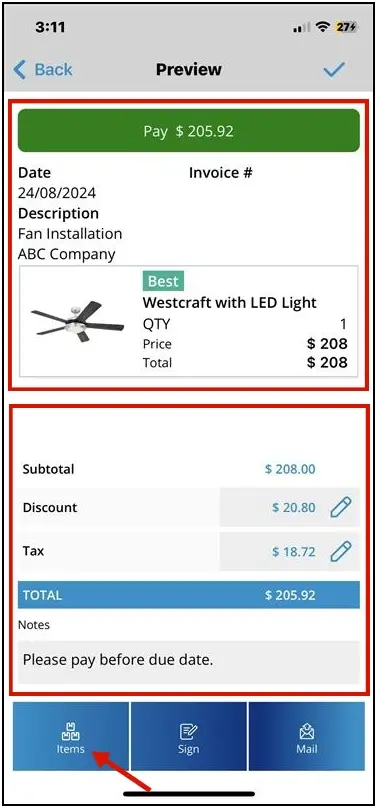
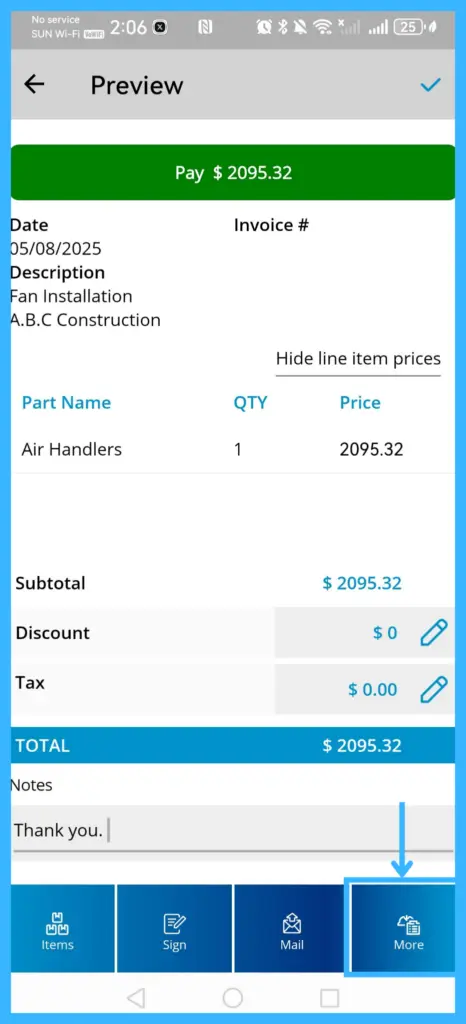
On the preview screen:
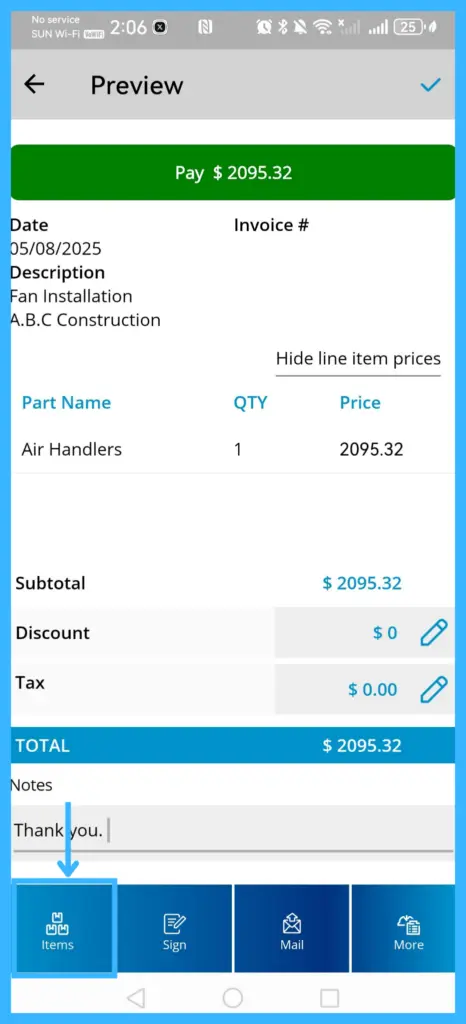
- Tap Items to add more items.
- Add tax or a discount, as a percentage or an amount.
- Add notes for the customer.
- Line item prices are hidden by default. Tap Hide line item prices to show all pricing.
-
Tap the checkmark (top right) to save.
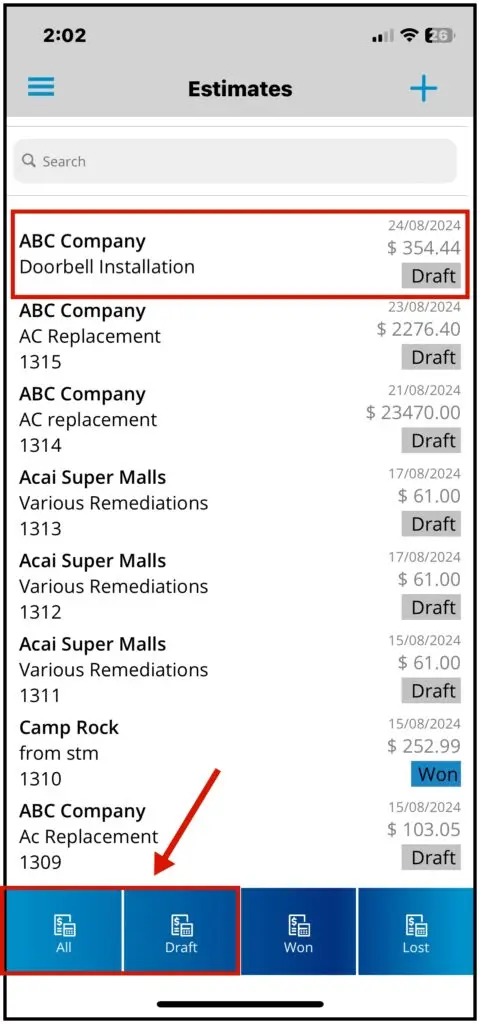
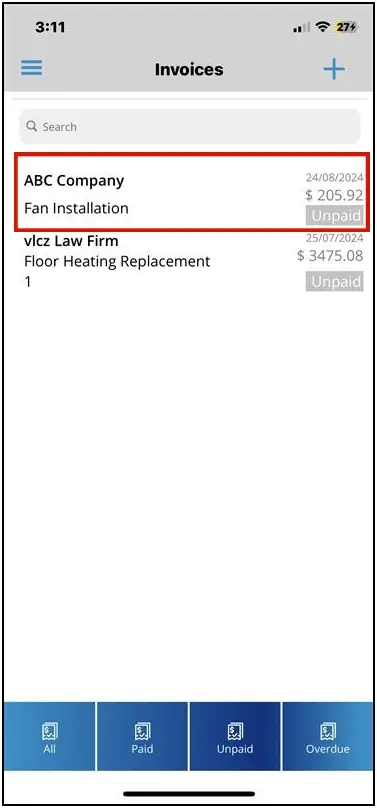
A saved estimate appears in the All and Draft lists. A saved invoice appears in the invoice list. Each gets a number automatically once the app syncs.
Add regular items
-
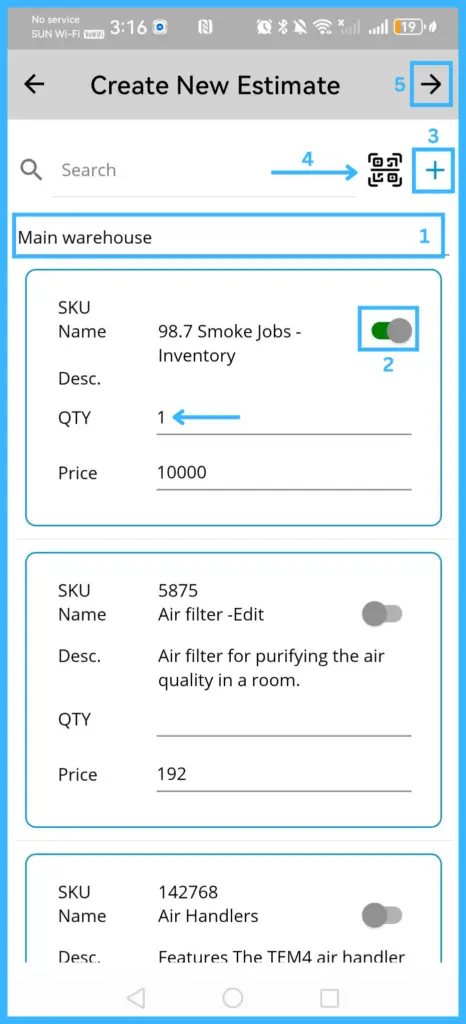
Pick the warehouse the items come from.
-
Search or browse, and tap the slider next to each item to add it. Change the quantity if needed.
-
To add an item that isn't listed, tap the + icon. To scan a barcode, tap Scan (top right).
-
Tap the arrow icon.
Add flat-rate items
Flat-rate items are available when your Flat Rate Pricebook is enabled. To enable it, contact IndusTrack Support or upgrade your subscription.
-
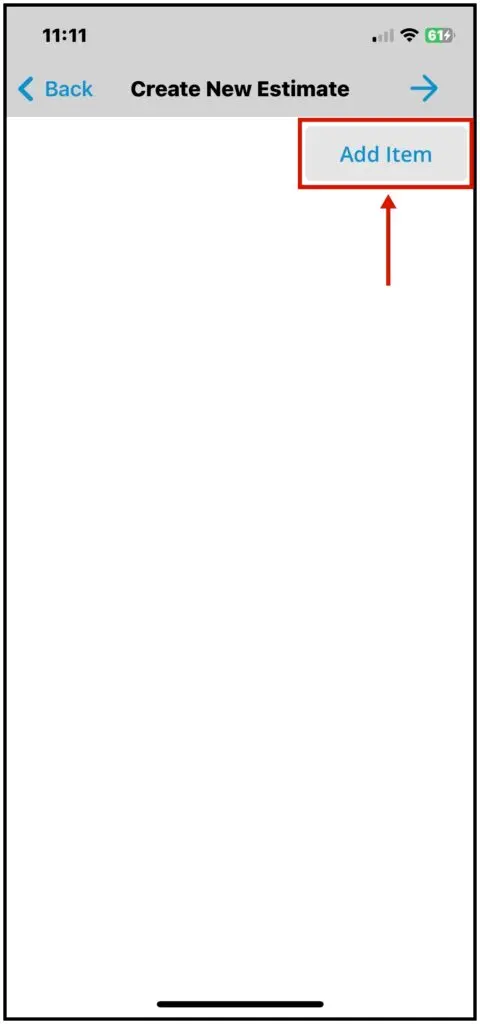
Tap Add Item. The Pricebook Category list opens.
-
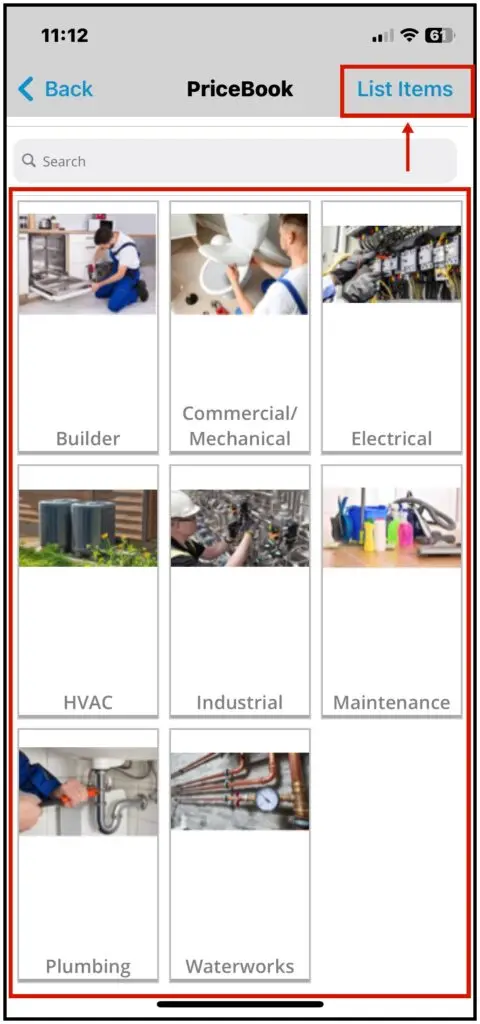
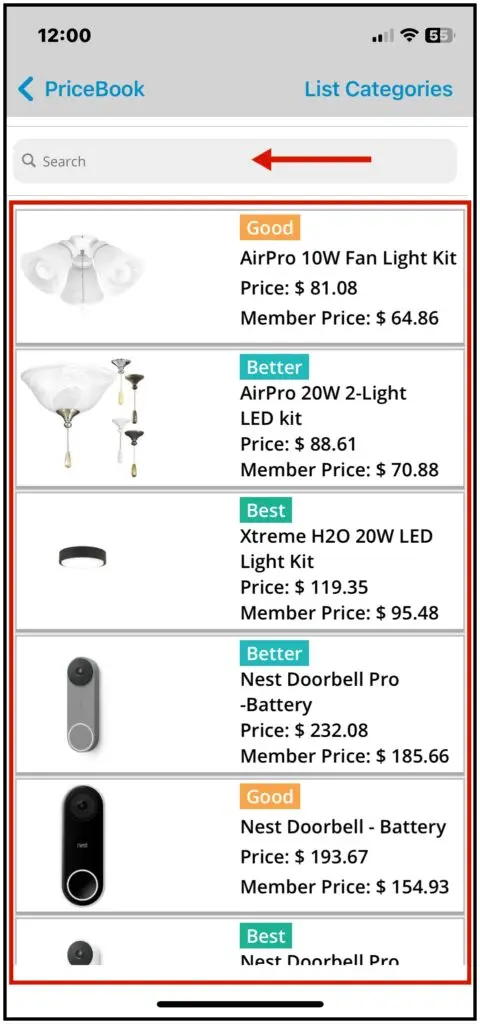
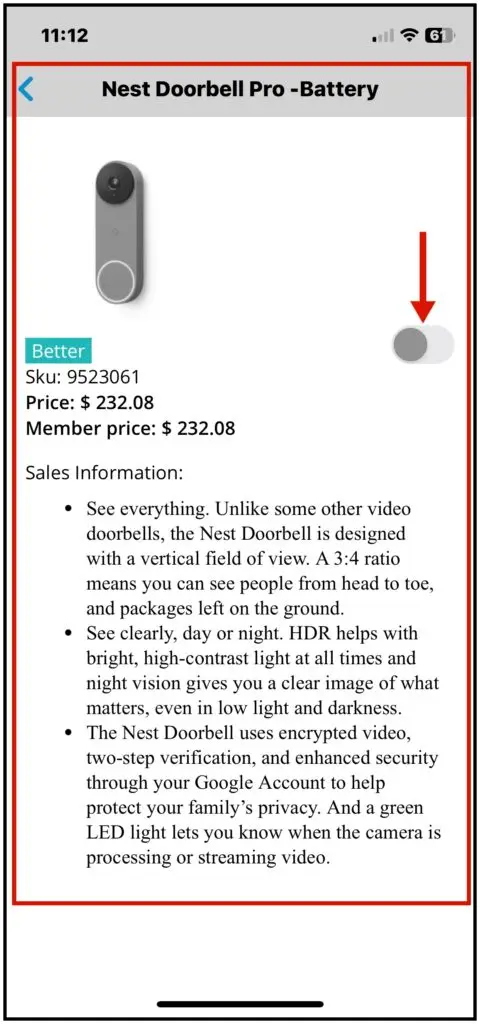
Browse through categories and subcategories, or tap List Items to see every flat-rate item. The list shows each item's conditions, Price (the total flat-rate price) and Member Price (the discounted price).
-
Tap an item to see its details, then turn on the toggle to add it.
-
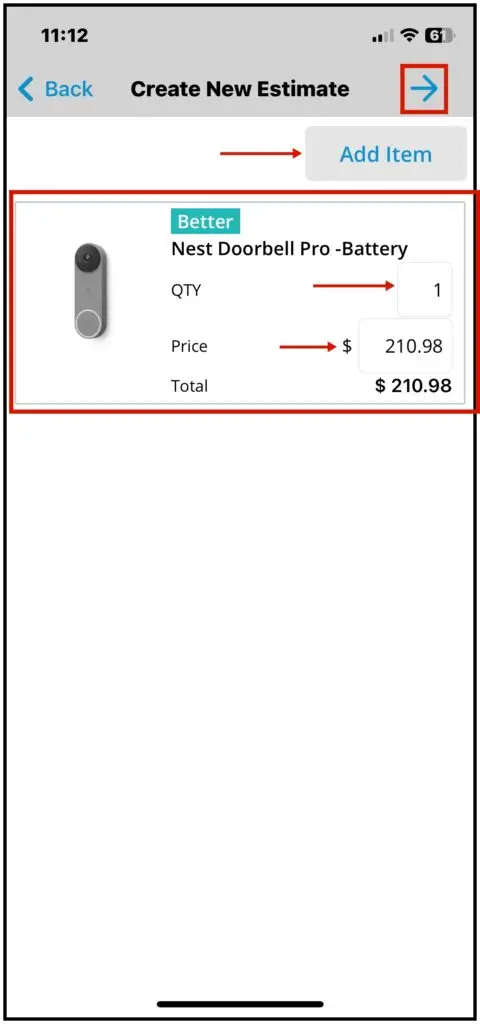
Change the quantity or price if needed. Tap Add Item to add more.
-
Tap the arrow icon to go to the preview.
Estimates: sign, present and convert
-
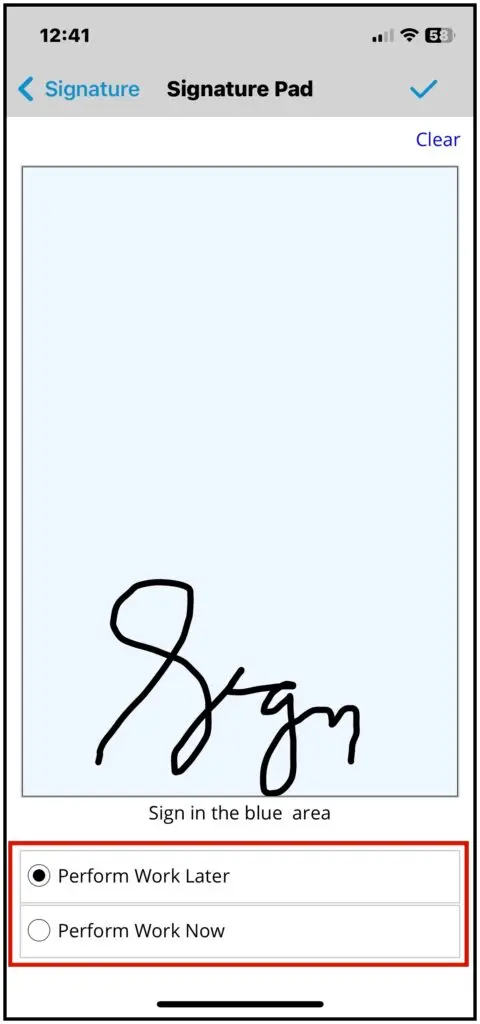
Sign: tap Sign, sign on the pad (or have the customer sign), then choose:
- Perform work now: create a new job from the estimate, or add it as a task on an existing job.
- Perform work later: marks the estimate Won and saves it.
Tap the checkmark to save.
-
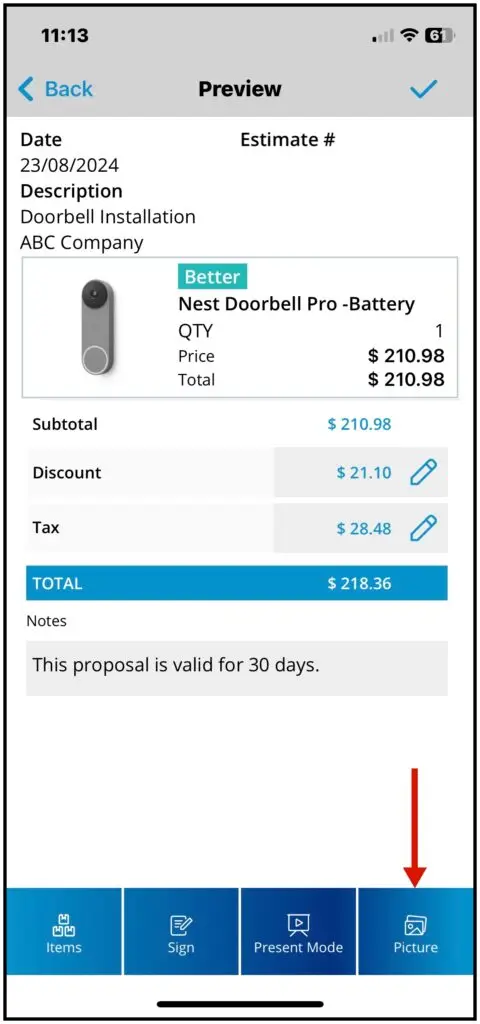
Pictures: tap the Picture tab to take a photo or add one from your gallery, then tap the check icon to save.
-
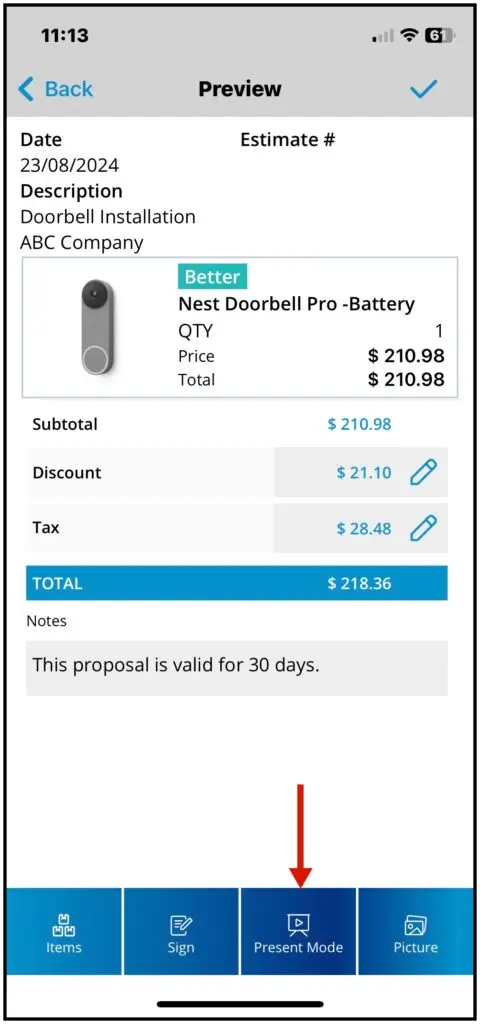
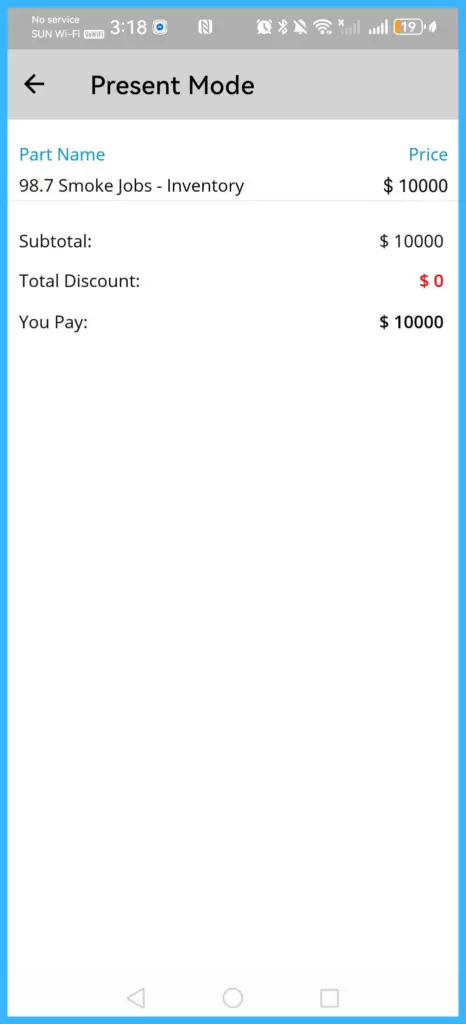
Present Mode (under More): shows a summary of the items, discounts and totals.
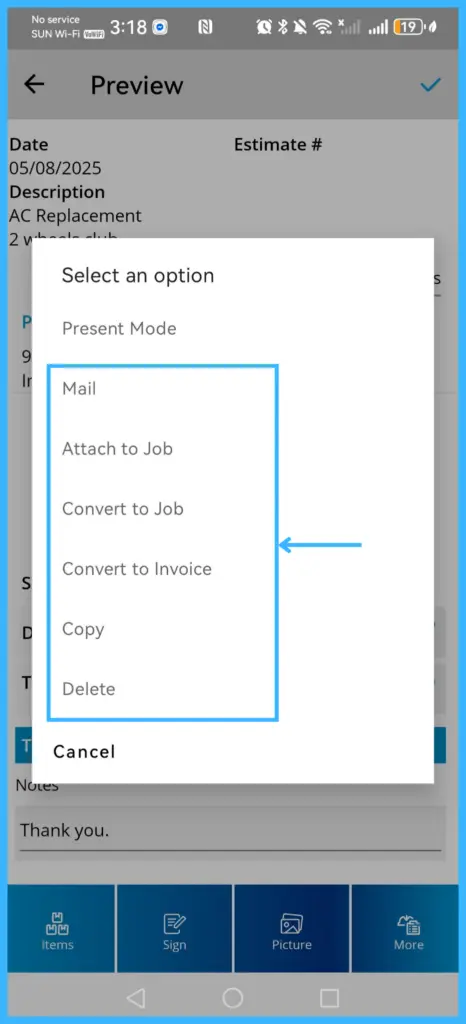
Other options under More:
| Option | What it does |
|---|---|
| Emails the estimate. | |
| Attach to Job | Links it to an existing job. |
| Convert to Job | Turns it into a new job assigned to you. The estimate status changes to Scheduled, and the job appears in your job list. |
| Convert to Invoice | Turns it into an invoice. The estimate status changes to Invoiced. |
| Copy | Duplicates it for another customer. |
| Delete | Removes it. |
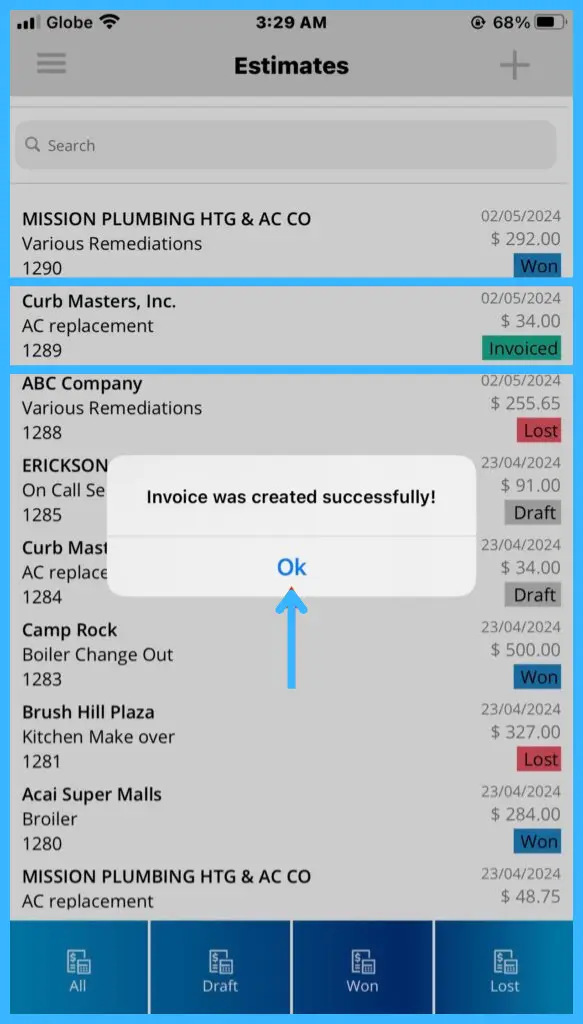
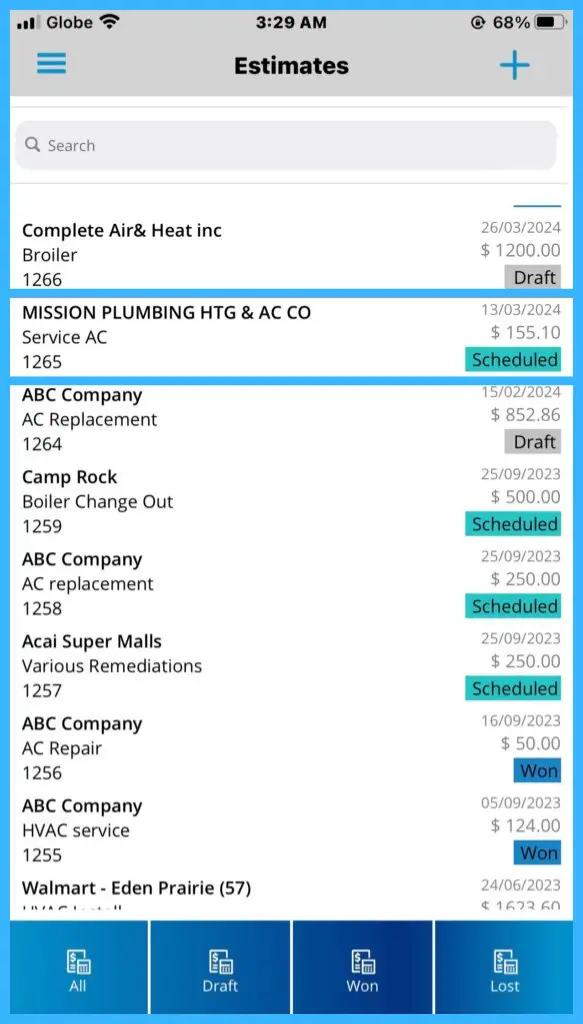
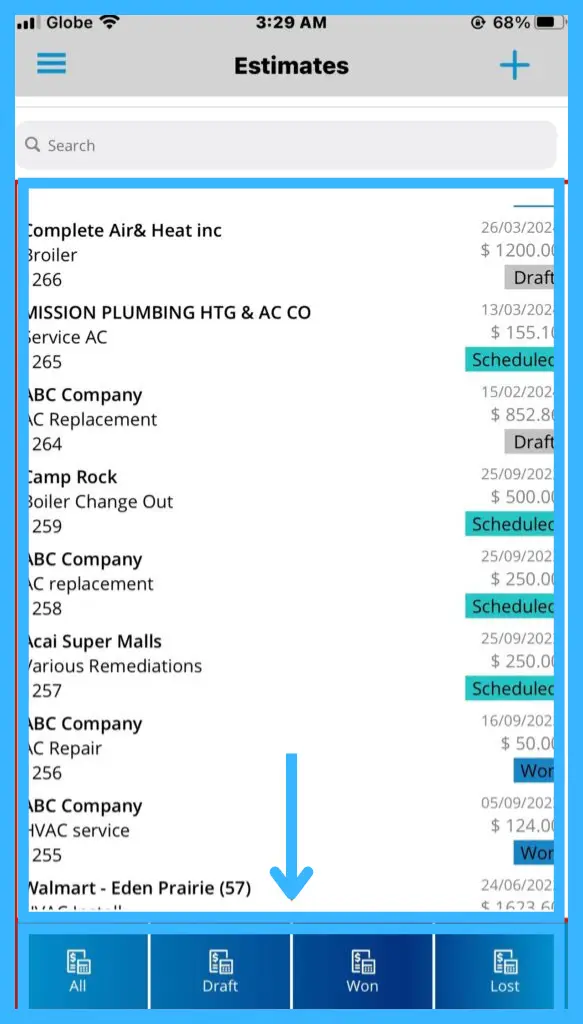
The tabs at the bottom of the Estimates page filter the list: All (default), Draft (still being worked on), Won (accepted) and Lost (declined).
Invoices: payment, signature and email
-
Take payment: after saving, tap Pay Invoice and choose Cash, Credit Card or Check. The tech needs the Payment Processing permission to accept payments in the app. Credit Card payments also need a card payment integration set up first. Card payments in the app are coming soon. Contact support if you'd like to know more.
-
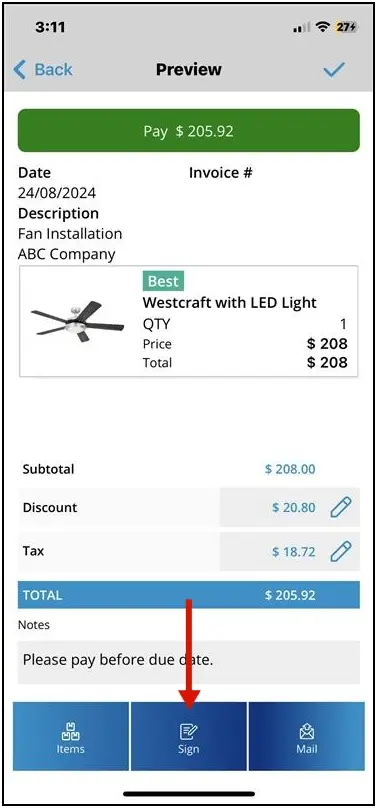
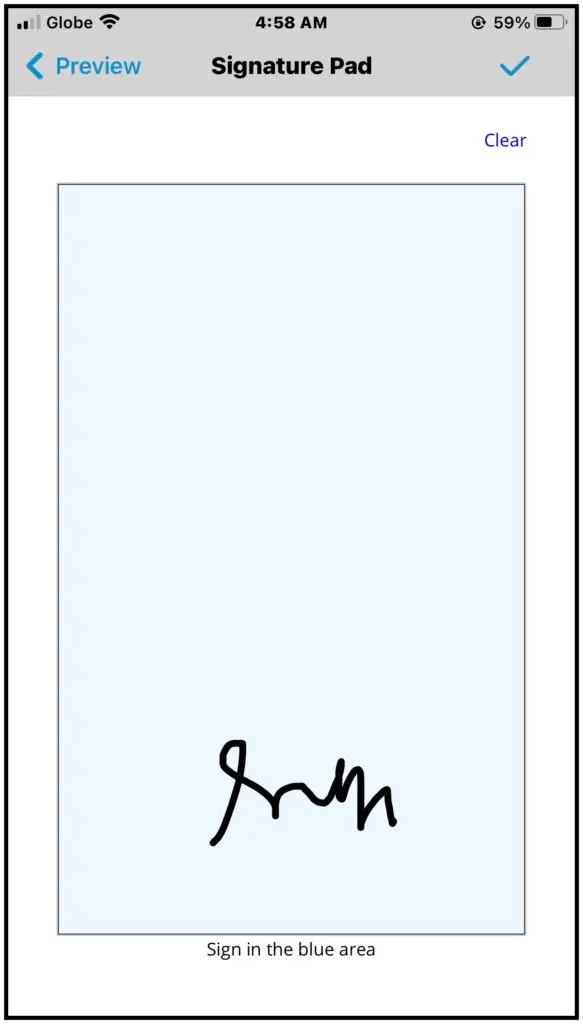
Signature: tap Sign and have the customer sign on screen. Tap Clear to redo it or Save to keep it.
-
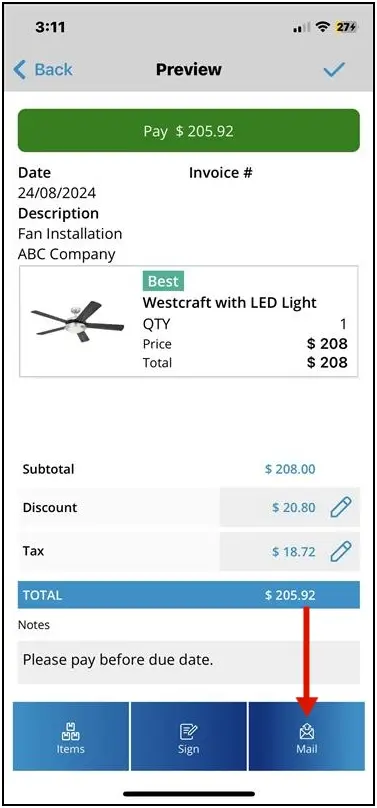
Email: tap the envelope icon. A PDF of the invoice is created. Edit the message if needed and tap the checkmark to send and save.
-
Items: tap the Items tab to add or edit items.
More actions:
| Where | Options |
|---|---|
| More Options on the invoice | Copy (duplicate for another customer), Delete (remove permanently) |
| Swipe left on an invoice in the list | Sign, Copy, Mail, Delete |
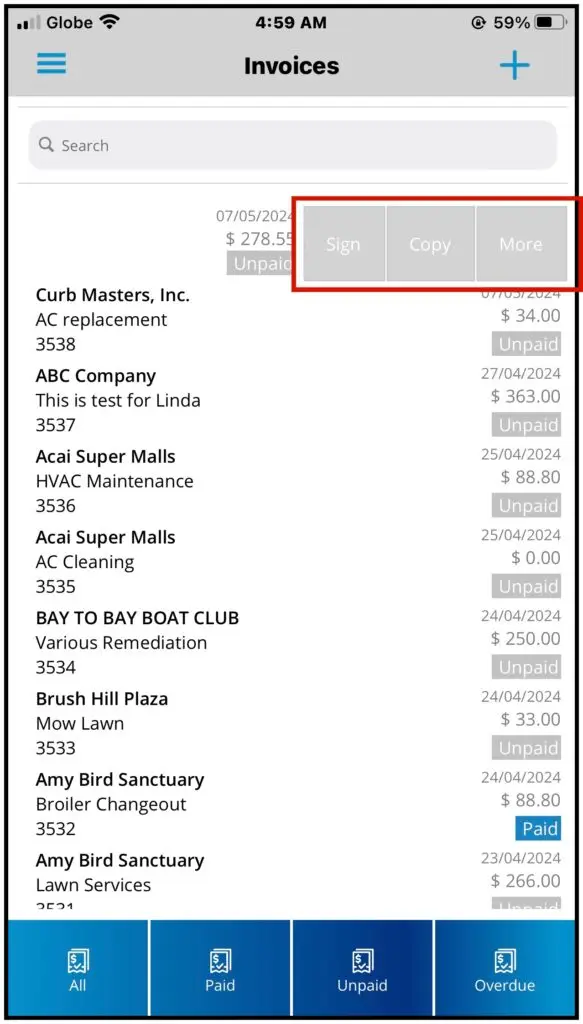
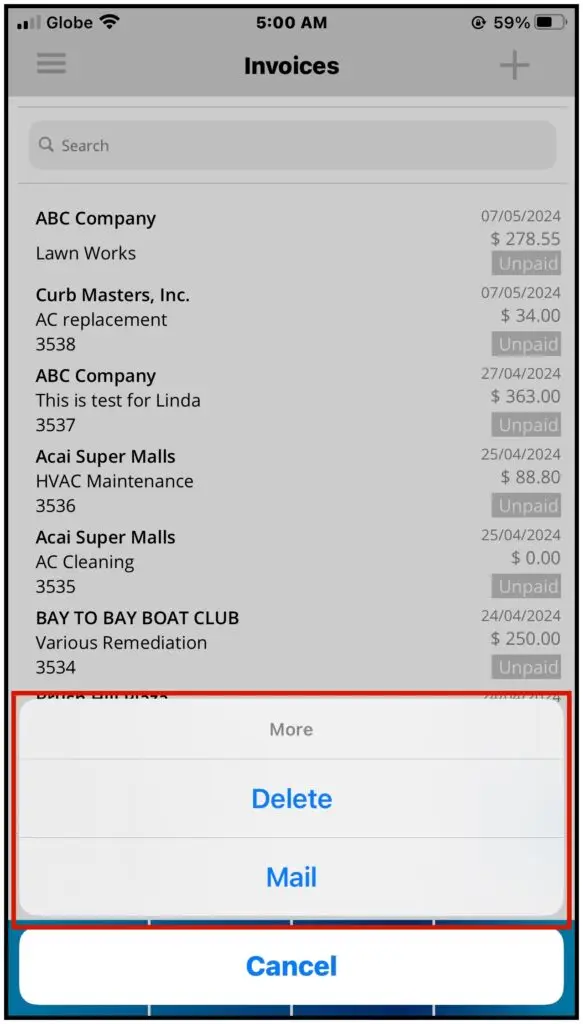
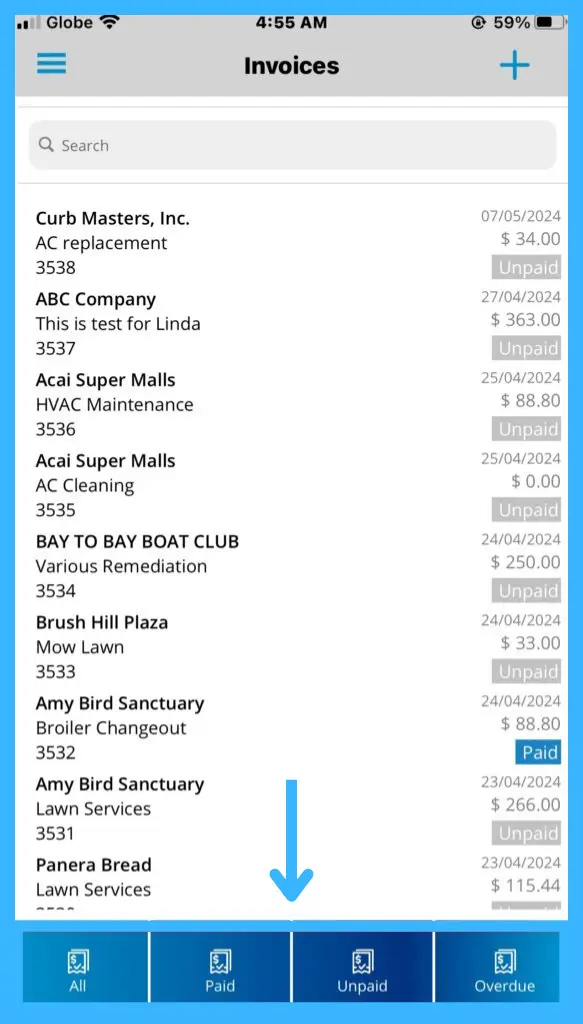
The tabs at the bottom of the Invoices page filter the list: All (default), Paid, Unpaid and Overdue.
Common questions
What does "Perform work later" do?
It marks the estimate as Won and saves it, so you can schedule the work later.
What's the difference between Price and Member Price?
Price is the total flat-rate price. Member Price is the discounted price.
Can I turn a completed job into an invoice?
Yes. Tap Done on the job and choose Convert to Invoice. See How do techs work jobs in the app?
Was this article helpful?
Contact support