How do I add field employees and set permissions?
Go to Settings›Field Employees›Manage Employees, click Actions and select + Add New. Fill in the employee's ID, name and mobile app login, choose which modules they can use, and click Save.
Field employees use the IndusTrack mobile app in the field. Office users with Super Admin permission manage them from the web app.
Add a field employee
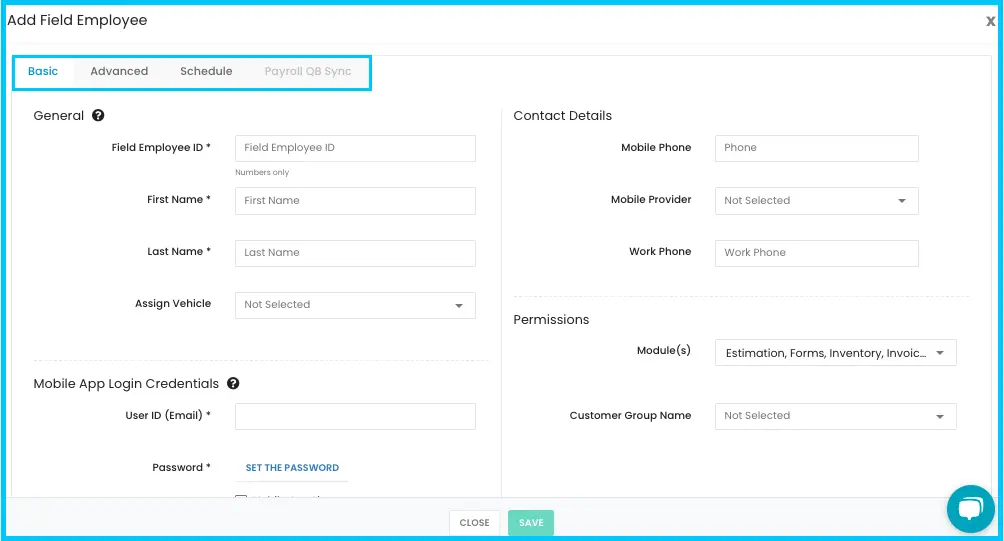
The Add/Edit Field Employee page has four sections: Basic, Advanced, Schedule and Payroll QB Sync.
-
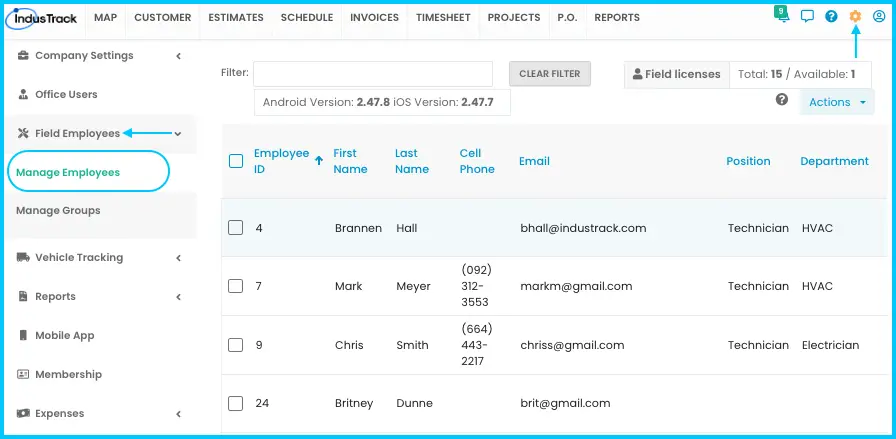
Go to Settings›Field Employees›Manage Employees.
-
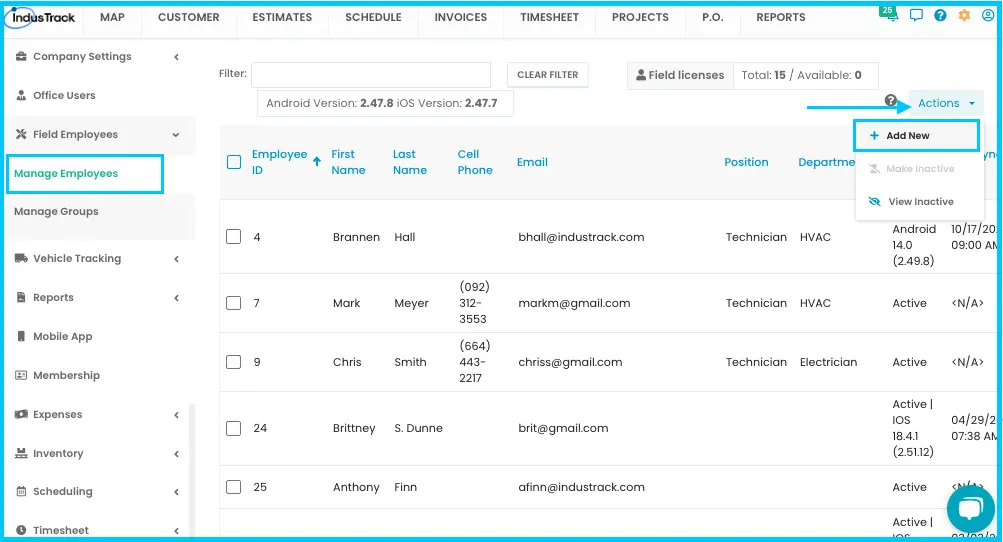
Click Actions and select + Add New.
-
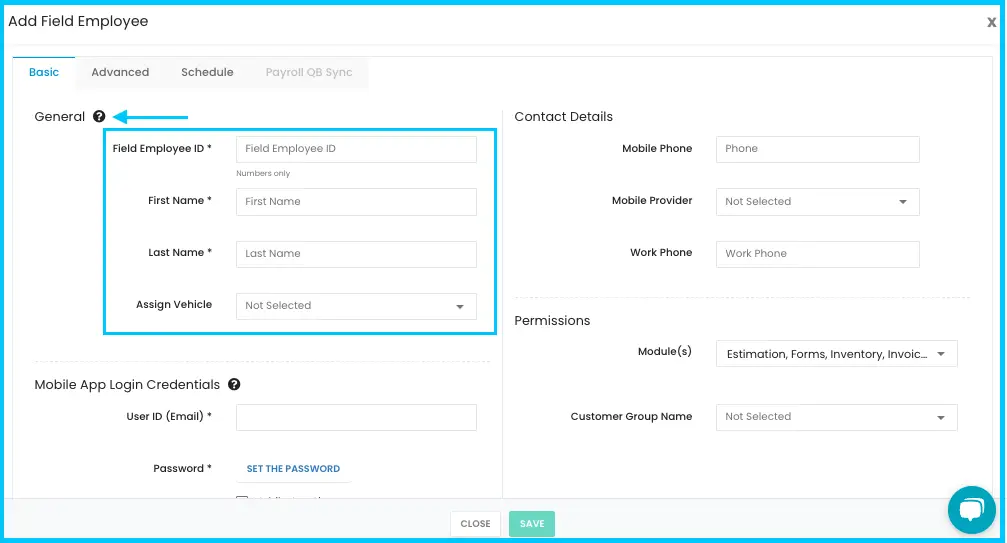
Basic: general information.
- Field Employee ID (required): a number.
- First & Last Name (required).
- Assign Vehicle: pick the employee's vehicle from the list, if they have one.
-
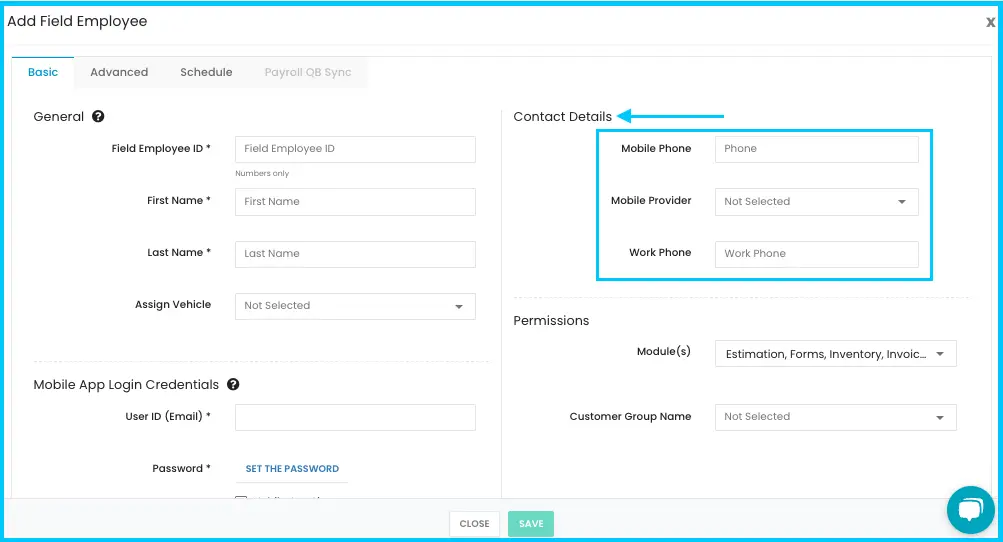
Basic: contact details.
- Mobile Phone: required for text alerts. SMS notifications go to this number.
- Mobile Provider: pick from the list.
- Work Phone (optional).
-
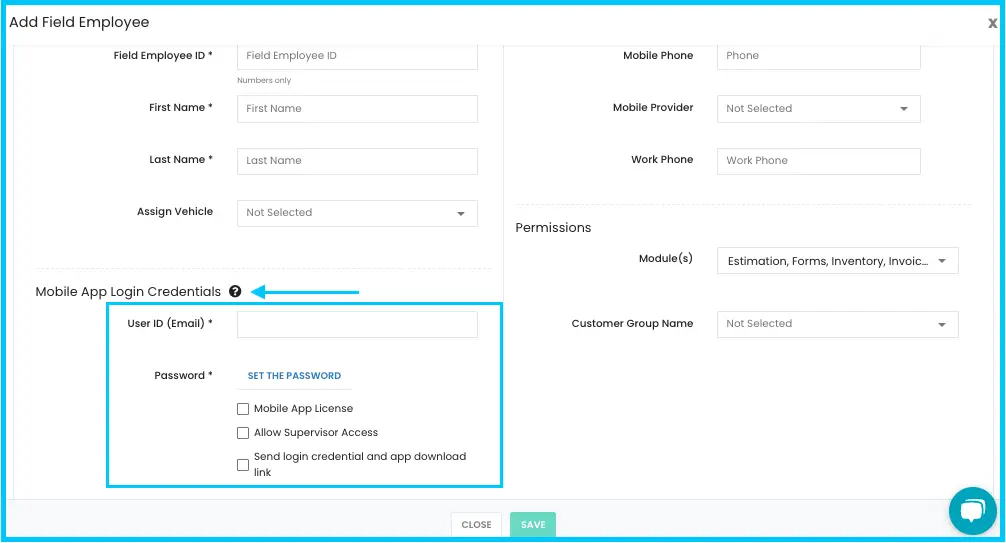
Basic: mobile app login.
- User ID (Email) (required): must be an email address no other employee uses.
- Password (required).
- Mobile App License: assign an available license.
- Allow Supervisor Access: turn on for supervisors.
- Send Login Credentials & App Download Link: emails the login details and app download link to the employee.
Watch: The message you get when the email is already used by another employee -
Basic: module permissions. Check each module the employee can use in the app (see the table below).
Watch: Checking the modules a field employee can use -
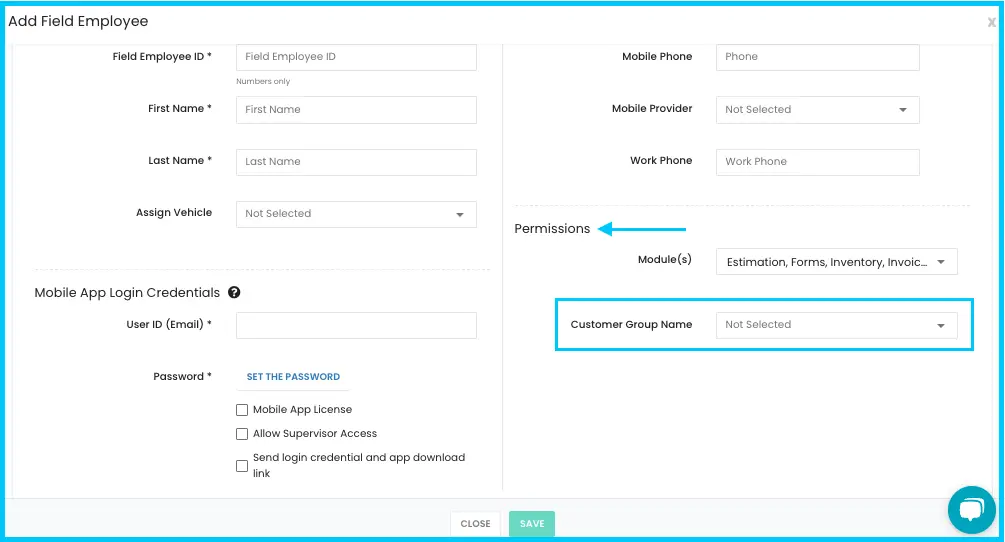
Basic: customer permissions (optional). Select a Customer Group (only available if the SnowTrack feature is enabled), or limit the employee to specific customers.
-
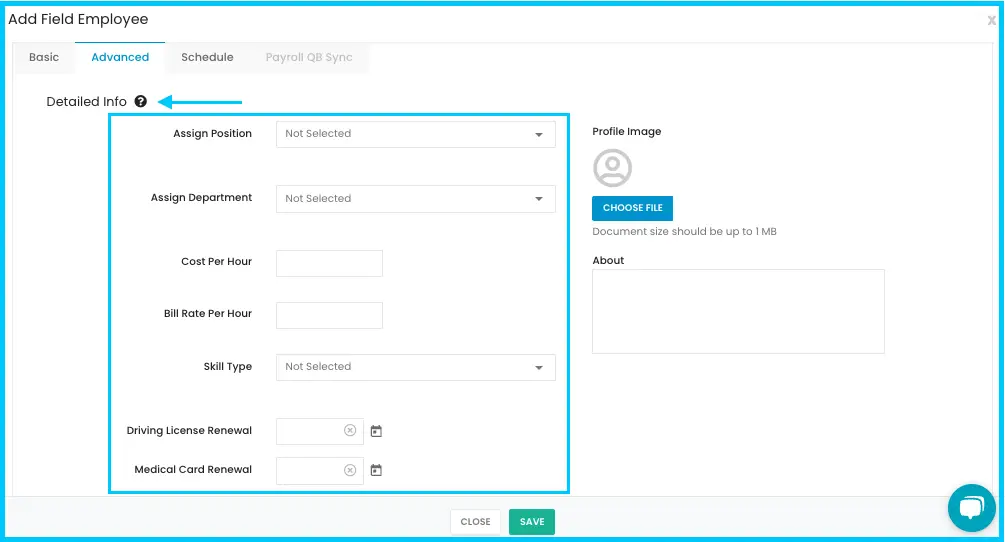
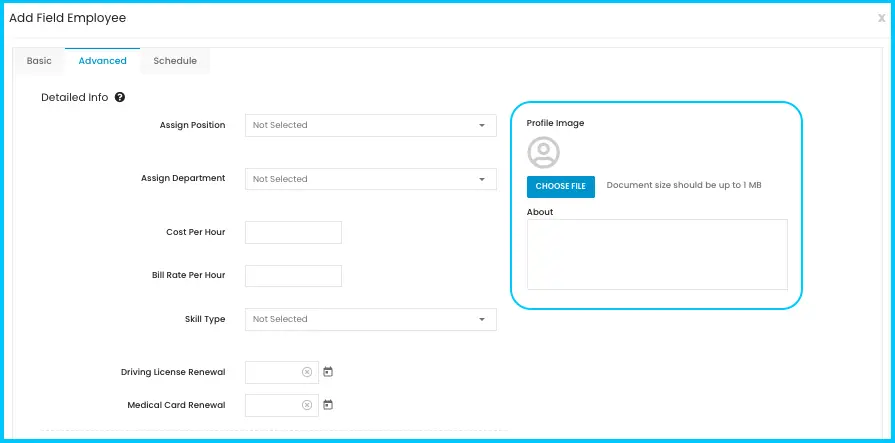
Advanced (optional).
- Assign Position (pick one or create a new one) and Assign Department.
- Cost per Hour: the employee's pay rate.
- Bill Rate per Hour: what you bill customers.
- Driver Skill Level.
- License & Medical Card Renewal: enter expiry dates to get reminders.
- Photo: click the image area to upload, change or delete a photo. The photo can be included in customer notifications.
- About: a short description of the employee, which can also be added to customer notifications.
-
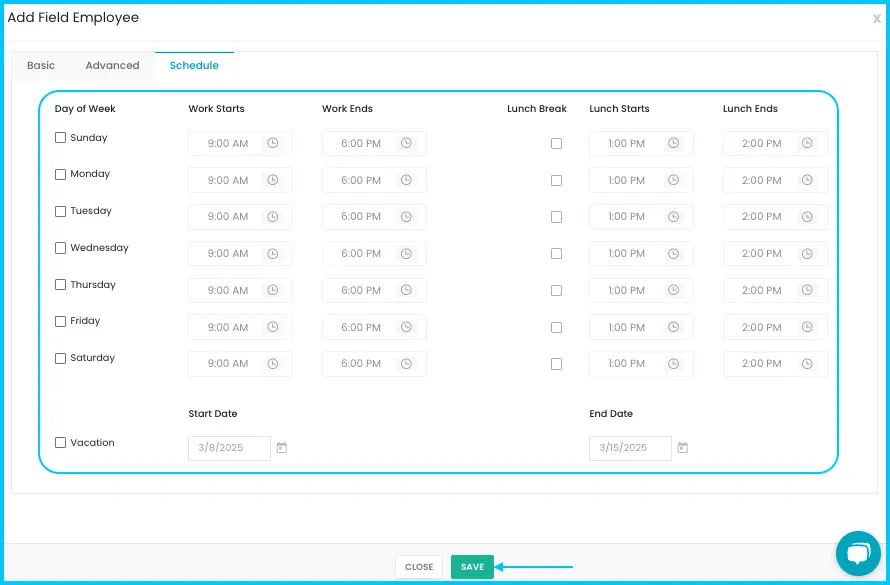
Schedule. Choose the employee's work days, start and end times, lunch break for each workday, and any vacation dates to exclude.
-
Payroll QB Sync. Link the employee to payroll items from QuickBooks. This works with both QuickBooks Online and QuickBooks Desktop. This section is disabled if QuickBooks isn't set up. See How do I connect QuickBooks Desktop?
-
Click Save. The employee is added to the list.
Module permissions
| Module | What the employee can do |
|---|---|
| Estimation | Create, edit and manage estimates. |
| Forms | Fill in, edit and send forms you've created. |
| Inventory | Manage inventory items and purchase orders. |
| Basic Inventory | Limited inventory access. |
| Invoices | Create and manage invoices. |
| Map | See real-time locations of vehicles and employees. |
| Payment Processing | Accept payments in the app. |
| Warehouses | Access and select inventory warehouses. |
| Inventory Tracking with QR/Bar Codes | Scan and track inventory. |
| Custom Proposals | Customize estimates. |
| Customers | View customer details, history and job records. |
| Scheduling | View and manage job schedules. |
| Timesheet | Clock in and out. |
| Snow | Use snow removal job tracking. |
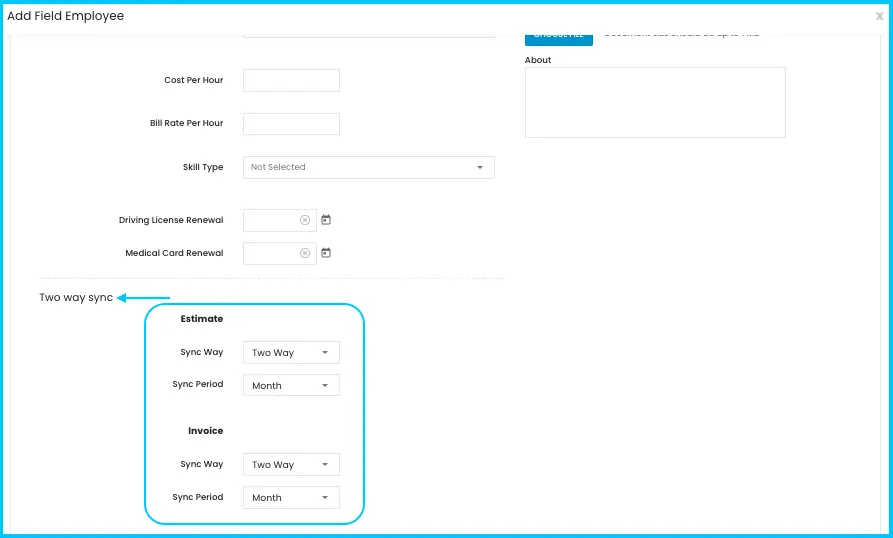
Estimate and invoice sync
These settings are in the Advanced section. They control how estimates and invoices move between the app and the office.
| Setting | What it does |
|---|---|
| One-Way Sync | Estimates (or invoices) created in the app sync to the office. Changes made in the office don't sync back to the app. |
| Two-Way Sync | Estimates (or invoices) sync both ways between the app and the office. |
| Sync Period | How often syncing happens: weekly, monthly or by pay period. |
Find employees
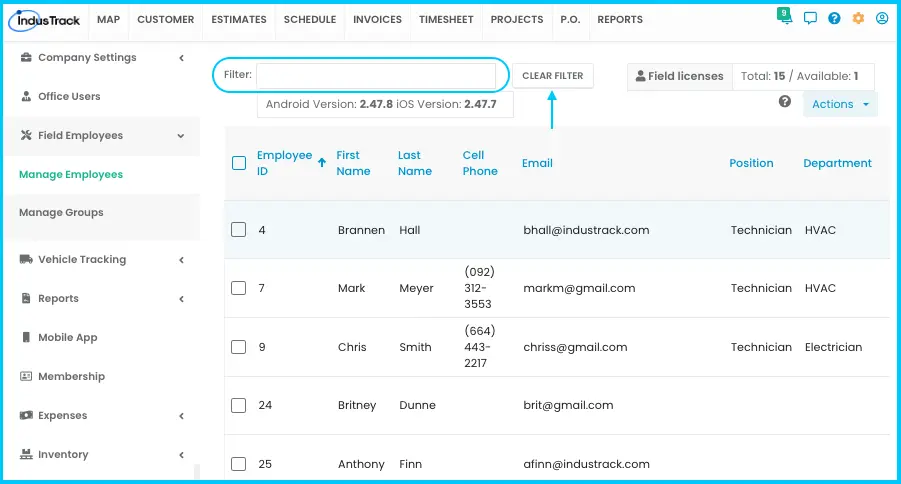
The Manage Employees page shows your Total Licenses (mobile app licenses purchased), Available Licenses (not yet assigned), and the latest Android/iOS Version of the app.
Employees are in three lists:
| List | Who's in it | How to open it |
|---|---|---|
| Active Users | Employees currently working. Shown by default. | Use Actions to return here from another list. |
| Inactive Users | Temporarily inactive employees, such as seasonal workers. | Actions›View Inactive |
| Archived Users | Former employees, kept for your records. | From the Inactive list, use Actions. |
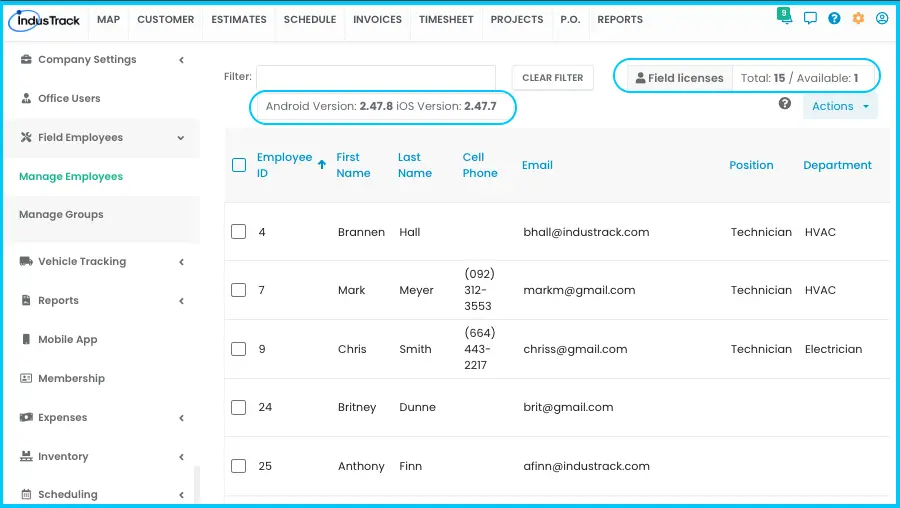
The Active list shows each employee's ID, name, phone, email, position, department, mobile app license (status, device and app version), Last Sync Time and Last Token Refresh Time. Use the filter bar to find employees by ID, first name or last name; it works in all three lists. Click Clear Filter to reset.
Edit an employee
-
Find the employee in the Active list.
-
Click the 3-dot menu and select Edit, or click anywhere on their row.
-
Make your changes and click Save.
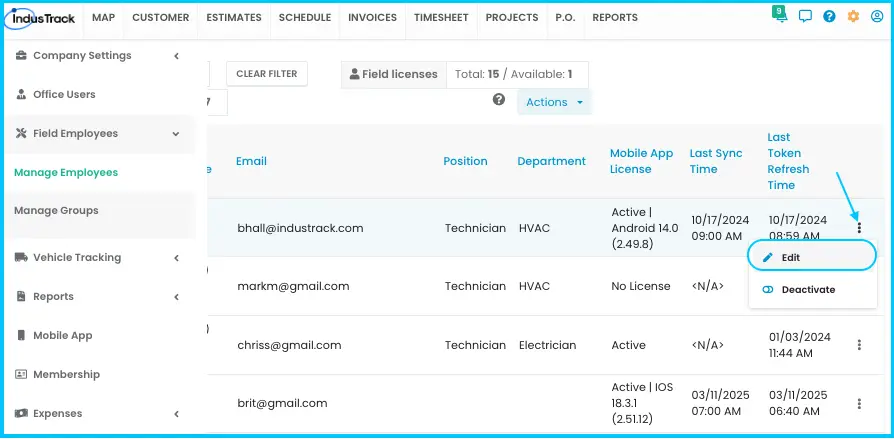
You can't edit an inactive or archived employee. Reactivate them first.
Deactivate, archive or reactivate an employee
| To… | Do this |
|---|---|
| Deactivate one employee | In the Active list, click the 3-dot menu, select Deactivate, then Yes. |
| Deactivate several | Tick the checkbox next to each name (or the top checkbox for everyone), then click Actions›Make Inactive. |
| Archive a former employee | In the Inactive list, click the 3-dot menu, select Archive, then Yes. |
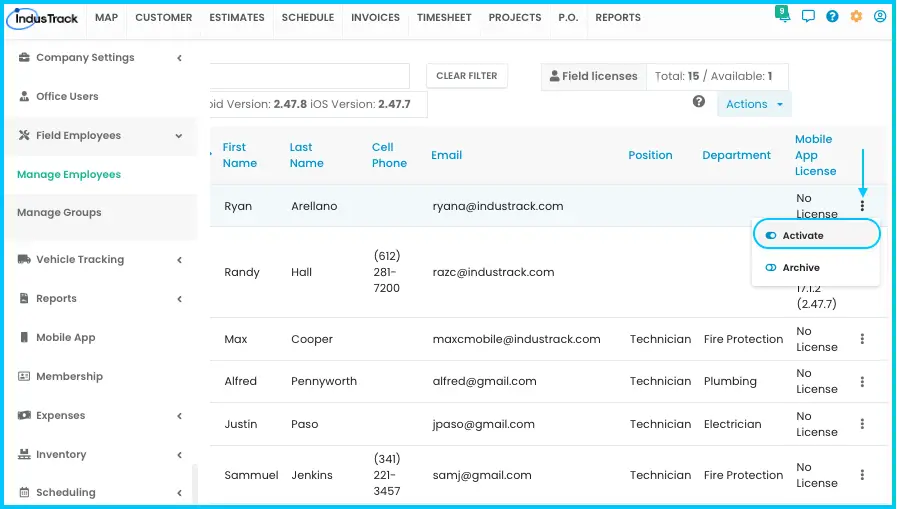
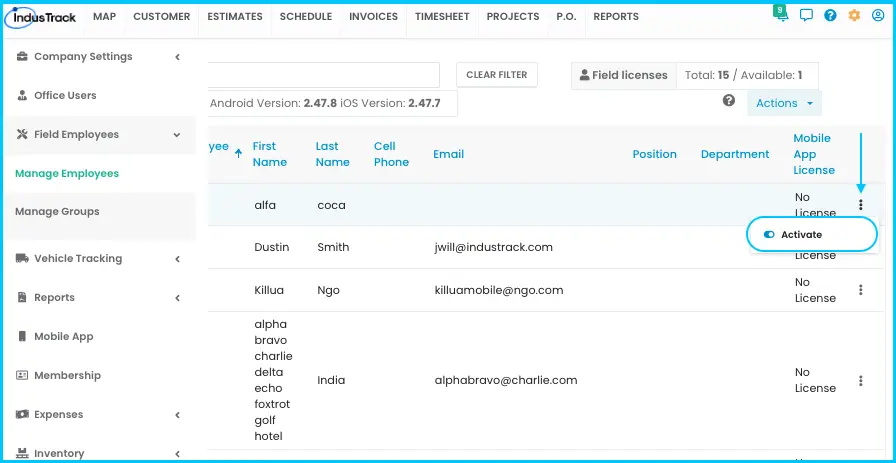
| Reactivate | In the Inactive or Archived list, click the 3-dot menu, select Activate, then Yes. The employee moves back to the Active list. Update their details and make sure they can log in. |
Common questions
Can I delete a field employee?
No. Field employee profiles are never deleted, so your records are kept. Archive employees who leave instead.
What happens when I deactivate someone?
They move to the Inactive list, can no longer log in, and their mobile app license is released so you can assign it to someone else.
Should I deactivate or archive?
Deactivate someone who will be away for a while. Archive someone who has left. You must deactivate an employee before you can archive them.
A former employee came back. Should I create a new profile?
No. Reactivate their archived profile.
Why won't it accept the employee's email?
Each employee needs a unique email address. The system won't let you use one that's already assigned to another employee.
Was this article helpful?
Contact support