How do I set up my pricebook?
Contact IndusTrack support to turn on PriceBooks. Then go to Settings›PriceBooks: set your markups and membership discount, create categories and subcategories, and add flat rate assemblies (bundles of parts, services and equipment sold as one line item).
Before you start
- Turn on PriceBooks. Contact IndusTrack support to enable the feature. If you already have a pricebook in another system, export it and IndusTrack support can help import it.
- Get your inventory in first. Flat rates are built from your inventory, so add it before you start: sync it from QuickBooks, send it to the IndusTrack team to import from Excel, or add items by hand. See How do I set up inventory items, non-inventory items and services?
- Set markups first (recommended). The flat rate prices are calculated from them.
Set markups and the membership discount
These settings affect PriceBook assemblies only. They don't change inventory item prices; for those, see How do inventory markups work?
-
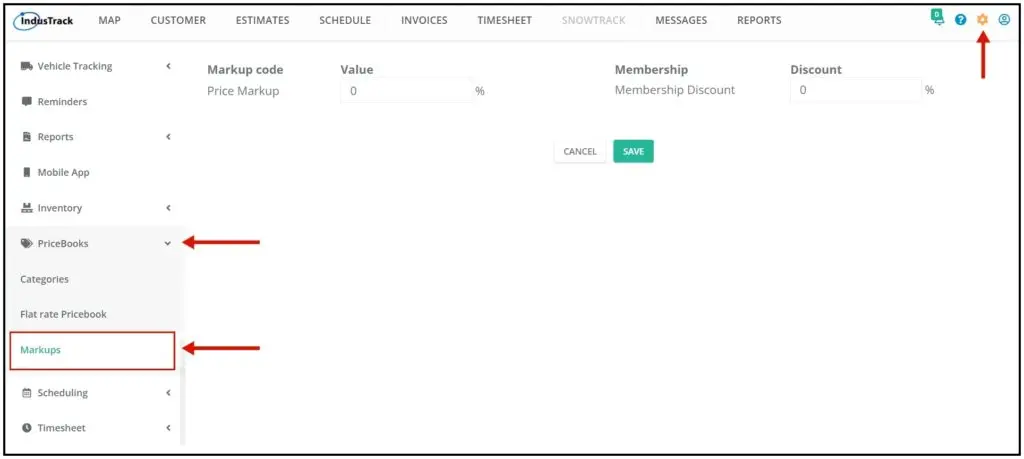
Go to Settings›PriceBooks›Markups.
-
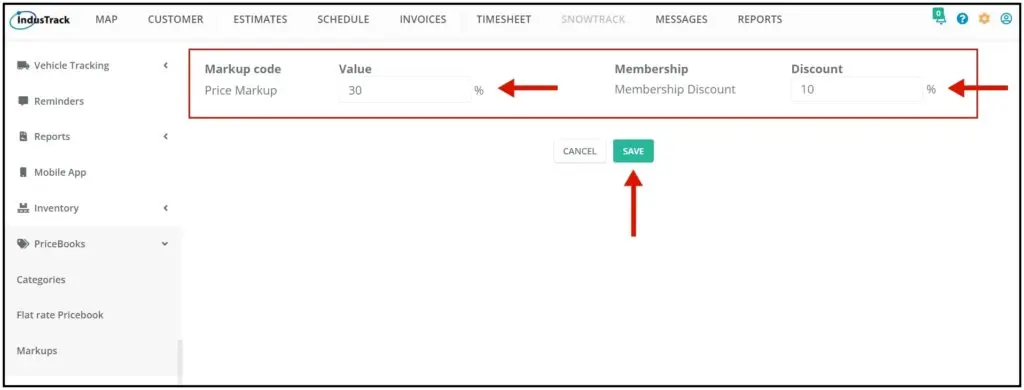
Enter the assembly markup and discount. Both are percentages only; fixed amounts aren't supported. The markup is a percentage above the regular price. The discount can't be higher than the markup.
-
Click Save.
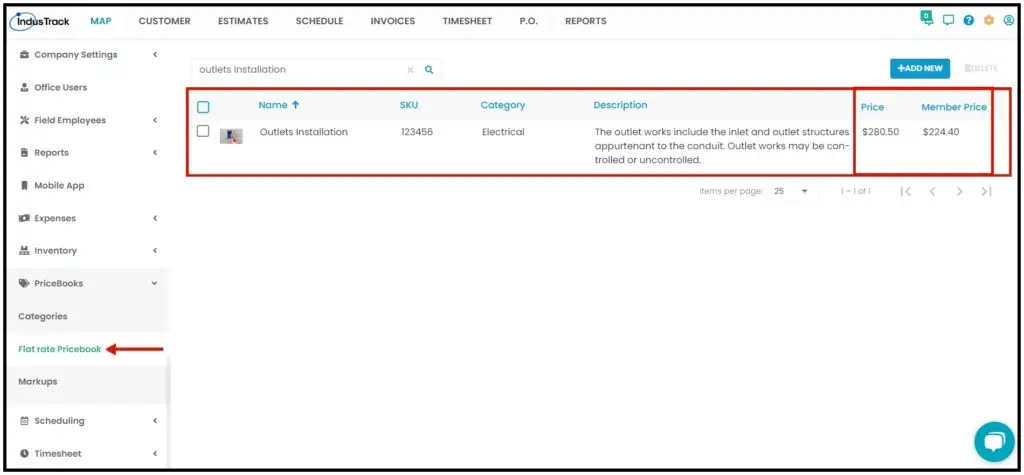
The markup and discount apply automatically to all existing and future flat rate assemblies. Each assembly shows a Price (with markup) and a Member Price (with markup minus discount).
Create categories
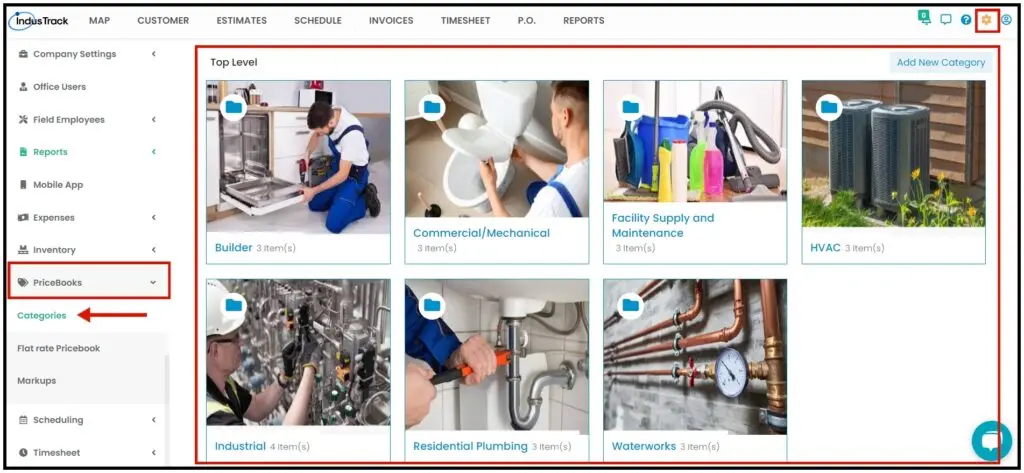
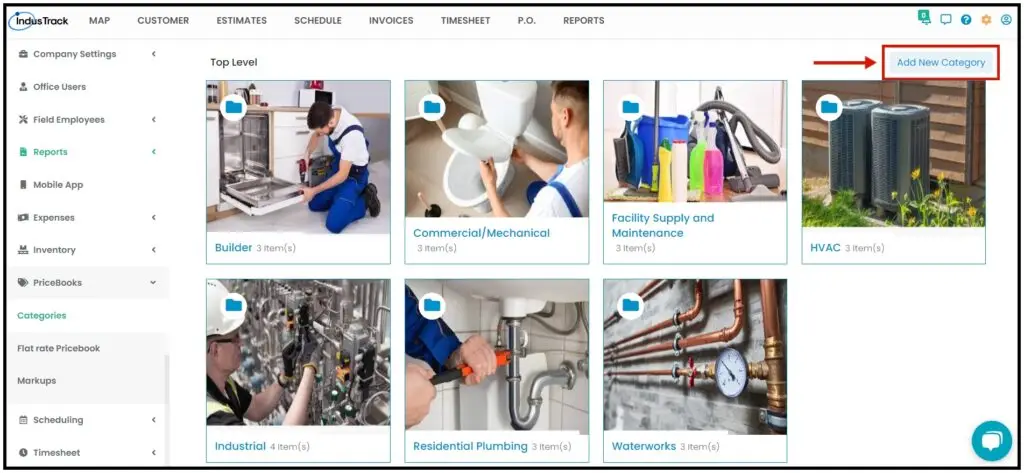
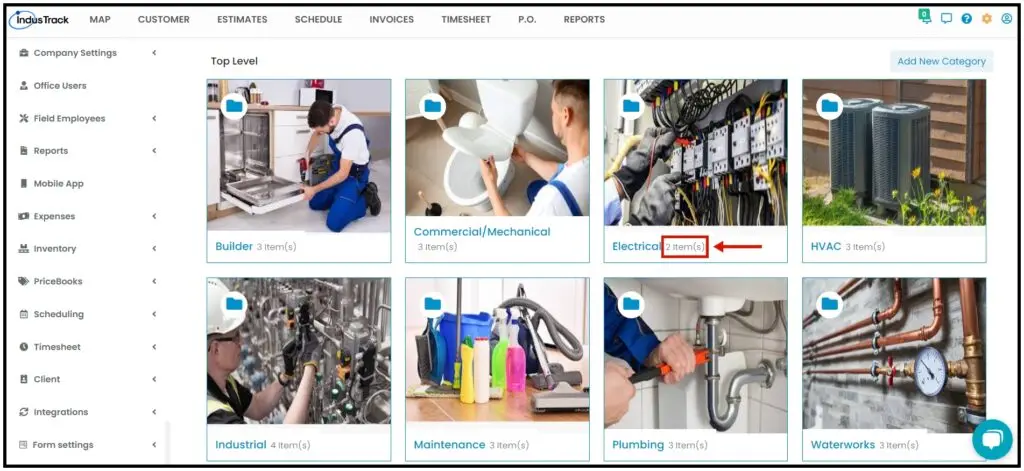
Categories group your pricebook items. All main categories show at the Top Level.
-
Go to Settings›PriceBooks›Categories.
-
Click Add New Category in the upper right corner.
-
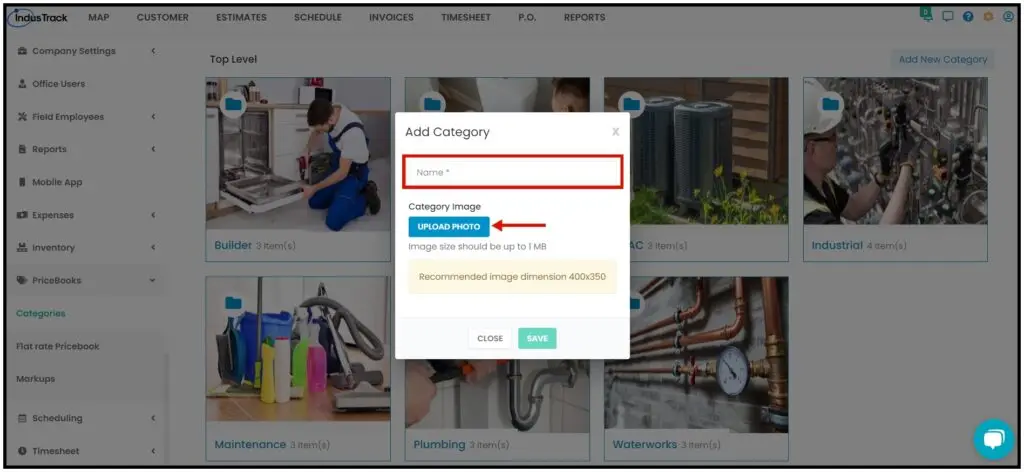
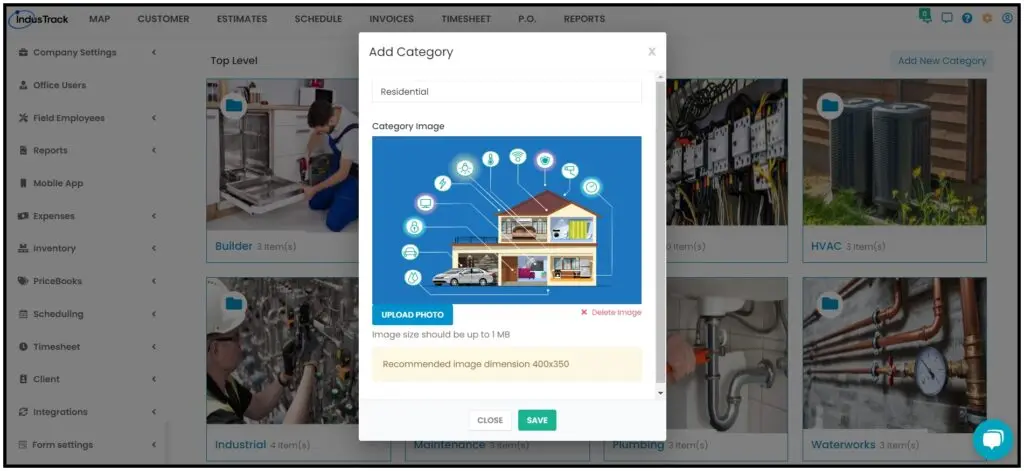
In the Add Category window, enter a name (required).
-
Optional: click Upload Photo in the Category Image field and pick an image. Images must be 1 MB or smaller; 400×350 is recommended. Larger images won't upload.
-
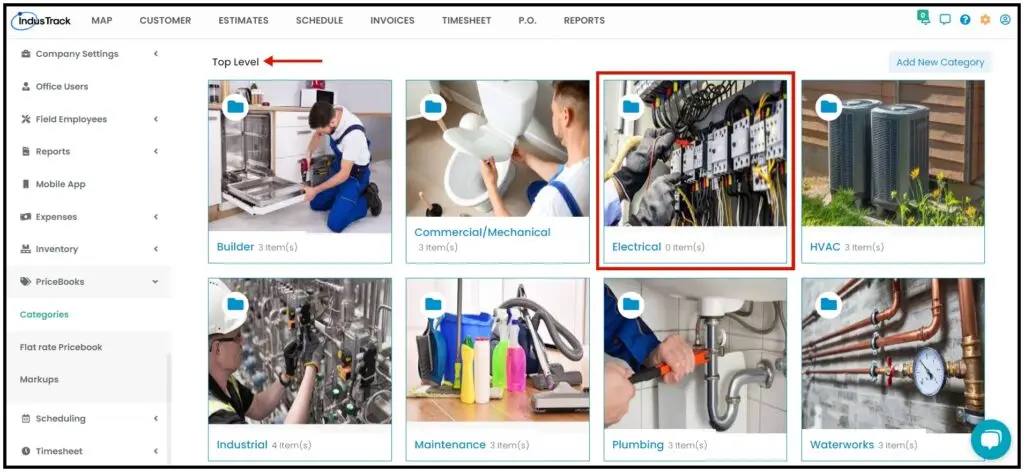
Click Save. The category appears at the Top Level.
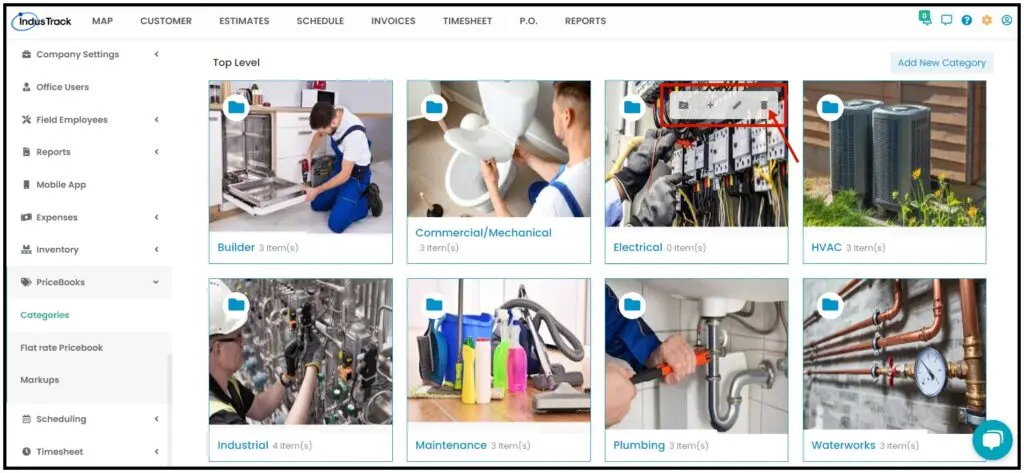
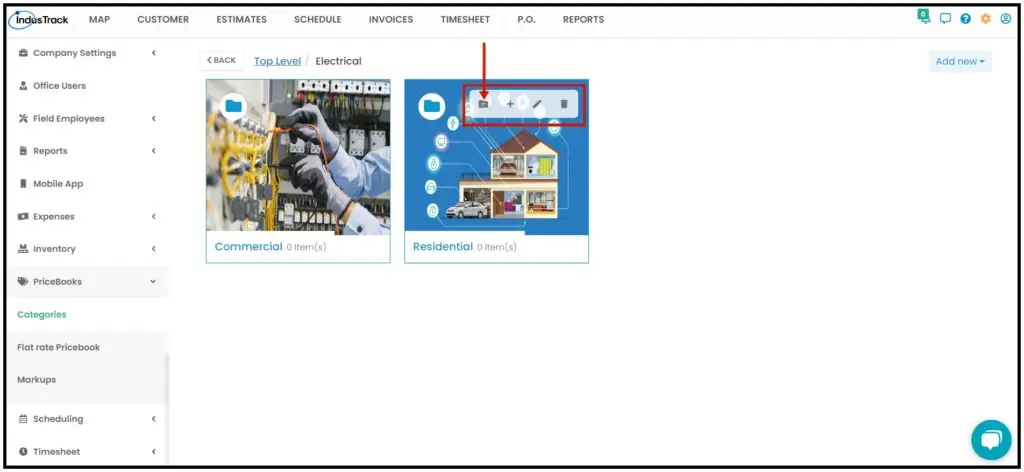
Hover over a category box to see four icons:
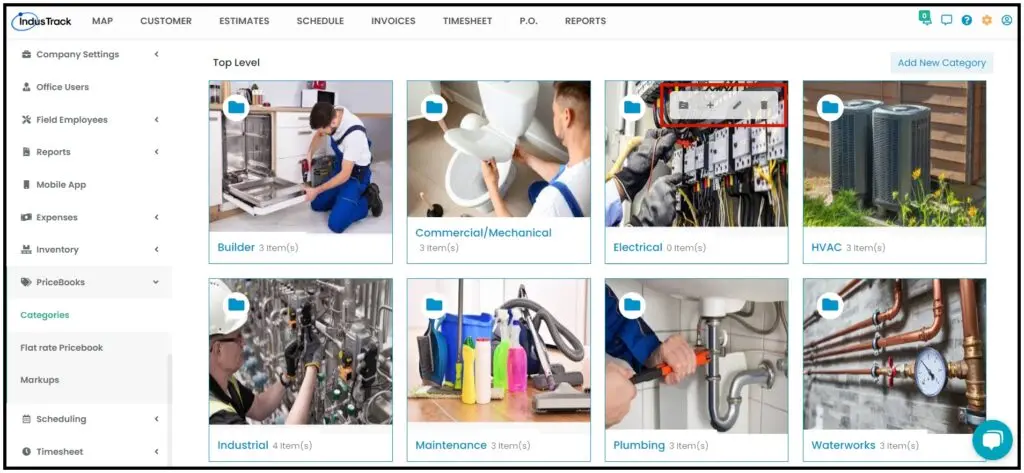
| Icon | What it does |
|---|---|
| Pencil | Edit the category name and photo. |
| X | Delete the category. Click Yes to confirm, or Cancel. Everything in the category, including its subcategories and assemblies, is deleted too. |
| Folder | Add a flat rate (assembly) to this category. |
| Plus | Add a subcategory to this category. |
Create subcategories
-
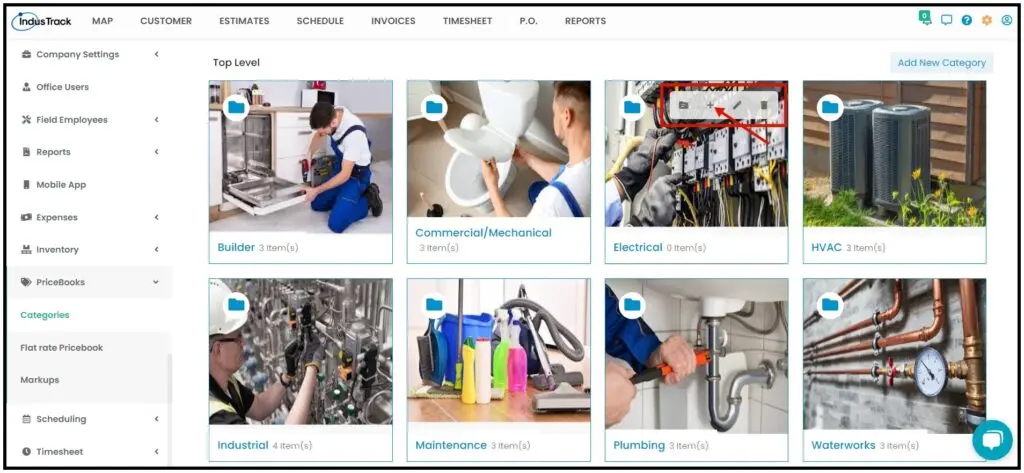
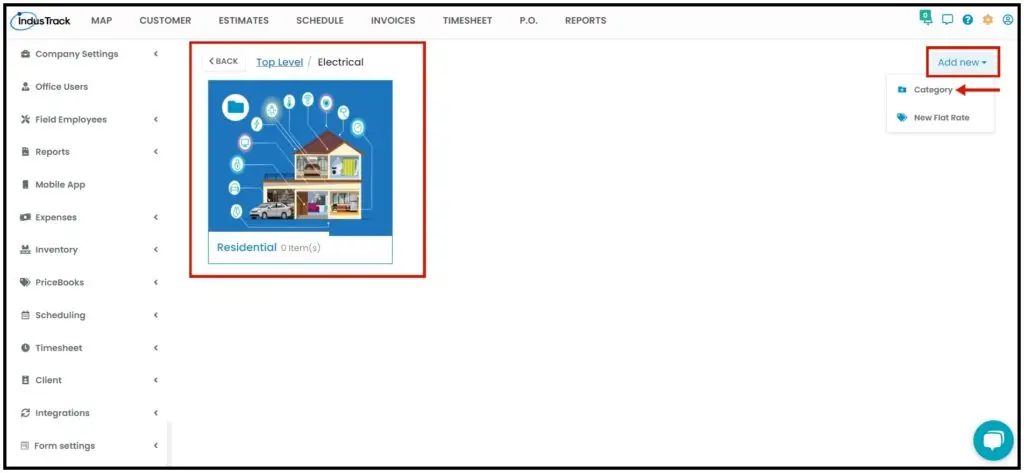
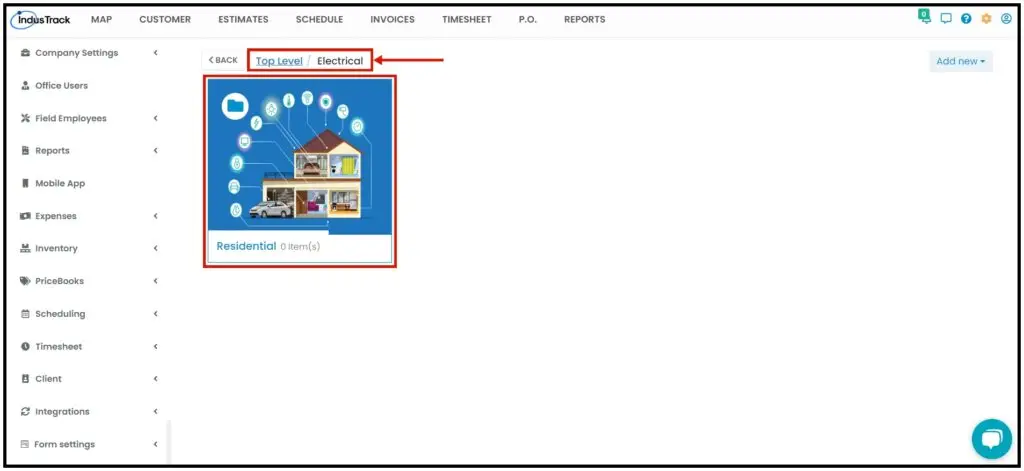
Hover over the main category and click the Plus icon. Or click the main category to open it, then click Add New and select Category.
-
In the Add Category window, enter a name and upload a photo if you have one.
-
Click Save.
The main category shows how many items it contains (for example, "2 items"). Click it to see its subcategories; click Top Level to go back. To edit or delete a subcategory, hover over it and use the same four icons as a main category.
Create a flat rate assembly
You must create the assembly and assign it a category before you can add the flat rate items.
-
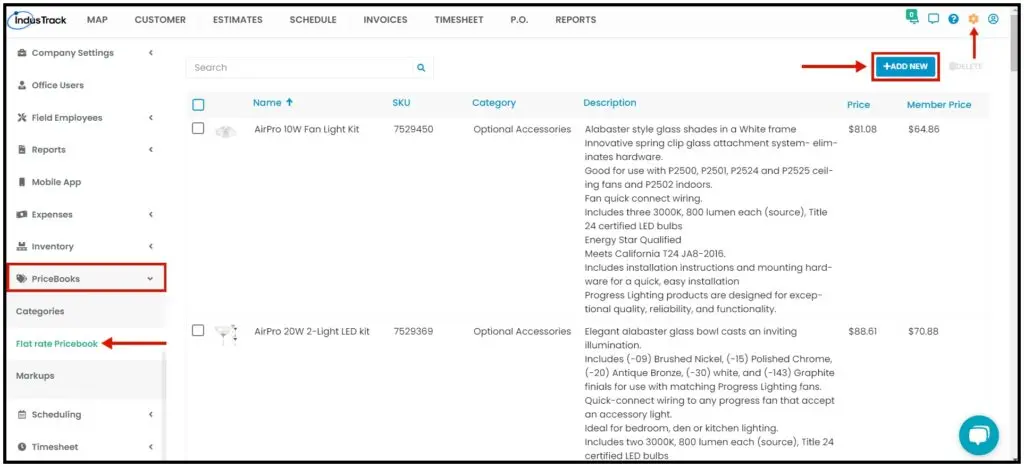
Hover over a subcategory and click the Folder icon. Or go to Settings›PriceBooks›Flat Rate Pricebook and click + Add New.
-
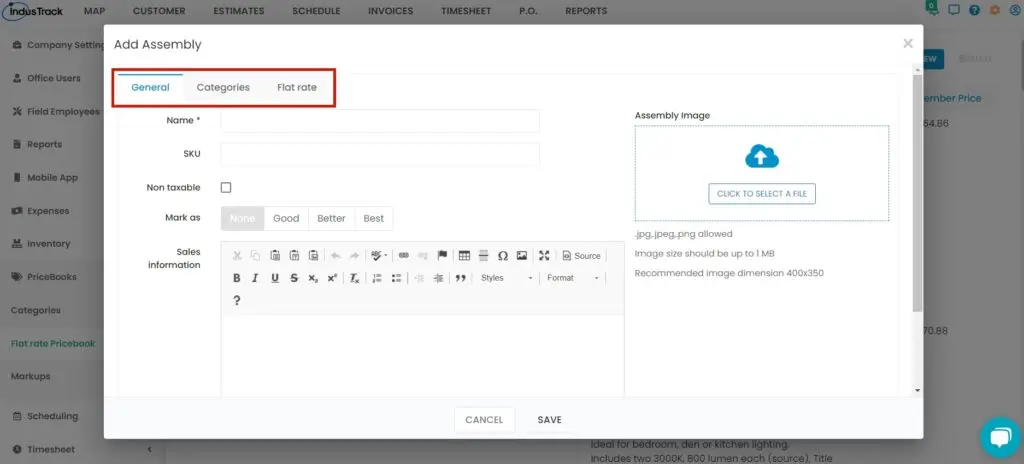
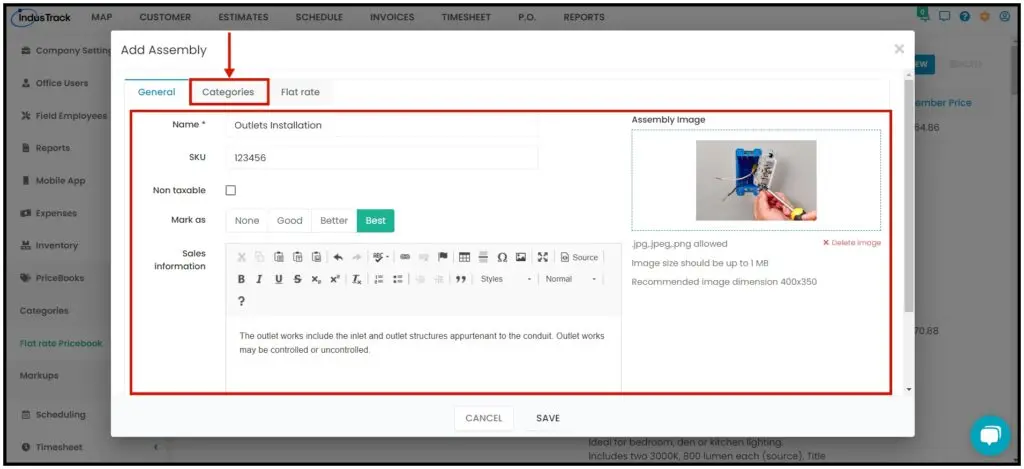
On the General tab, fill in:
- Name (required)
- SKU: the assembly code, if you have one.
- Non-Taxable: check if it isn't taxed.
- Mark quality: the quality level of the assembly, for example based on the materials or parts in it. Choose None (no quality level), Good (entry level), Better (mid level) or Best (highest quality).
- Sales Description: a short description.
- Assembly image (optional): click the image box to pick a file. 1 MB or smaller; 400×350 recommended.
-
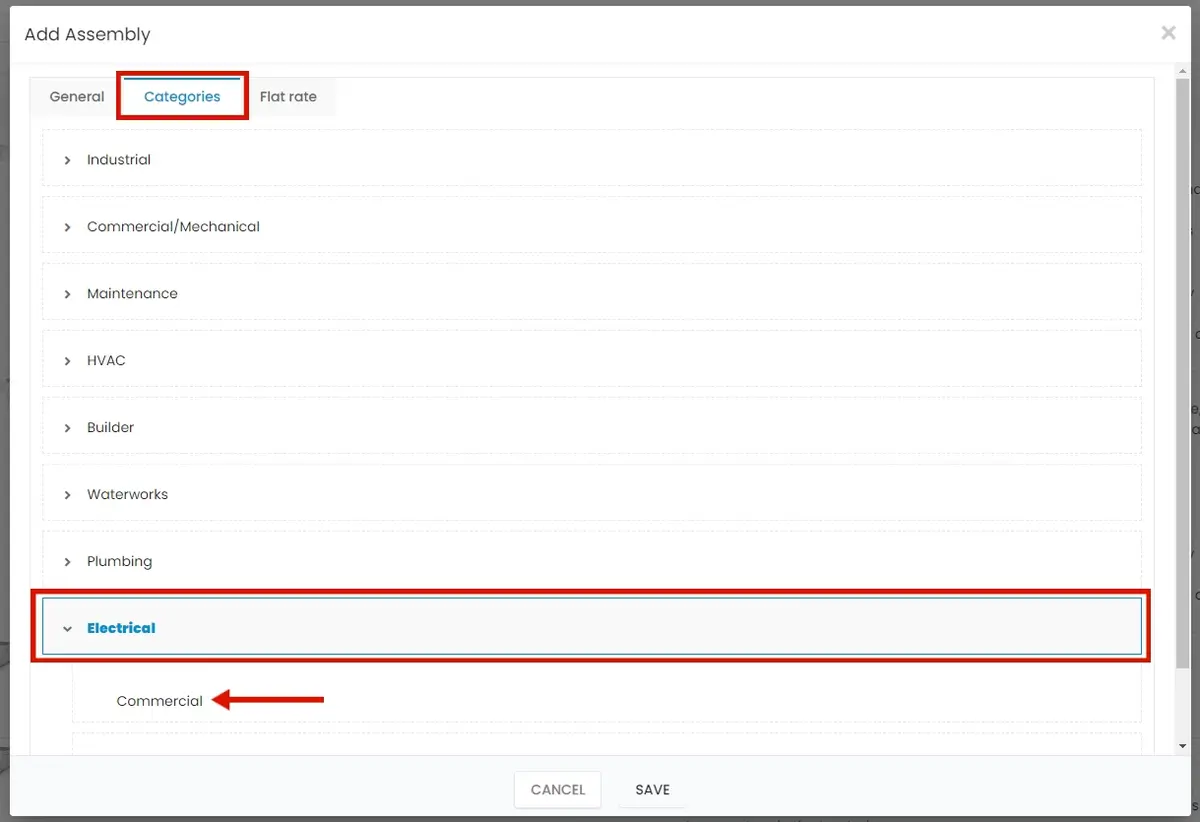
Don't save yet. Click the Categories tab. Click the arrow next to a main category to show its subcategories, and select where the assembly belongs.
-
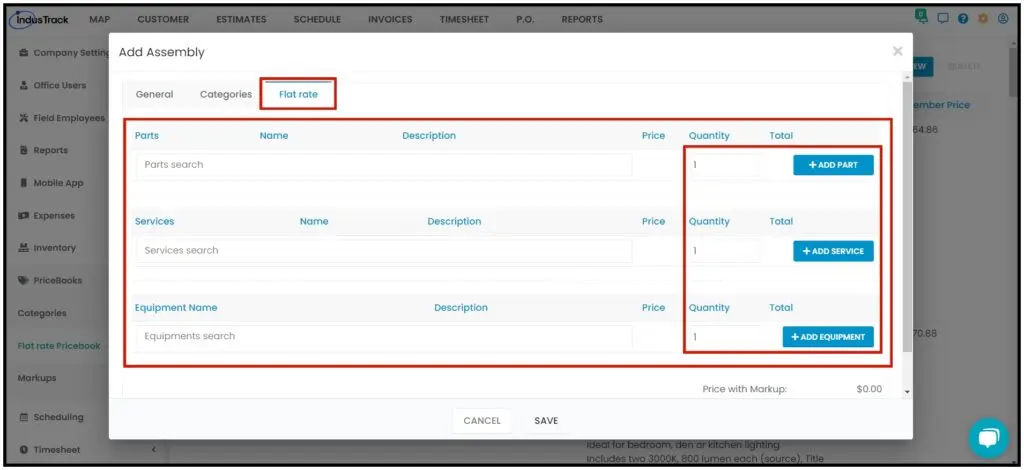
Don't save yet. Click the Flat Rate tab.
-
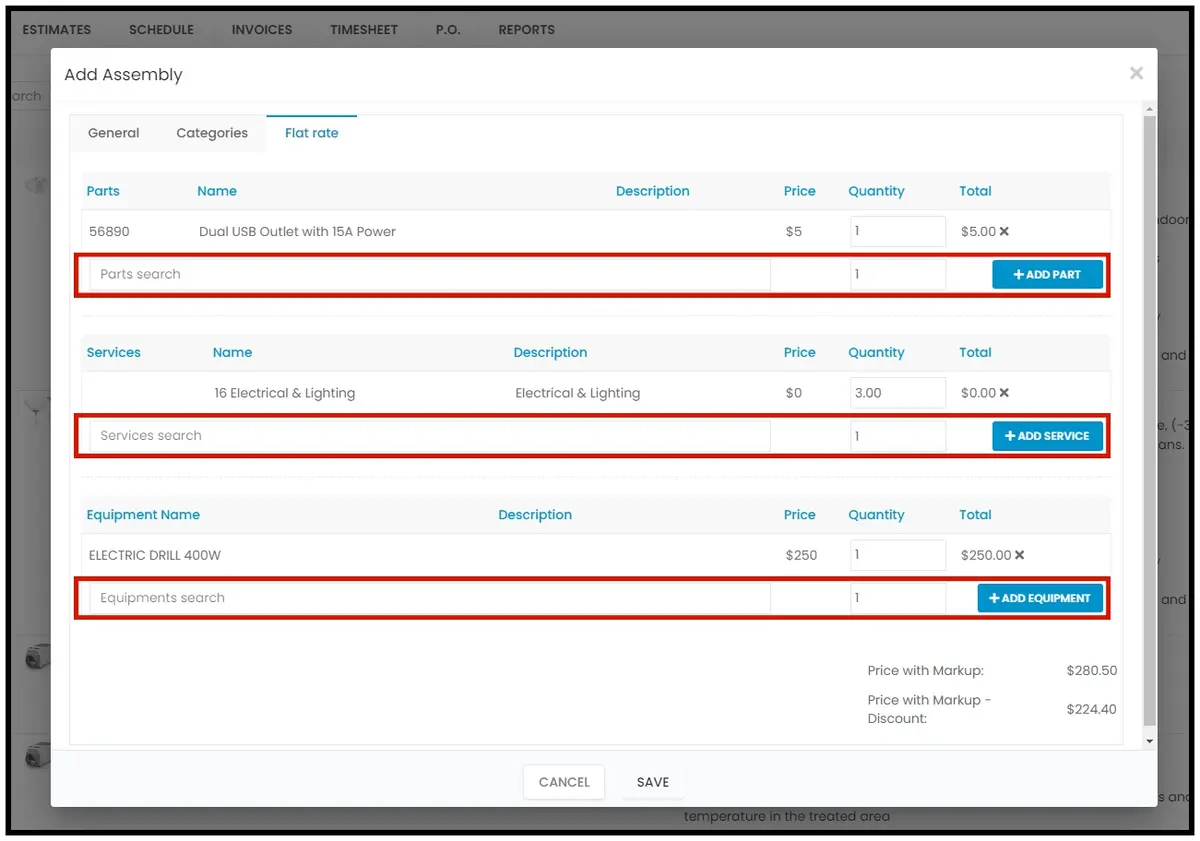
Use the search bars to pick the parts, services and equipment. Enter a quantity for each, then click + Add Part (or the matching button for services and equipment). A new search bar appears so you can add more.
-
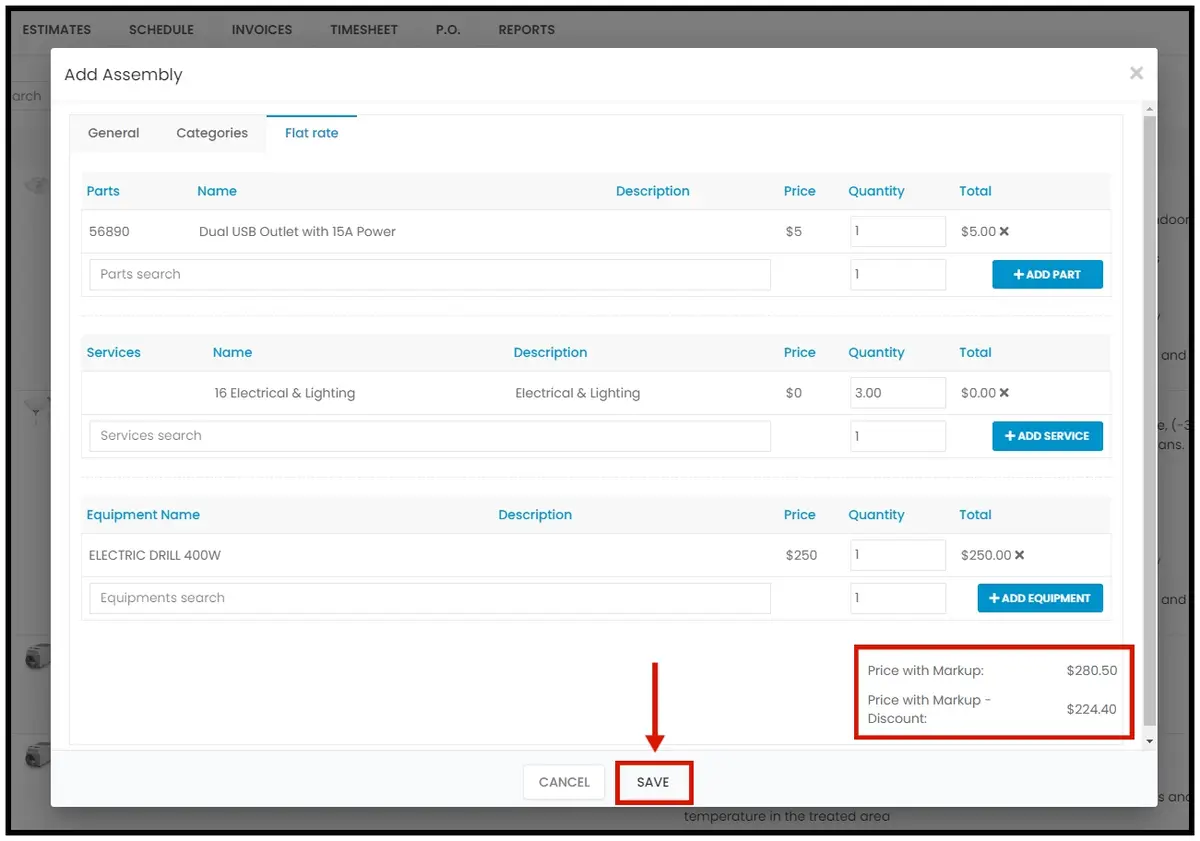
If markups are set up, check the Price with Markup and Price with Markup – Discount shown below.
-
Click Save.
Find your flat rates
-
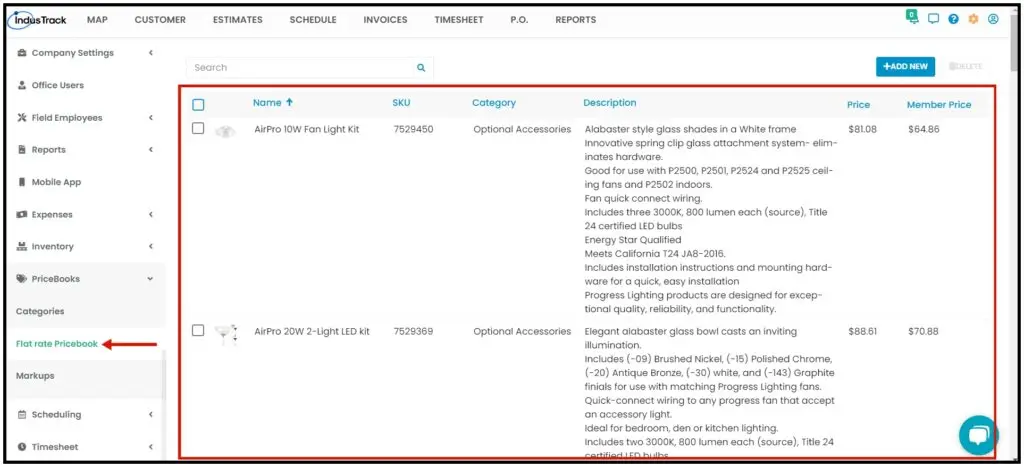
Settings›PriceBooks›Flat Rate Pricebook lists the flat rates for all subcategories. Click one to edit it.
-
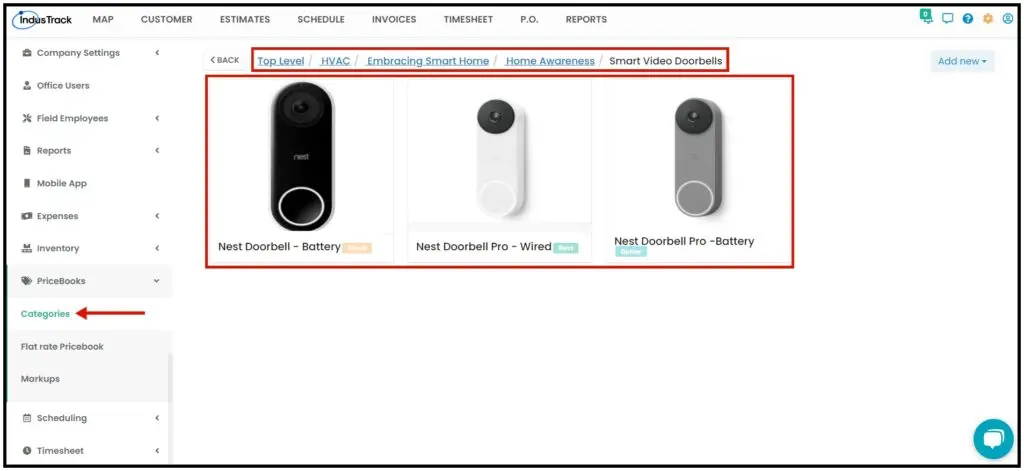
Settings›PriceBooks›Categories, then open a category and subcategory, shows the flat rates in that subcategory.
| Column | What it shows |
|---|---|
| Name | The assembly name. |
| SKU | The code, if any. |
| Category | The subcategory it belongs to. |
| Description | The flat rate description. |
| Price | Calculated automatically, with the markup if set. |
| Member Price | Calculated automatically, with markup minus discount if set. |
Edit or delete a flat rate assembly
- Go to Settings›PriceBooks›Flat Rate Pricebook.
- To edit an assembly, click it in the list.
- To delete an assembly, check the box next to it and click Delete in the upper-right corner.
Common questions
What is flat rate pricing?
It bundles several inventory and service items into one line item for the customer, so pricing is standard and clear instead of a long list of items.
Who gets the Member Price?
Customers with a membership. Memberships are assigned on the customer's profile. See How do memberships work?
Is a pricebook assembly the same as an inventory assembly?
Yes, they are the same. Inventory assemblies are covered in How do I build assemblies?
Was this article helpful?
Contact support