How do I set up a geofence for a customer?
Open the customer's profile, go to the Geofences tab and click Add New. Find the location, draw the area on the map, name it and click Save. A geofence is an area on the map that triggers an alert when someone enters or leaves it.
Create a geofence
-
Open the customer's profile from the Customer module.
-
Click the Geofences tab.
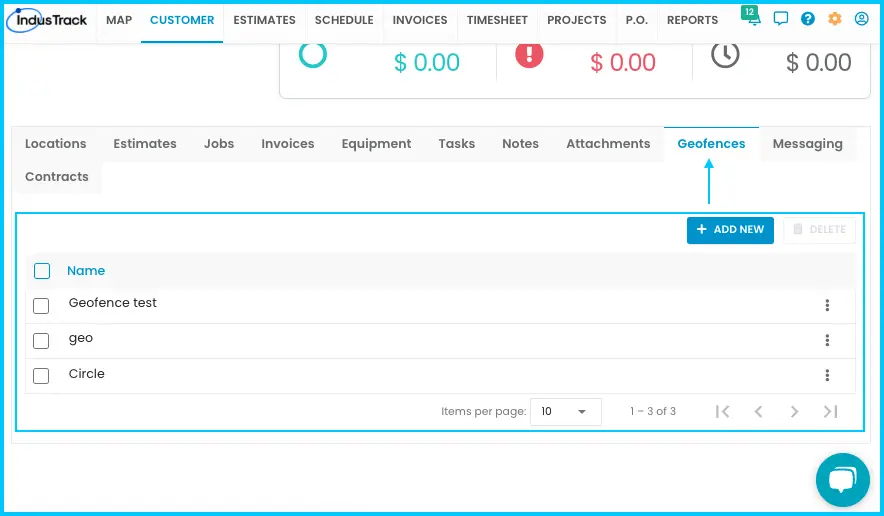
-
Click Add New. A map window opens.
-
Use the search bar to find the location.
-
Draw or resize the geofence area on the map.
-
Give it a name.
-
Click Save. The geofence appears in the list and is tagged on the customer's profile.
Watch: Creating a geofence on the map
Edit a geofence
-
Find the geofence in the list.
-
Click the three dots next to it and choose Edit.
-
Make your changes and click Save.
Watch: Editing a geofence
Delete geofences
Deleting a geofence can't be undone and can affect other data or settings.
-
Choose what to delete:
- One geofence: click the three dots next to it and choose Delete, or check its box and click Delete.
- Several: check the box next to each one (or the box in the table header to select all), then click Delete.
-
Click Yes to confirm, or Cancel to stop.
Watch: Deleting one or more geofences
Common questions
How do I get alerts when someone enters or leaves the geofence?
Alerts are set up separately. See How do I set up vehicle alerts?
Does a customer get a geofence automatically?
No. Geofences are created manually from the Geofences tab, where you can also edit or delete them.
Was this article helpful?
Contact support