What's in a customer profile? (jobs, estimates, invoices, equipment, contracts, notes, files)
Go to the Customer module and click a customer to open their profile. The top shows their contact details and account summary; the tabs below hold their locations, estimates, jobs, invoices, equipment, tasks, notes, attachments, geofences, messages and contracts.
Open a profile
-
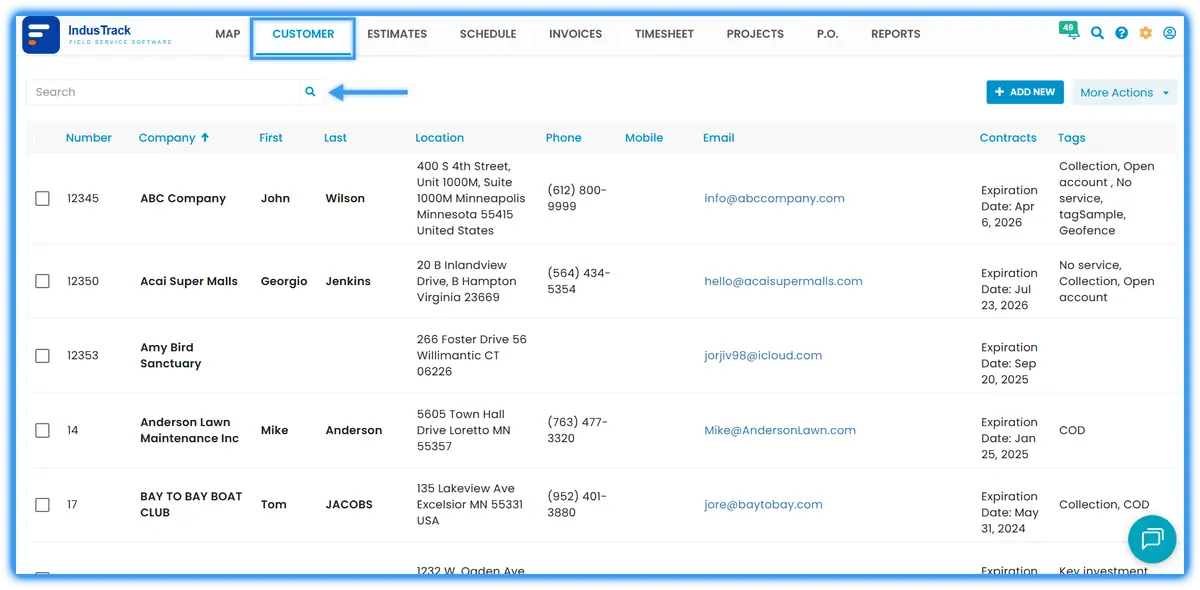
Go to the Customer module.
-
Find the customer with the search bar. You can search by any of the columns shown in the list.
-
Click the customer to open their profile.
- To change their details, click Edit Contact in the top-right corner. See How do I add or edit a customer?
- Click Back to return to the customer list.
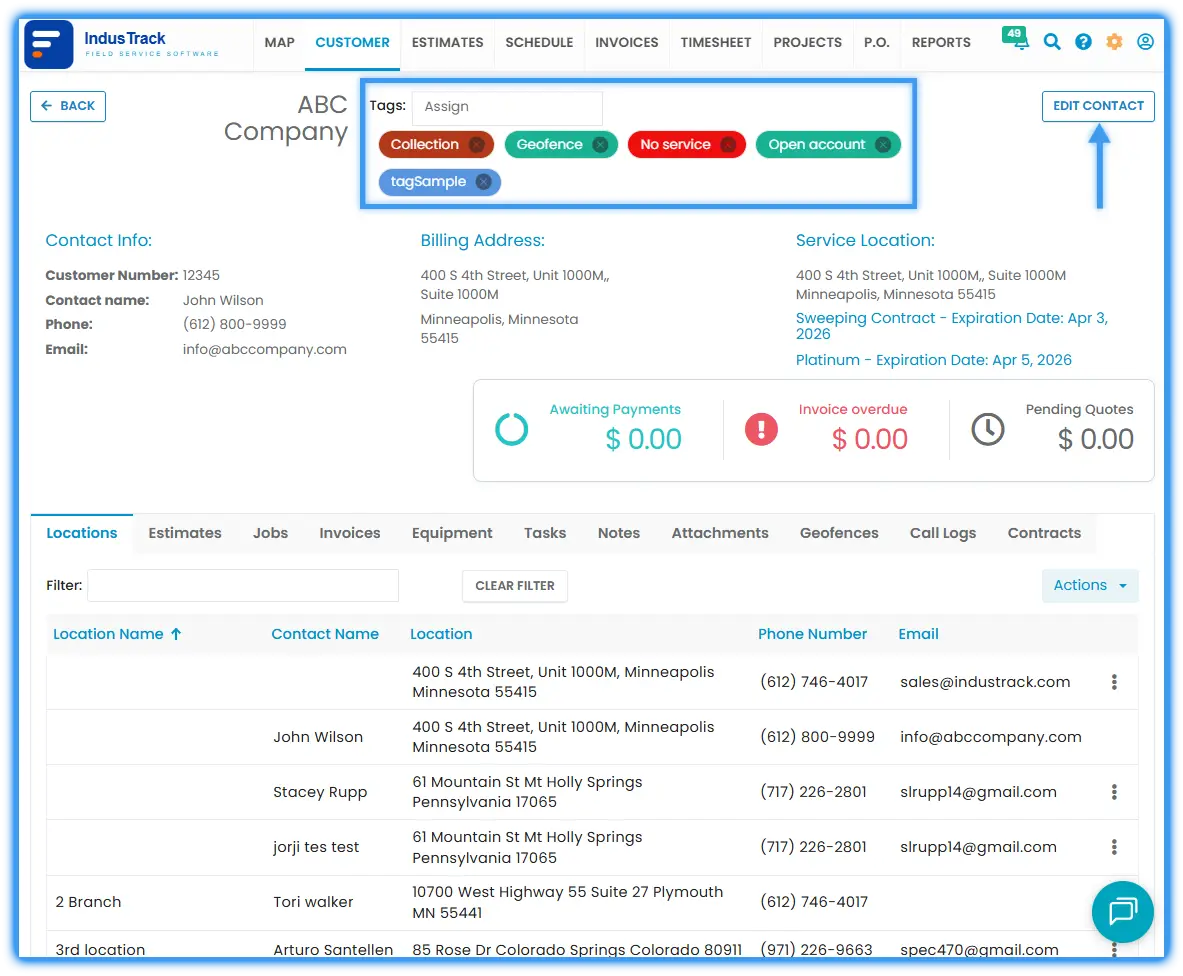
Top of the profile
| Section | What it shows |
|---|---|
| Customer info | Company name, contact details, billing address and service locations. |
| Pending Quotes | Estimates sent to the customer that are not yet approved or rejected. |
| Overdue Invoices | Invoices past their due date and not paid. |
| Awaiting Payments | Invoices not paid yet but still within the allowed time. |
| Tags | Tags assigned to the customer. |
To add a tag:
-
Click the Tags field.
-
Pick an existing tag, or scroll to the bottom and click Create New Tag.
-
Type the tag name and click Save.
Watch: Adding and creating a tag on a customer profile
Profile tabs
| Tab | What it's for |
|---|---|
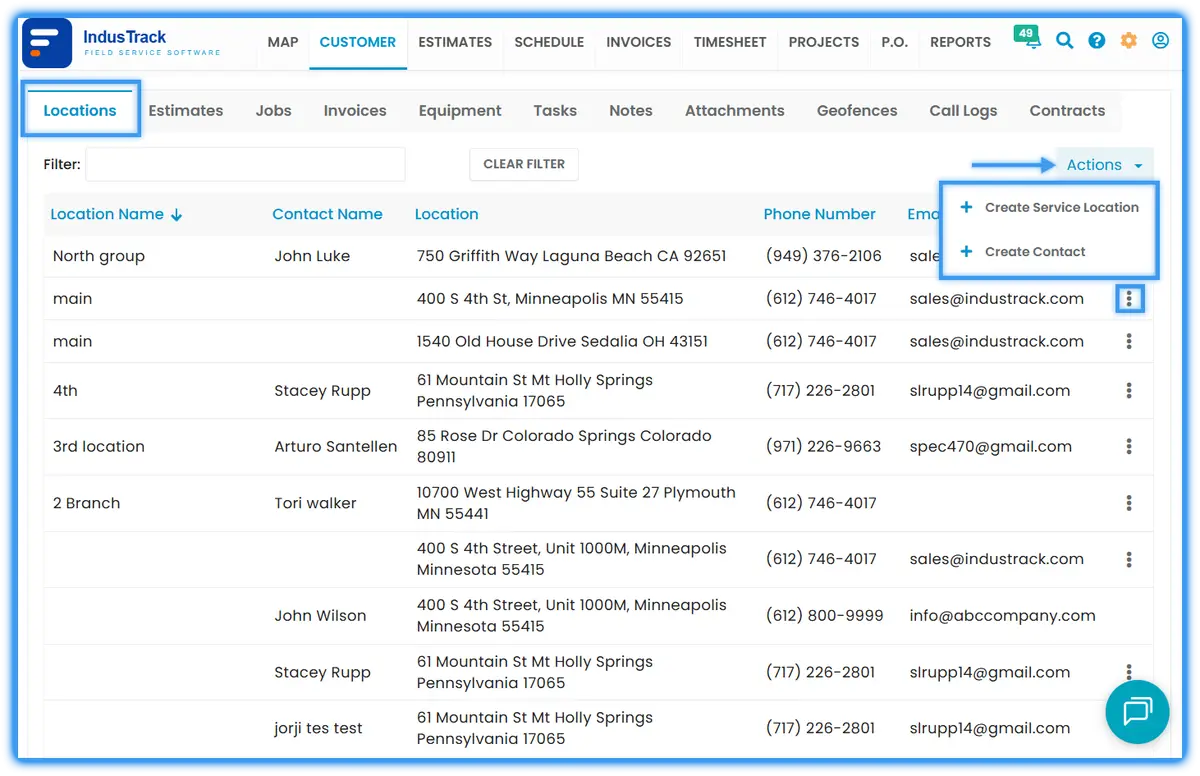
| Location | The customer's service locations. See How do I manage a customer's service locations? |
| Estimates | Estimates for this customer. |
| Jobs | Jobs for this customer. |
| Invoices | Invoices for this customer, with payments. |
| Equipment | Equipment the customer owns, including items from other vendors you track or service. |
| Tasks | Task reminders for your office users. |
| Notes | Office notes, job notes and site notes. |
| Attachments | Files such as photos, site maps, manuals and contracts. |
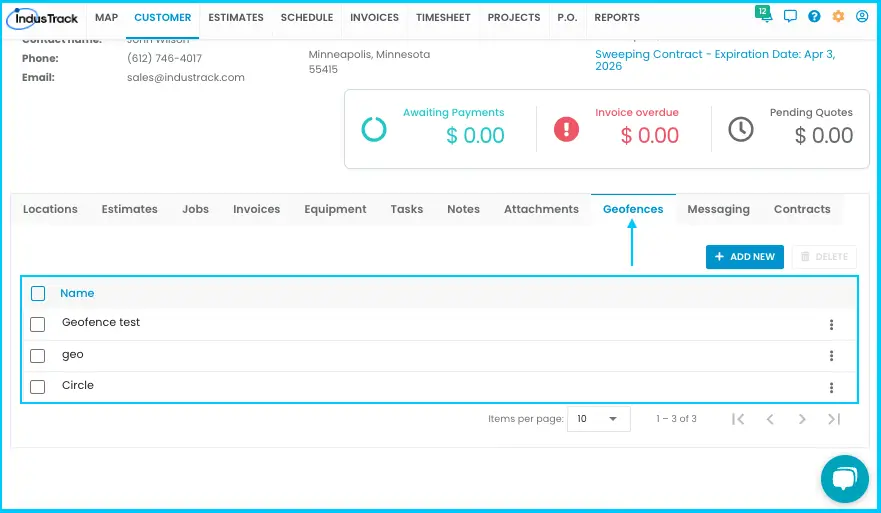
| Geofences | Geofences around the customer's sites. See How do I set up a geofence for a customer? |
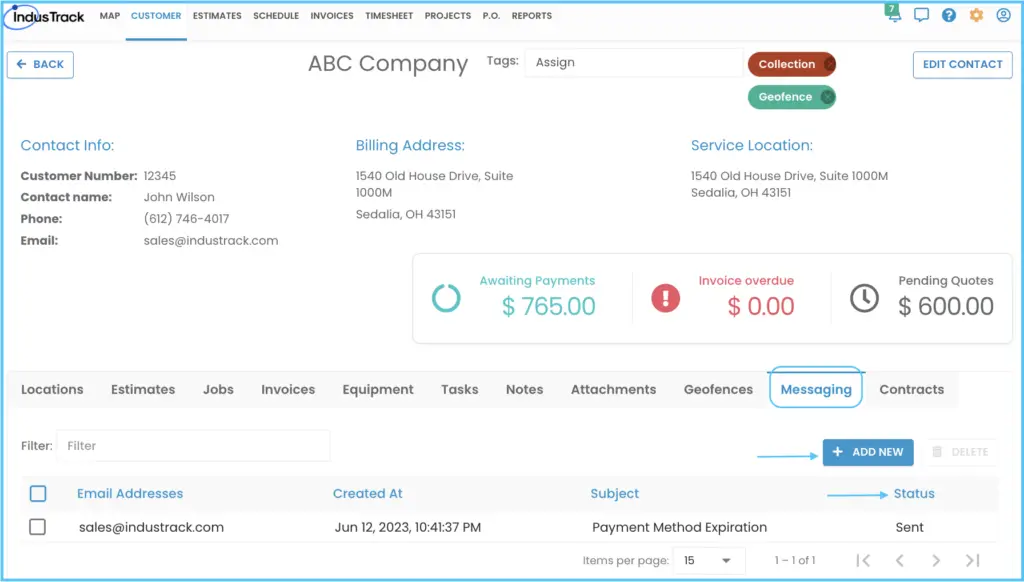
| Messaging | Emails sent to the customer from IndusTrack. Replies can't be received here. See How do I message a customer? |
| Contracts | Service Agreements and Memberships. |
Estimates tab
The list works the same as the main Estimates module but shows only this customer. Each estimate shows its number, date created, who created it, total and status (Draft, Sent, Won, Lost, Scheduled or Invoiced).
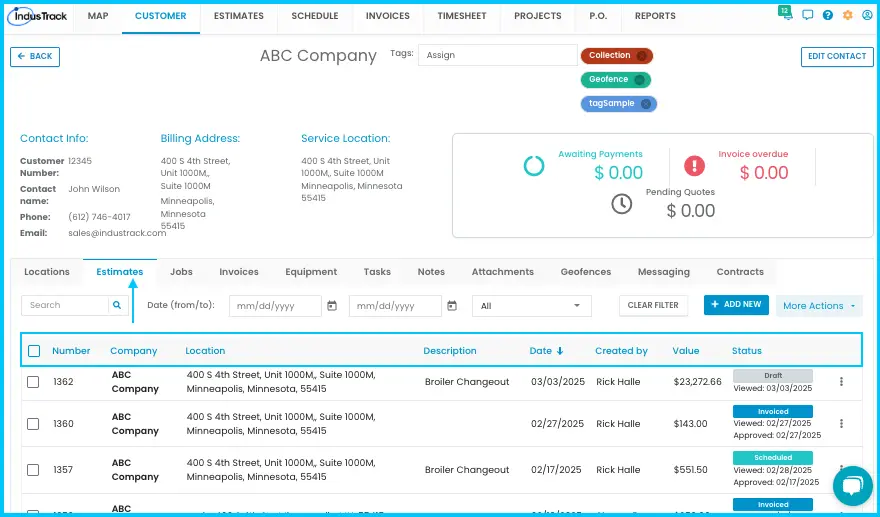
- Search by estimate number, service location or estimate value.
- Filter by status or date range.
- Click the three dots next to an estimate to Edit, Copy, Preview, Print, Send, Convert or Delete it. If it has been converted, you can also click View Job or View Invoice.
- To update several estimates at once (mark as Won or Lost, delete, or configure the list columns), use the More Actions button.
To create an estimate for this customer:
-
Click + Add New. The Add Estimate window opens in the Estimates module.
-
The customer's name and location are filled in. If they have more than one service location, choose the right one.
-
Click Proceed and fill in the estimate. See How do I create an estimate?
-
Click Actions›Save and Close.
Watch: Creating an estimate from the customer profile
Jobs tab
Lists the jobs for this customer. Each job shows the date and time it was created, the assigned field employee, task details and status (Not Started, Started, Paused, Completed, On Hold or Declined).
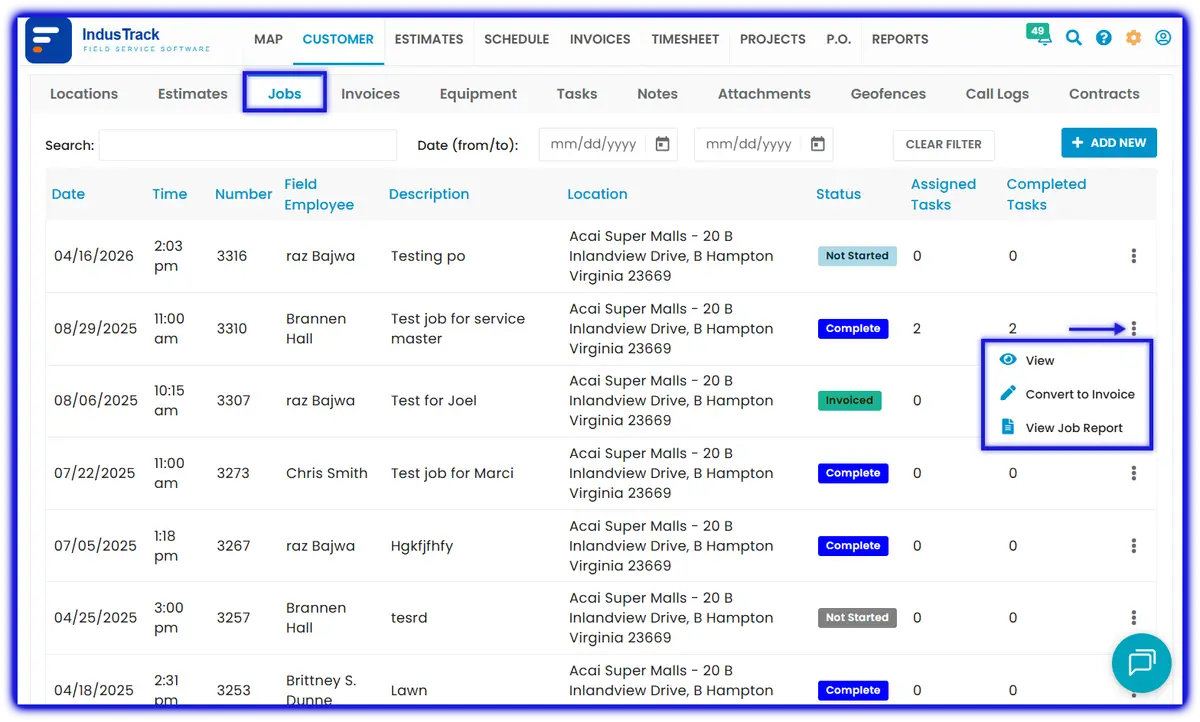
- Search by the field employee's name.
- Filter by date or date range.
To schedule a job for this customer:
-
Click + Add New. The New Job window opens with the customer's name and location filled in.
- If they have more than one service location, select the right one.
-
Set the schedule date and time, then save. The rest works as in How do I create and schedule a job?
Watch: Scheduling a new job from the customer profile
To work with an existing job, click the three dots next to it:
- View: open the job, make changes and save.
- Convert to Invoice: opens the New Invoice window. Add any extra parts or charges, then click Actions›Save. The invoice appears in the customer's invoice list.
- View Job Report: see the detailed job report.
Invoices tab
Works like the main Invoices module but shows only this customer. Each invoice shows the invoice number, estimate number, job number, creation date, due date, status (Paid, Unpaid or Overdue), total and balance due.
- Search with the search bar.
- Filter by status or date range.
- Click the three dots next to an invoice to Edit, Copy, Preview, Send, Print or Delete it, view the related estimate and job report, or click Receive Payment to record a payment.
To create an invoice for this customer:
-
Click + Add New.
-
The customer's name and location are filled in. If they have more than one service location, choose the right one.
-
Click Proceed and fill in the invoice. See How do I create and manage invoices?
Watch: Creating an invoice from the customer profile
Equipment tab
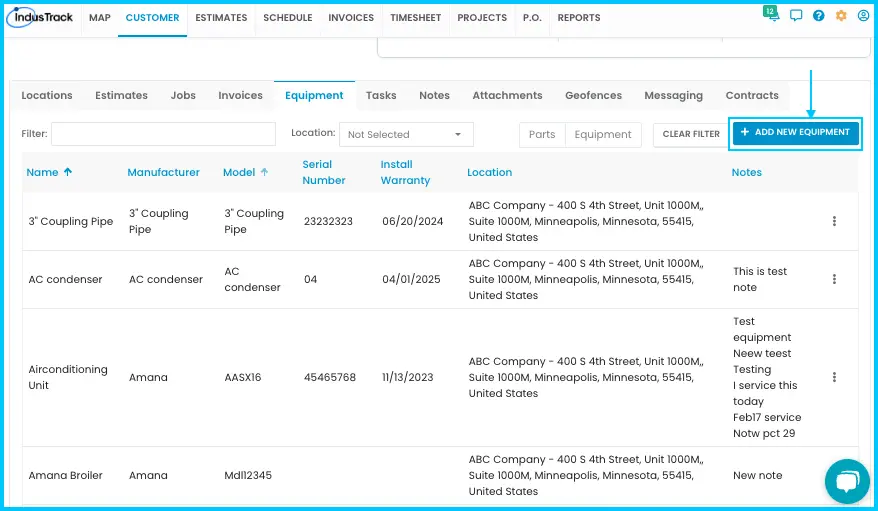
Lists equipment the customer bought from you and equipment from other vendors that you track or service. Each item shows type and model, manufacturer, serial number, warranty, service location and notes.
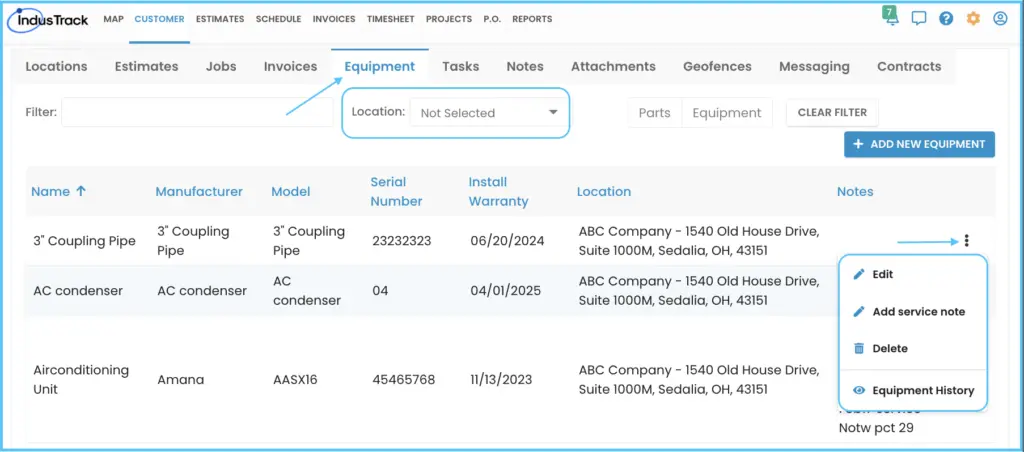
- Filter by location (if the customer has more than one) and by Equipment or Parts. You can combine filters. Click Clear Filter to reset.
- Click the three dots next to an item to edit it, add service notes, delete it, or view detailed reports of its job history and notes.
To add an item:
-
Click Add New Equipment. The Add New Equipment window opens.
-
On the General tab, enter the equipment details, such as the equipment name, manufacturer, warranty information and the service location where the equipment is.
-
On the Service Notes tab, add notes about the equipment's service history or maintenance.
To get warranty reminders for equipment:
- Add the warranty information when you add the equipment.
- Go to Settings›Office Users and click the name of the office user who should get the reminders.
- Click the Notifications tab and find the Equipment section.
- Turn on Equipment Warranty Expiration Reminder and set the reminder date.
- Select the office user's email address to get the reminder by email.
- To also show the reminder as a pop-up when the office user logs in, turn on Show in Pop-Up.
Tasks tab
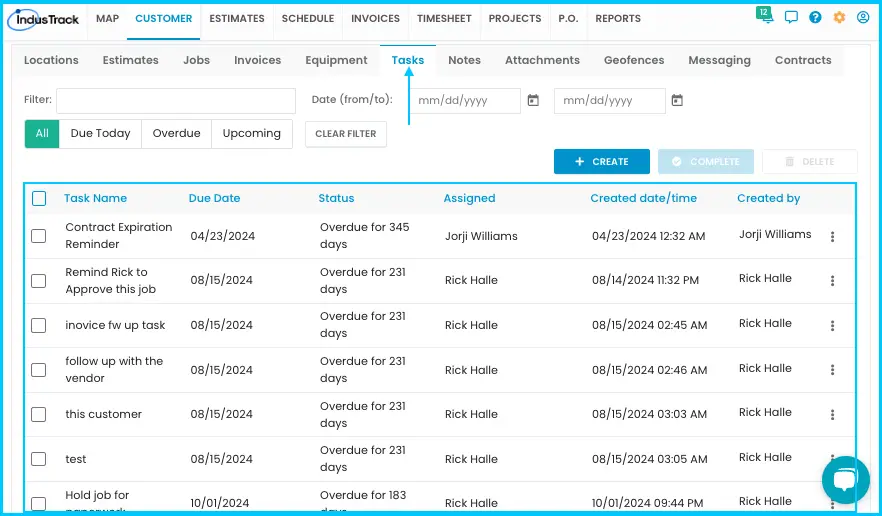
Create tasks for your office users, for example a task for an office user to follow up with this customer about an invoice payment. You can assign a reminder to one or more users. Reminders show up in the Reminders List.
To create a task:
- Click the Tasks tab.
- Click + Create in the upper-right corner.
- Fill in the task details:
- Task Name (required).
- Due Date (required).
- Send Reminders: when to send the reminder. Choose No Reminder, At Task Due Time, 30 Minutes Before, 1 Hour Before, 1 Day Before, 1 Week Before or Custom Date.
- Show in Popup: check it to also show the reminder as a pop-up.
- Assigned To (required): choose from your office users.
- Associate With: filled in automatically with the customer.
- Address Book: filled in automatically with the company name.
- Service Location: choose one of the customer's service locations.
- Notes/Description: optional notes about the task.
- Click Save at the bottom of the page to create the task, or Cancel to discard it.
The office user gets the task reminder by email. If Show in Popup is checked, the reminder also appears as a pop-up when they log in to IndusTrack.
Tasks are for office users only. They don't send notifications to customers.
Notes tab
There are three types of notes:
| Type | What it is |
|---|---|
| Office Notes | Notes seen by office users only. |
| Job Notes | Notes added by field employees in the mobile app. |
| Site Notes | Notes shown to field employees in the mobile app. Site notes stay with the customer's location and go out with their jobs. Use them for gate codes, parking or safety instructions. |
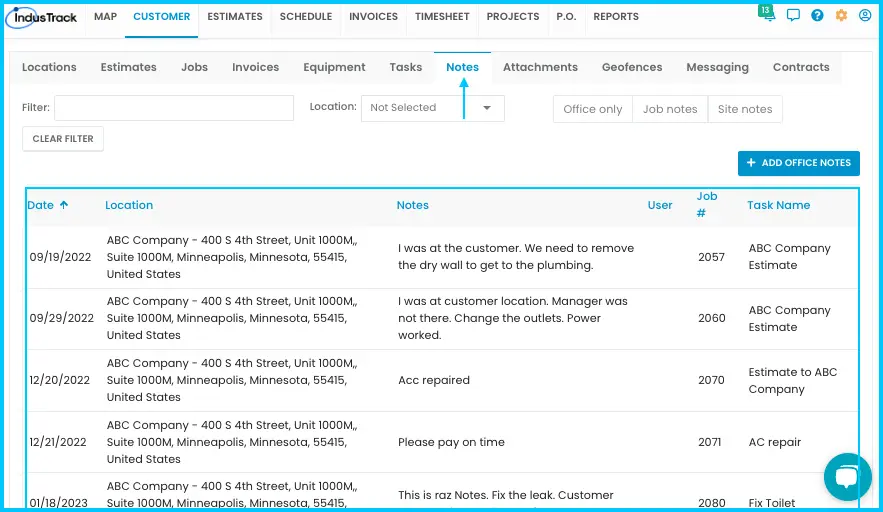
The list shows when each note was created, the service location, the note text, who created it (email), the job number if linked to a job, and related tasks. You can search, filter by location or note type, and clear filters.
To add a note:
-
Click + Add Office Notes.
-
Type the note in Note Text (required).
-
To make it a site note, check Site Note.
-
If the customer has more than one location, choose the Service Location. If you leave it blank, the note is saved to the customer's main location.
-
Click Save.
Watch: Adding an office note or site note
To edit or delete a note, click the three dots next to it and choose Edit (make changes, click Save) or Delete (click OK to confirm).
Attachments tab
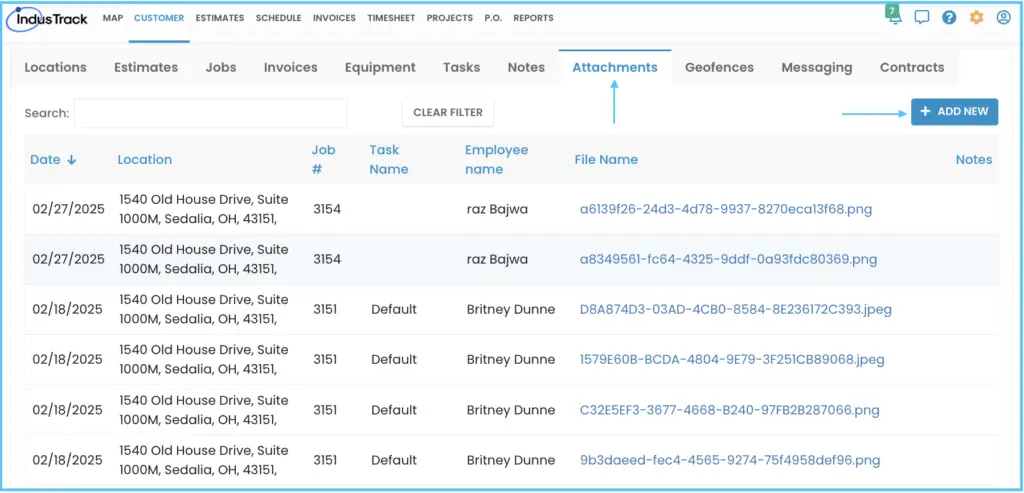
Store files such as photos, site maps, instruction manuals and contracts. The list shows the date added, service location, job number and task, uploader's email, file name (click to open) and notes. Field employees can also upload pictures from job sites, and you can attach files when you create a job.
To upload a file:
-
Click Add New.
-
Fill in the required fields (marked with *).
-
Click Choose File and pick the file.
-
Add notes if needed.
-
To show the file to field employees in the mobile app, check Site Map.
-
Click Save.
Watch: Uploading a new attachment
To edit a file or replace it with a new one, click the three dots next to it, choose Edit, upload the new file if needed, and click Save. To delete it, choose Delete and click OK.
Contracts tab
Shows the customer's Service Agreements and Memberships, with their status and progress. A Service Agreement estimate assigned to the customer also shows here. The tab has two sections:
- Upcoming Services (opens by default): upcoming jobs and tasks with recurring schedules, from both Memberships and Service Agreements. When one is due, you can schedule a job from this list.
- Contracts List: all agreements and memberships for the customer, with the job templates or service types included, start and end dates, and description.
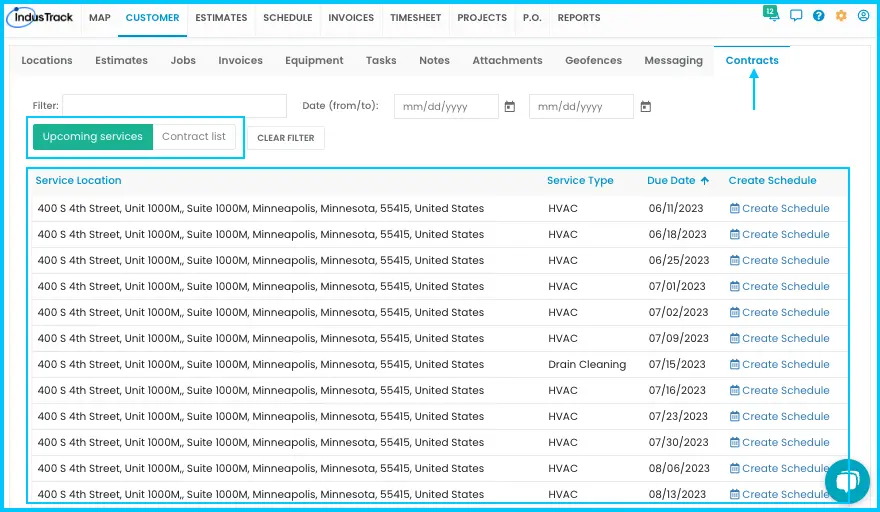
To create a contract, click Add New. To edit or delete one, or view its status report, click the three dots next to it.
Common questions
Why don't I see timesheet jobs on the Jobs tab?
Timesheet jobs are not listed there.
I got a warning when converting a job to an invoice. Why?
The job isn't marked Completed. Change the job status to Completed first so you only bill for finished work.
Why is my billing address missing from the Location tab?
The Location tab lists service locations only. A billing address appears there only if you also add it as a location.
How do I know if an invoice has been partly paid?
If the balance due is lower than the total, a partial or full payment has been made.
Equipment appeared on the Equipment tab that I didn't add. Why?
When a job is completed that includes equipment with a serial number, that equipment is added to the customer's Equipment tab automatically, as long as the serial number isn't already assigned to this or another customer. If you deleted that serial number from the tab before and it's used on a later job, it comes back after that job is completed.
Why can't I delete a piece of equipment?
It's linked to a service agreement. You'll see a warning and the equipment won't be deleted.
Can a location have more than one site note?
No. Each location has one site note. If you create a new one, the old one becomes an office note.
Can I get a deleted note or attachment back?
No. Deleting is permanent and may affect related data, so delete only what you no longer need.
Is there a file size limit for attachments?
Yes, 15 MB. Each attachment holds one file, so add a separate attachment for each file.
Can customers see their profile?
They can see limited information through the client portal. See How do I give customers portal access?
Was this article helpful?
Contact support