How do I set up my company details, terms and tax?
Go to Settings›Company Settings›General for your company name, address, contact details, logo, numbering, invoice and scheduling settings. Payment terms and tax rates are under Settings›Company Settings›Tax & Terms.
Company info
-
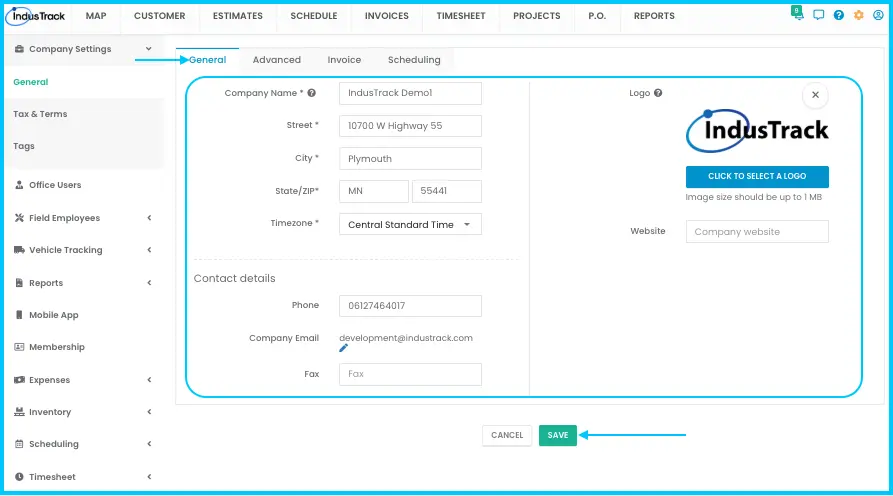
Go to Settings›Company Settings›General.
Watch: Opening Settings > Company Settings > General -
Fill in your company details:
- Company Name: your registered business name. It appears on estimates, invoices and other forms.
- Address (required): check it's correct and choose your Timezone. Check Use Device Timezone if you want timestamps to use the device's local time.
- Contact Details: your company phone, email and fax, not personal details.
- Website: your company website.
-
Click Save at the bottom of the page.
Company logo
-
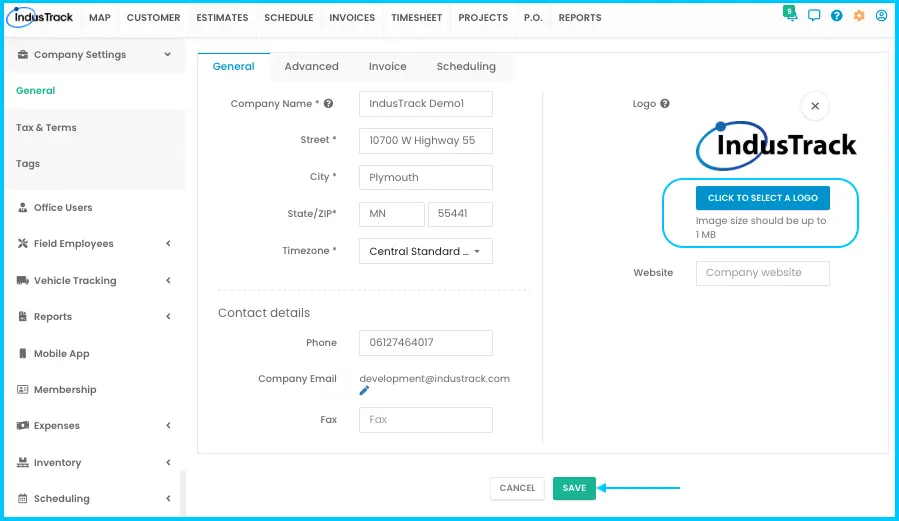
Add or change the logo: click Select a Logo, choose an image from your device, and click Save.
-
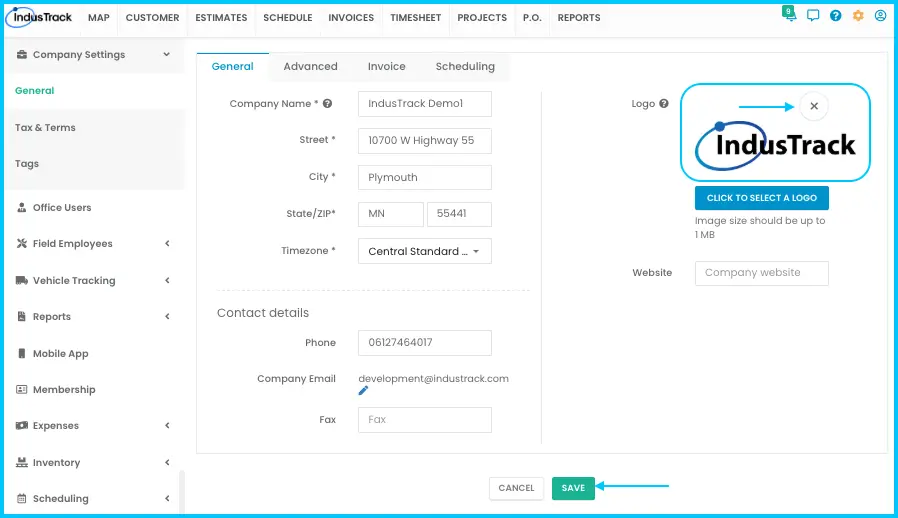
Remove the logo: click the delete (X) icon and click Save.
Auto-numbering
Number jobs, invoices, estimates, purchase orders and customers automatically.
-
Click Settings (the orange gear icon at the top right). In the left panel, click Company Settings›General, then click the Advanced tab.
-
Choose what to number: Jobs, Invoices, Estimates, Purchase Orders or Customers.
-
Check Autoincrement.
-
Click Change and enter your starting number. If you're continuing an existing series, enter the next number in it.
-
Repeat for the other record types if needed.
-
Click Save.
Watch: Turning on Autoincrement and setting a starting number
Invoice settings and late fees
- Set the Invoice Report period to Monthly or Weekly. If you use timesheet jobs, this sets whether completed jobs are grouped by month or by week on the View Completed Jobs page (Timesheet module ›Actions›View Completed Jobs). From that page you can turn completed timesheet jobs into invoices.
- Turn on late fees if you want them added to invoices that aren't paid on time.
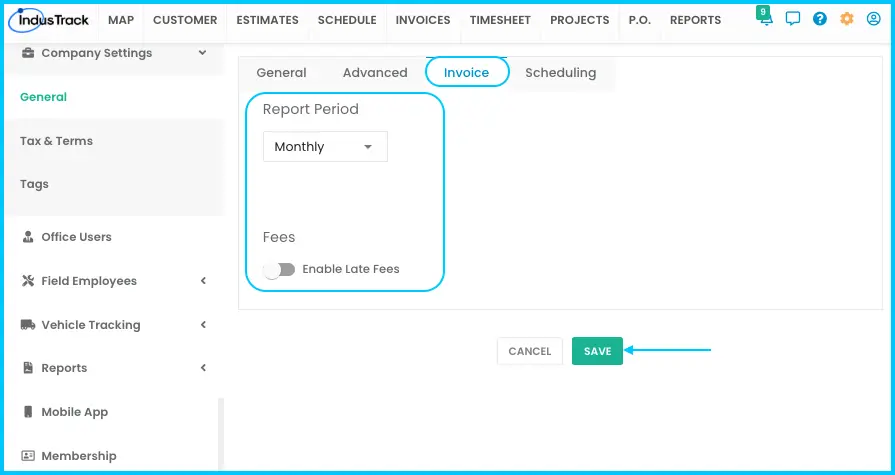
To set up late fees:
-
Turn on Enable Late Fee. A warning appears: "This change will be applied to all existing and future overdue invoices."
-
Choose the type of late fee:
- Flat Fee: a fixed amount added to the overdue invoice, for example $25 each time an invoice becomes past due.
- Percentage of Remaining Balance: a percentage of the unpaid balance, for example 2%.
-
Set the grace period: 1, 5, 7, 14 or 30 days after the due date. For example, with a 7-day grace period the fee is added 7 days after the due date if the invoice is still unpaid.
-
Click Save.
Watch: Turning on late fees, choosing the fee type and grace period, and saving
Scheduling settings
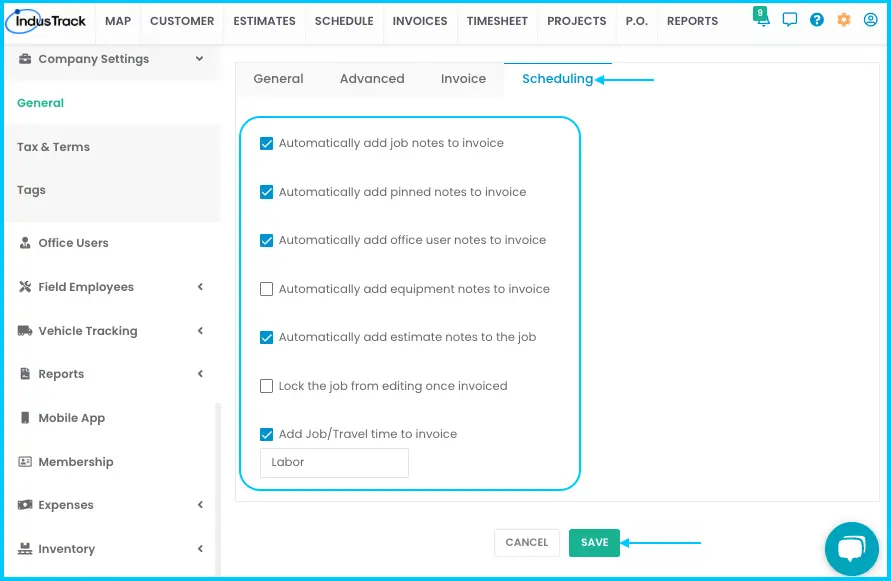
These control what carries over when you convert jobs into invoices. Check the ones you want and click Save.
| Setting | What it does |
|---|---|
| Automatically add job notes to invoice | Job notes are added to the invoice. Otherwise, add them by hand. |
| Automatically add Pinned notes to invoice | Customer site notes are added to the invoice. |
| Automatically add office user notes to invoice | Office user notes on the job are added to the invoice. |
| Automatically add equipment notes to invoice | Equipment service notes are added to the invoice. |
| Automatically add estimate notes to the job | Estimate notes carry over when you convert an estimate into a job. |
| Lock the job from editing once invoiced | Jobs can't be edited after they're invoiced. |
| Add job/Travel time to Invoice | Field employee time is added as a line item on the invoice. Not available when QuickBooks integration is active. |
Payment terms
Terms set when customers must pay. Set them up early to avoid incomplete reports and manual fixes later.
-
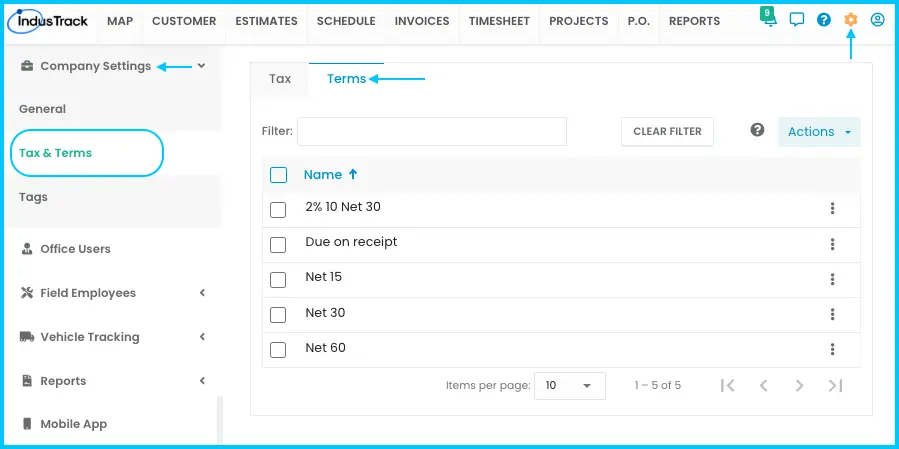
Go to Settings›Company Settings›Tax & Terms›Terms.
-
Click Actions and select + Add New.
-
Enter a name for the term.
-
Choose the payment schedule:
Schedule How the due date is set Example Fixed Number of Days A number of days after the invoice date Invoice March 1, 15 days: due March 16 Specific Day of the Month A set day of the month Invoice March 5, day 20: due March 20 -
Click Save. The term appears in the list.
Watch: Adding a new payment term and choosing its payment schedule
With Specific Day of the Month, every invoice is due on the set day of that month, whatever its issue date.
-
Edit a term: click the three-dot menu next to it, select Edit, make changes and click Save.
Watch: Editing a payment term from the three-dot menu -
Delete a term: click the three-dot menu, select Delete and confirm. To delete several, check their boxes and click Actions›Delete.
Watch: Deleting payment terms -
Set a default term for invoices: click Actions, select Set as Default, and choose the term.
Watch: Setting a default payment term with Actions > Set as Default
Once your terms are set up, you can assign them to customers in their customer profile.
Tax rates
-
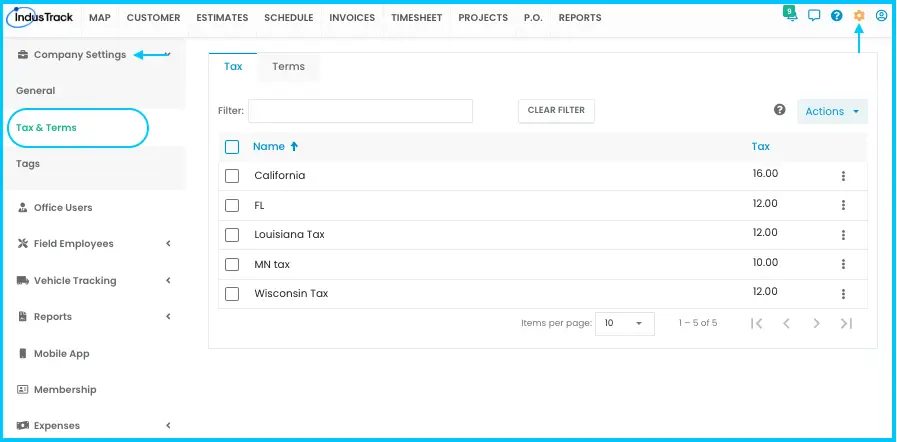
Go to Settings›Company Settings›Tax & Terms›Tax.
-
Click Actions and select + Add New.
-
Enter the tax details:
- Name: an existing tax name or your own, for example Sales Tax.
- Tax Rate: the percentage.
-
Click Save.
Watch: Adding a new tax rate
-
Edit a tax rate: click the three-dot menu, select Edit, update it and click Save.
Watch: Editing a tax rate from the three-dot menu -
Delete a tax rate: click the three-dot menu, select Delete and confirm. To delete several, check their boxes, click Actions›Delete and confirm. To select all, check the box at the top of the Name column.
Watch: Deleting tax rates
Common questions
I use QuickBooks. Why can't I edit some terms or tax rates?
If IndusTrack is connected to QuickBooks, your terms and tax rates sync from QuickBooks automatically. Synced terms and tax rates can't be edited in IndusTrack.
Does the term on an estimate carry over to the invoice?
Yes. The term you pick on the estimate appears on the invoice (not the default term), whether you convert the estimate straight to an invoice or to a job and then to an invoice.
If I turn late fees on or off, does it affect invoices that are already overdue?
Yes. The change applies to all existing and future overdue invoices.
Why isn't the job and travel time option working?
Add job/Travel time to Invoice is disabled when QuickBooks integration is active.
Was this article helpful?
Contact support