How do I use the schedule and the jobs queue?
The Schedule tab shows every field employee's jobs on a calendar. The Jobs Queue (Actions›Jobs Queue) lists all jobs by stage, from unassigned to invoiced, so you can assign jobs, and approve and invoice them in bulk.
The schedule
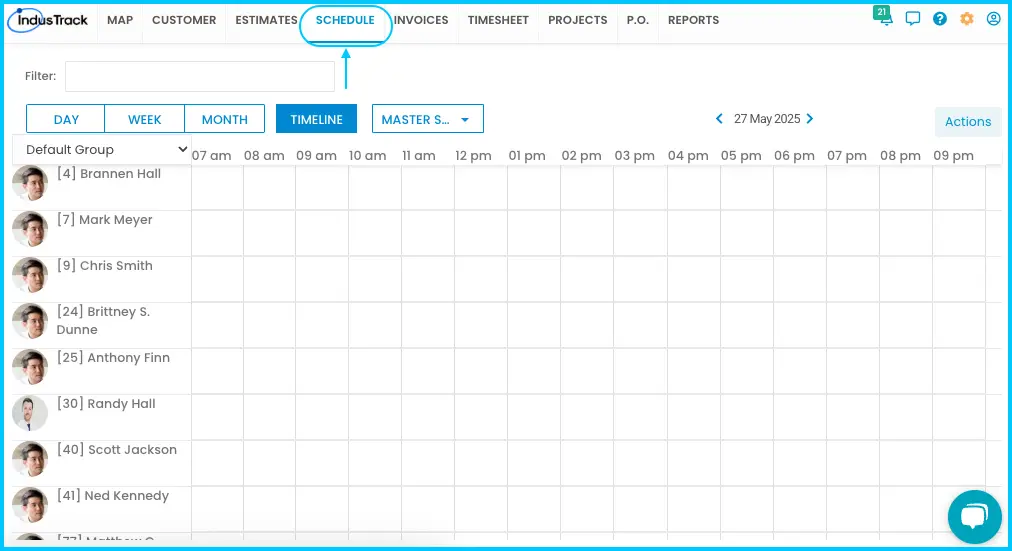
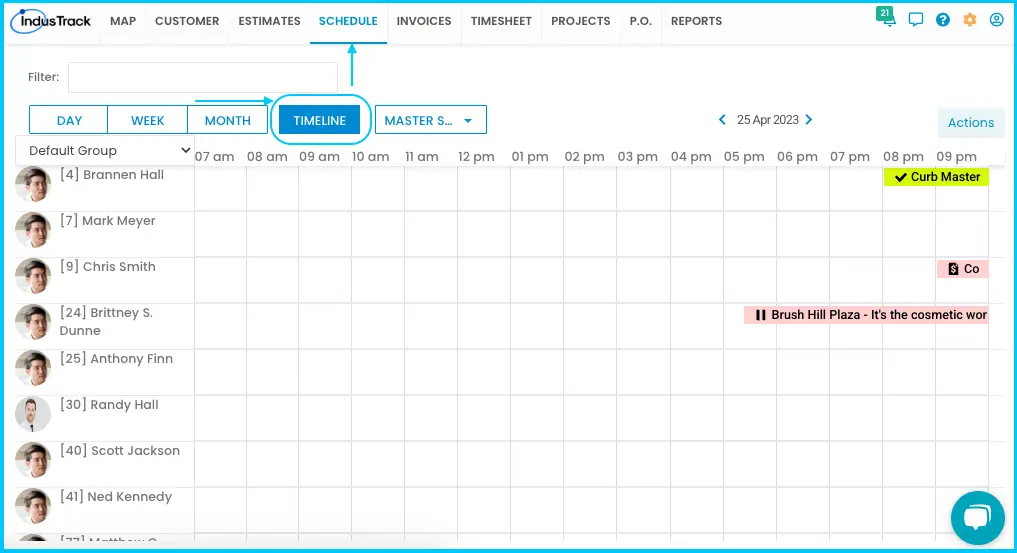
The default Timeline View is a daily grid by hour. Every field employee is listed, even without jobs, and jobs appear as colored blocks.
-
Change the date: click the date to pick a day, or use the arrows.
-
Search: find jobs, customers or employees.
-
Filter by group: show only certain employee groups.
-
See job details: hover over a job.
Watch: Changing the date, searching, filtering by group and hovering over a job -
Day, Week or Month view: switch at the top left. These views show all jobs rather than rows per employee; hover to see who's assigned.
Watch: Switching between day, week and month views -
Custom calendars: pick one from the dropdown to see only that calendar's employee groups. You can create and assign jobs there too.
Watch: Picking a custom calendar from the dropdown -
Actions menu: Add Unassigned Job, Jobs Queue, View Upcoming Services and Print.
Watch: The options in the Actions menu on the Schedule page
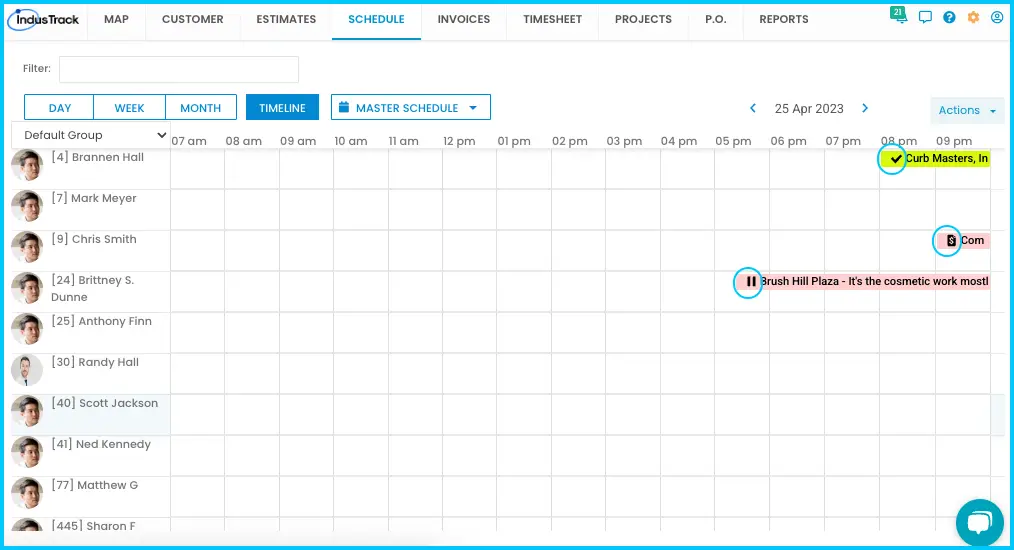
Job status icons:
| Icon | Status |
|---|---|
| Diskette | Created or saved |
| Truck | Dispatched |
| Steering wheel | Tech traveling to the job |
| Play button | Started |
| Pause button | Paused or on hold |
| Checkmark | Completed |
| X | Declined |
| Dollar sign | Invoiced |
The jobs queue
Open it from the Schedule module with Actions›Jobs Queue. Jobs move through six sections:
-
Unassigned: no employee yet. Click a job, select a field employee in Edit Job and click Dispatch Now; it moves to Assigned. Click CREATE JOB to add a new unassigned job here.
Watch: Assigning an unassigned job and dispatching it -
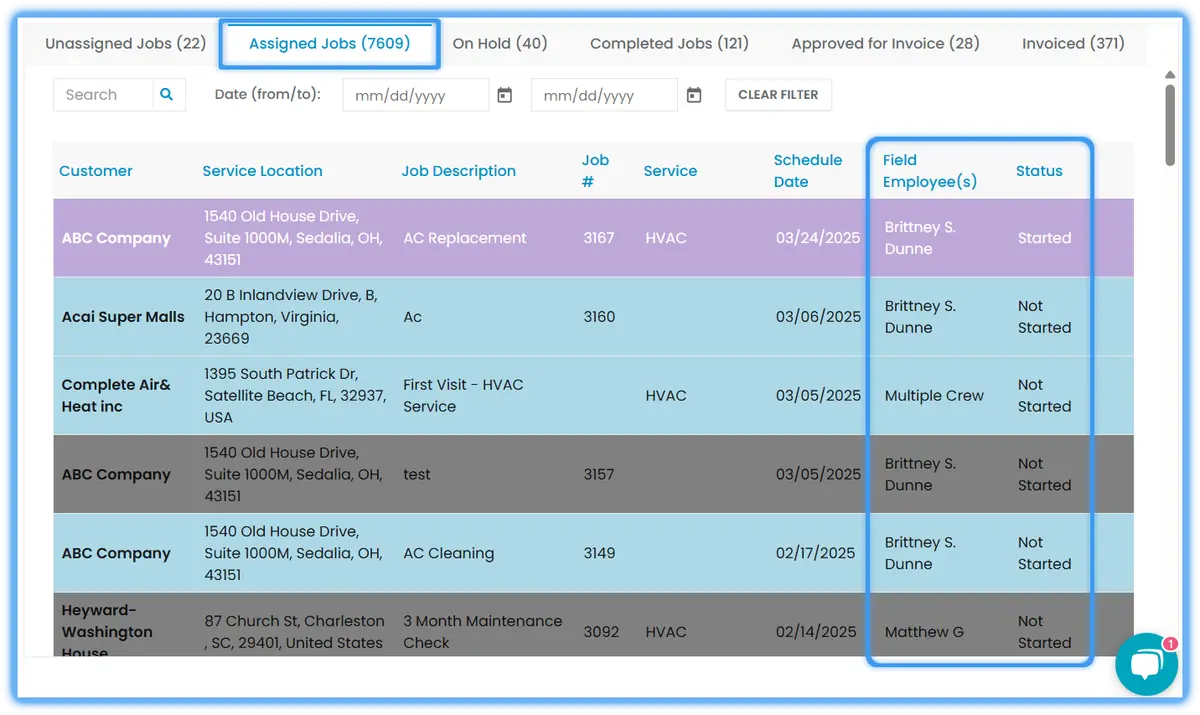
Assigned: shows who has each job and its current status.
-
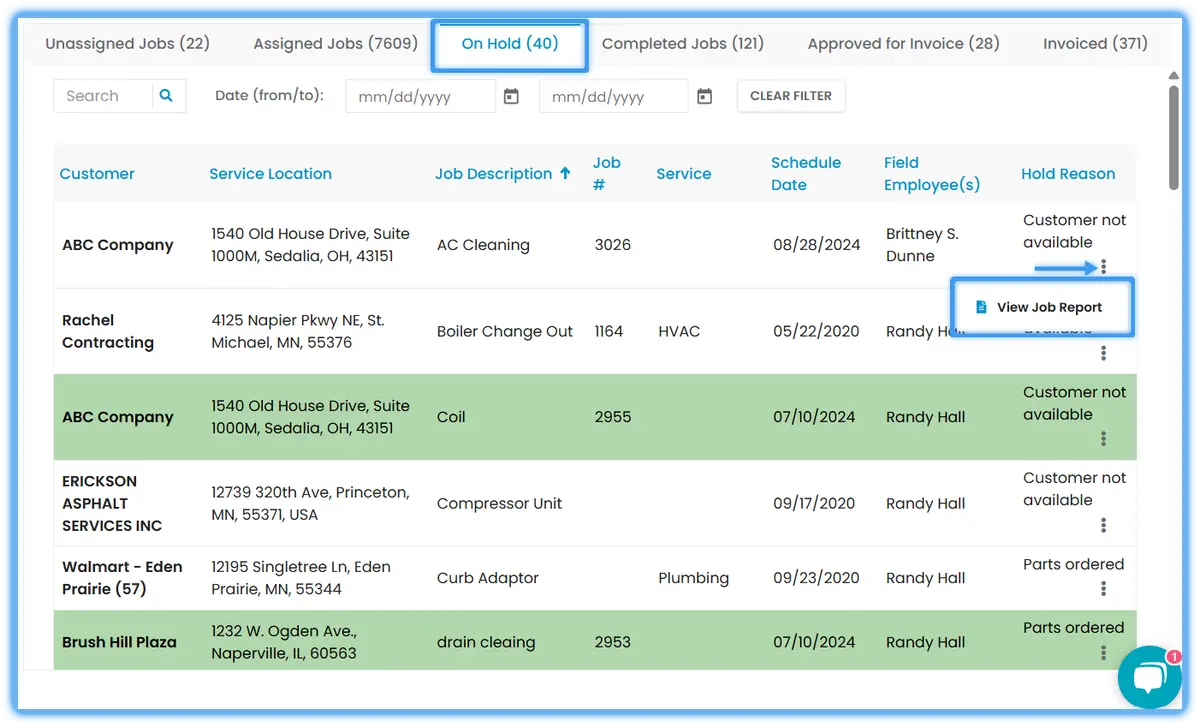
On Hold: jobs started then paused for a reason, such as customer unavailable or waiting for parts. Click the three-dot menu and choose Job Report to see work done, field notes and time spent.
-
Completed: finished jobs. The three-dot menu offers View Job, Approve, View Job Report, View Estimate (if the job came from one) and Delete. Approve one job from its menu, or several by checking them and clicking Approve at the top right.
Watch: Approving completed jobs one at a time or several at once -
Approved for Invoice: create one invoice per job, combine several jobs for the same customer with CREATE ONE INVOICE FOR MULTIPLE JOBS, or create separate invoices for several customers.
Watch: Creating invoices from jobs approved for invoice -
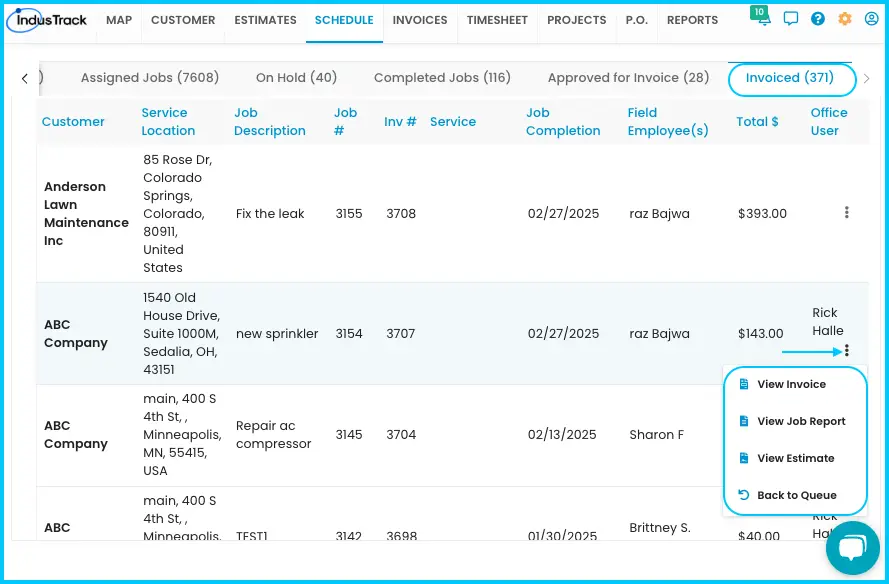
Invoiced: use the three-dot menu to view the invoice, job report or estimate.
At the top of the Jobs Queue, search by company name, job number, service name or job description, filter by the date the job was created, sort by clicking a column header, and click the eye icon to open a job.
Common questions
I approved or invoiced a job by mistake. How do I undo it?
Click the three dots next to the job and choose Back to Queue. It returns to Completed Jobs. If it was invoiced, the invoice is deleted.
How do I download all the photos and files from a job?
Open the job, click Actions›View Job Report, scroll to Attachments and click Download All Images. You get a ZIP file.
The Schedule tab is greyed out or missing. Why?
Greyed out means your user doesn't have access. Missing means your company plan may not include it.
Where do I change calendar hours, job colors or service types?
In Settings›Scheduling. See the next article.
Was this article helpful?
Contact support