How do timesheets work?
Field employees' shift, job, travel and break time is recorded in the mobile app and shows up in the Timesheet module. There you can see who is working where, fix conflicting records, add or edit time, and approve time for QuickBooks payroll.
What the Timesheet page shows
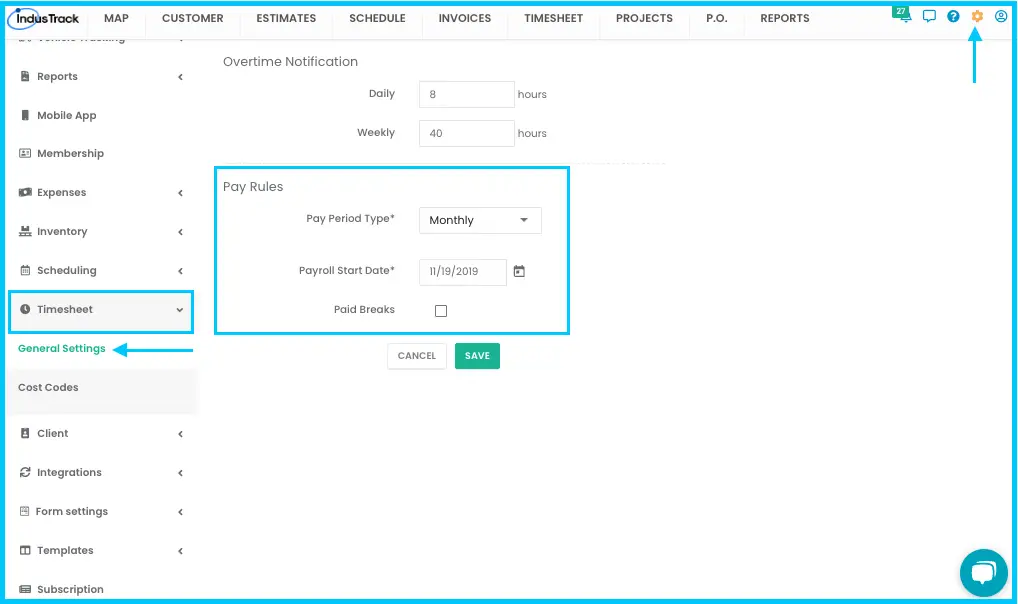
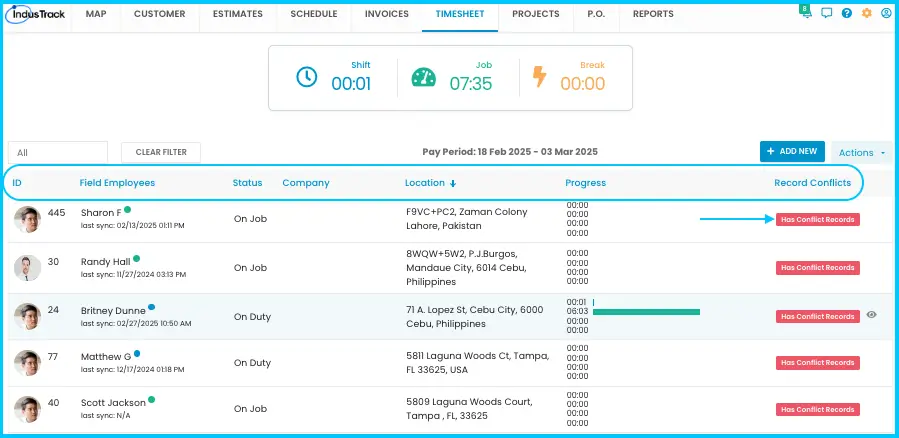
The top of the page sums up Shift, Job and Break hours for the current pay period. The period (for example weekly, bi-weekly or monthly) comes from Settings›Timesheet›General Settings›Pay Rules; see How do I set up timesheet rules and cost codes?
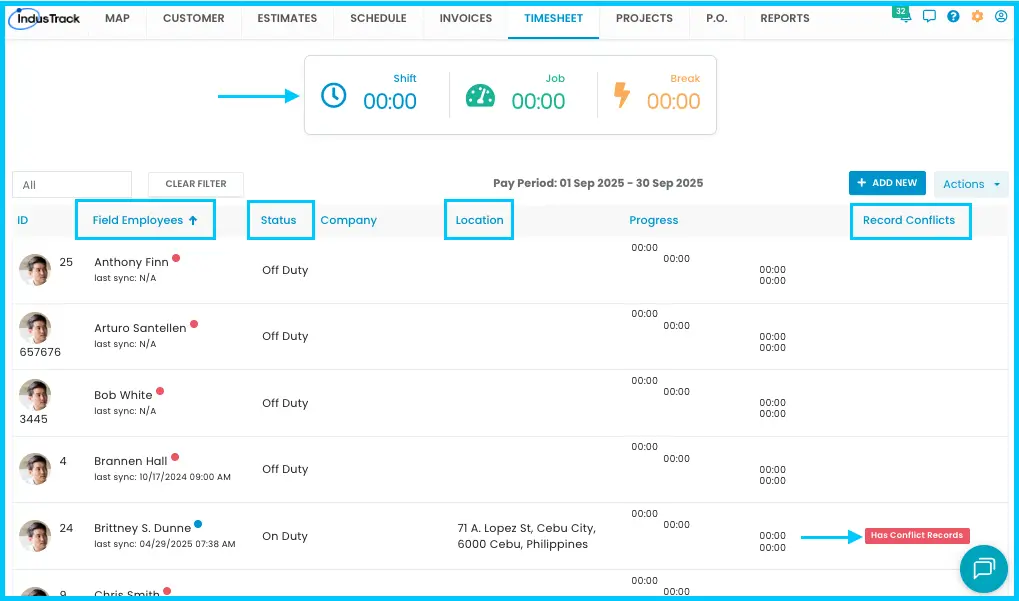
For each field employee you see:
| Column | What it shows |
|---|---|
| Status | On or Off Duty, On a Job, on Break, or Traveling. |
| Company | The customer the employee is working for. |
| Location | The employee's current location. |
| Progress | Shift, job and break hours in the pay period. |
| Record Conflicts | Alerts for incomplete or conflicting records, such as a missed clock-out. |
Under each employee's name is the last time their mobile app synced, so you know how current the data is.
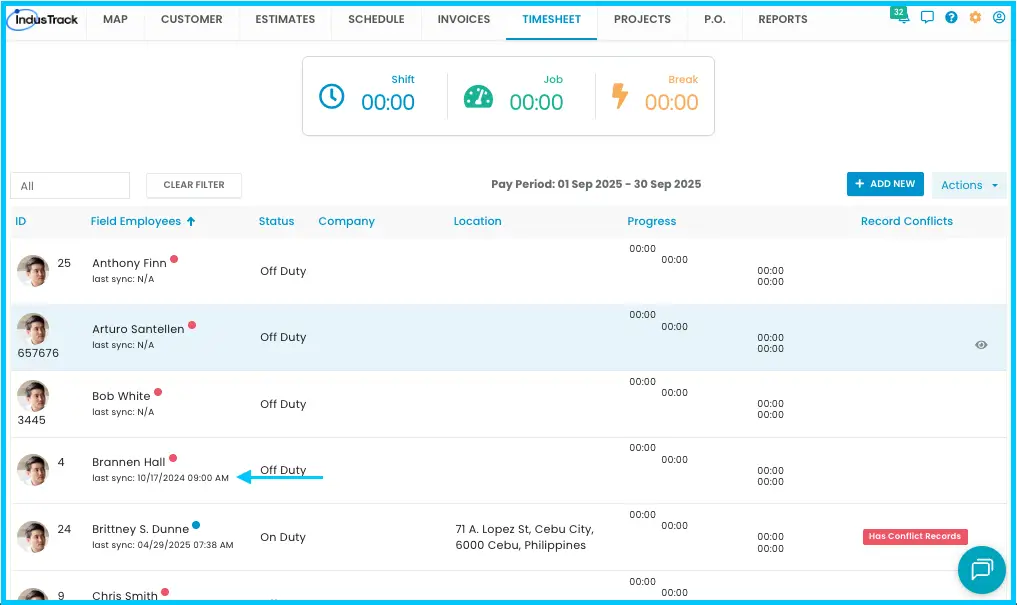
View an employee's records
-
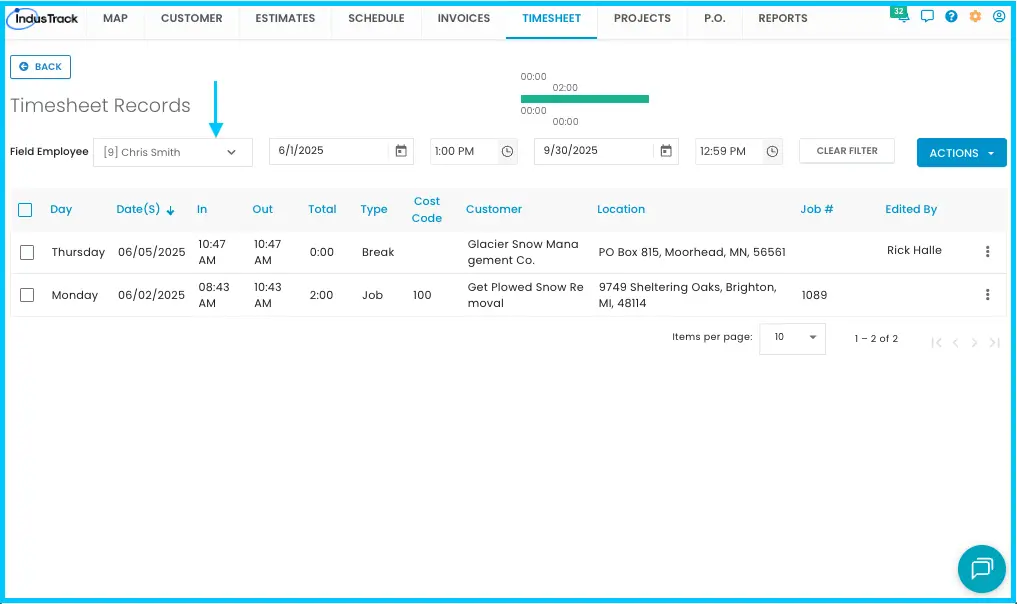
Click the employee's name, or pick them from the Field Employee drop-down.
-
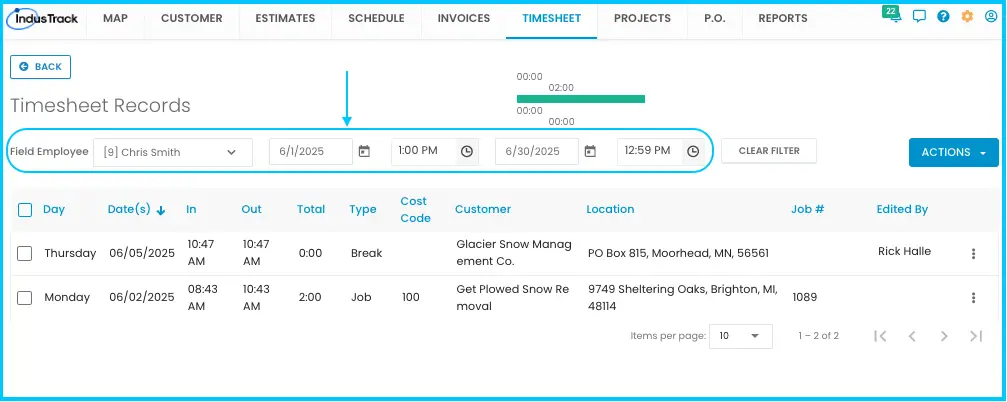
To change the time period, select new start and end dates.
-
To switch to another employee, use the drop-down in the upper left corner.
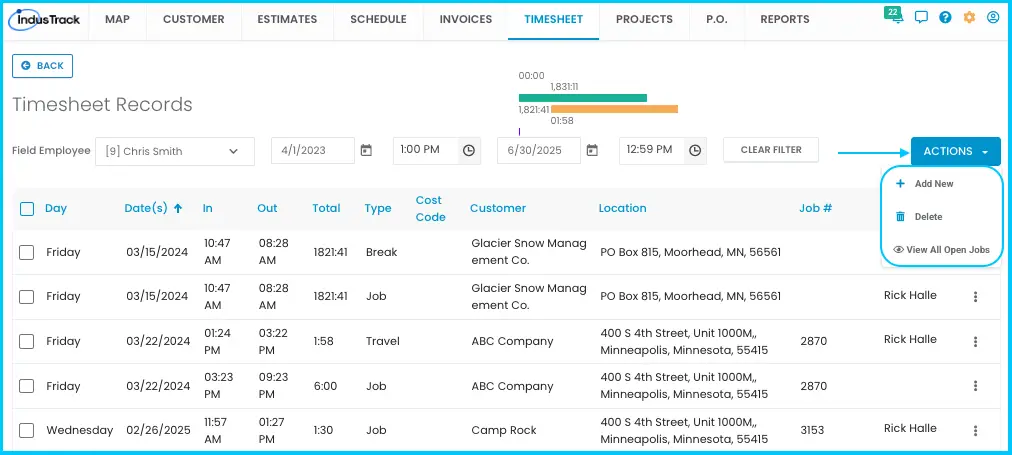
To see entries that were never checked out (a shift, job, travel or break with no end time), click Actions›View All Open Jobs.
Add a timesheet record
-
Start the record one of two ways:
- Click an employee's name, then click Add New on their Timesheet Record page.
Watch: Adding a timesheet record from an employee's Timesheet Record page - Or click + Add New on the main Timesheet page and choose the employee from the drop-down.
Watch: Adding a timesheet record with + Add New and choosing the employee 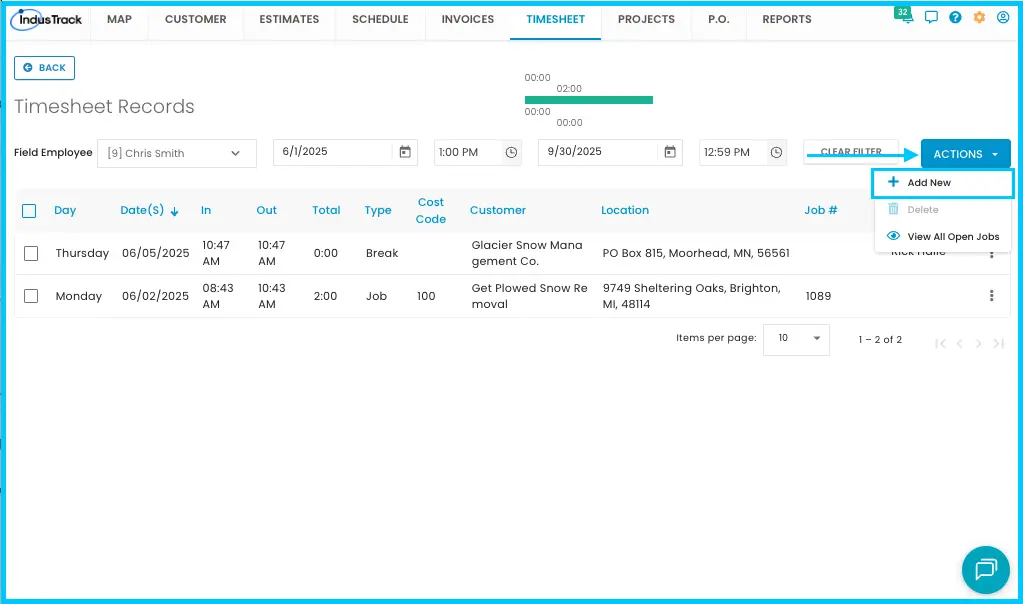
-
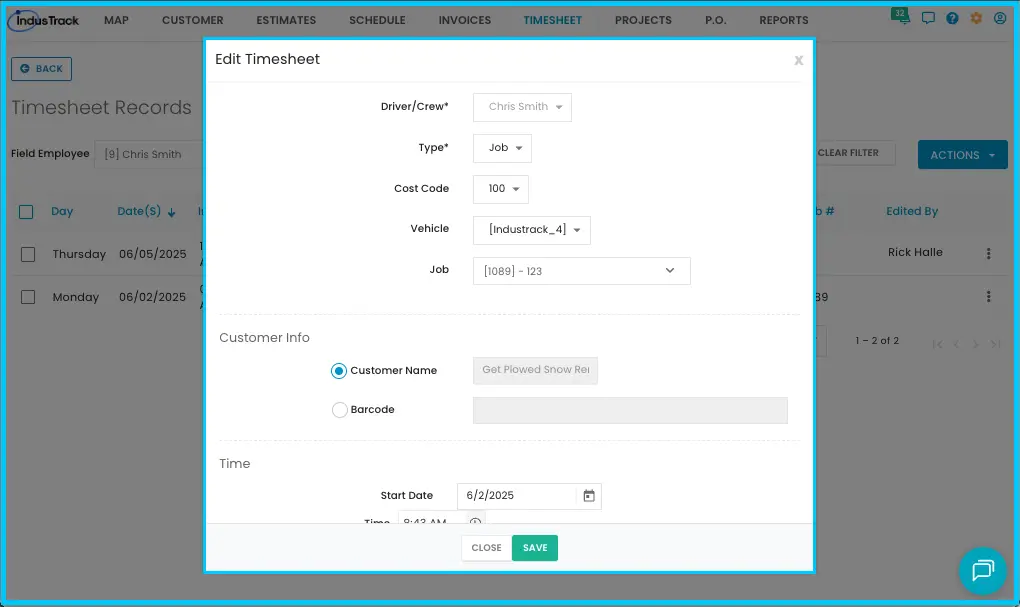
Fill in the record:
- Type: Job, Travel, Shift or Break.
- Cost Code (if you use them), Vehicle, Job and Customer. Some of these fill in automatically.
- Start/End Date, Duration and Notes.
-
Click Save Changes.
Edit, delete or check the history of a record
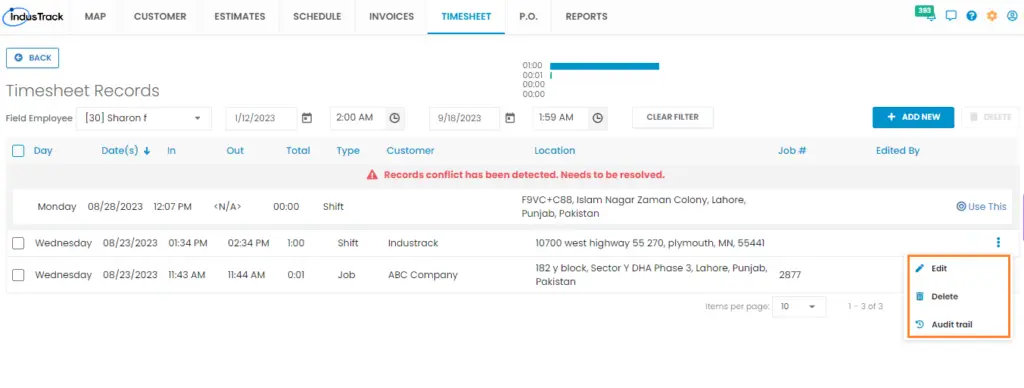
Click the three dots at the right of a record and choose:
-
Edit: change the time details.
-
Delete: remove the entry.
Watch: Deleting a timesheet entry -
Audit Trail: see what was changed, when, and by whom.
Watch: Viewing a record's audit trail
Fix conflicting records
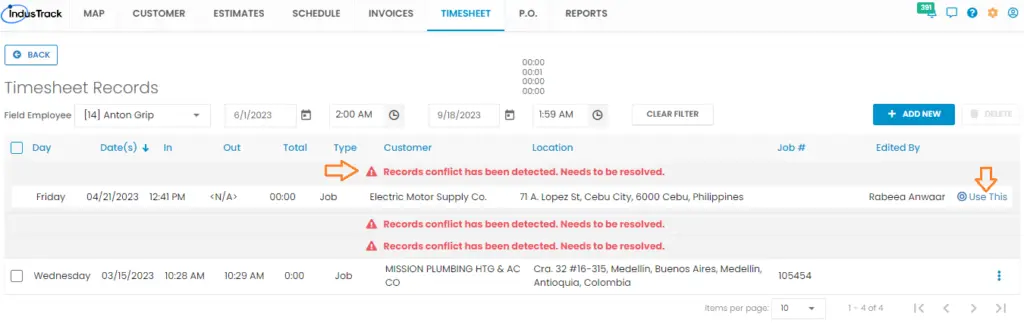
A conflict means time wasn't recorded properly, for example an employee never clocked out.
-
Click Has Conflict Records for the employee. Their conflicting records show a red conflict message.
-
Click the red message, then click Use This to open the record.
-
Fix it one of these ways:
- Edit or Delete the record. Changes take effect right away.
- Add a timesheet entry with 0 duration. This clears the conflict without adding time to the employee's record.
Watch: Clearing a conflict with a zero-duration timesheet entry - Mark it Not Conflicted if the record is actually fine. You can't do this when the conflict is caused by overlapping records.
Watch: Editing a conflicted record or marking it Not Conflicted
You can review both conflicted and previously conflicted records. The Audit Trail shows the reason for each conflict:
| Conflict message | Why it appears |
|---|---|
| Timesheet end time hasn't been received within X hours | The record has stayed open longer than the limit you set. |
| Timesheet end time received. Conflict resolved automatically by the system | The record was flagged for a missing end time, then the end time arrived from the mobile app and the system cleared the conflict. |
| Timesheet duration is longer than X hours | The record has an end time, but its total length is over the limit you set. |
| Update has been received for a deleted timesheet | The record was deleted in the IndusTrack web app, then an update for it arrived from the mobile app. |
| This timesheet has 2 different end times (Snow Track & Shift only) | The record already had an end time, and a different one arrived from the mobile app. |
| Overlapping timesheet records | The record overlaps another record of the same type. |
The "X hours" limits are set in Settings›Mobile App (Alert if timesheet is open for (hr) and Alert for timesheet entries Longer than (hr)). By default, records open for more than 24 hours are flagged. See How do I set up the mobile app for my team? (office settings)
Timesheet jobs
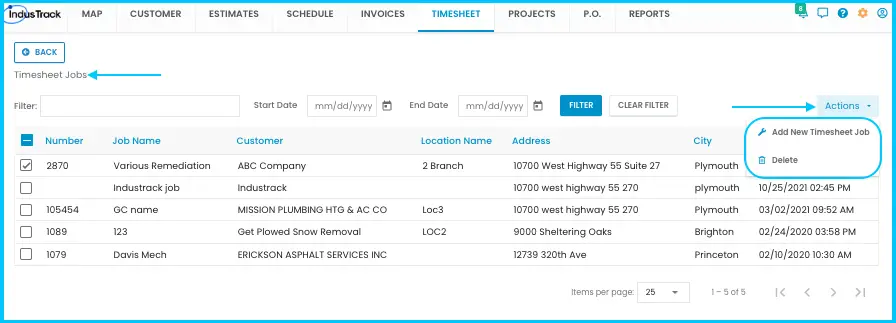
Jobs created in the Timesheet module are called Timesheet Jobs.
-
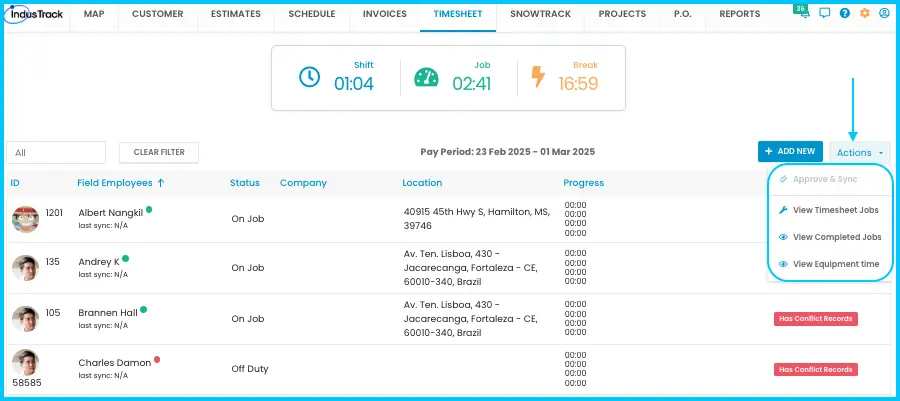
See or change them: click Actions›View Timesheet Jobs. Click a row to open the Edit Job window. Use Actions on that page to add or delete a timesheet job.
Watch: Viewing and editing timesheet jobs -
See completed ones: click Actions›View Completed Jobs and set the date range. When a field employee completes a timesheet job in the app, it appears here. Click Convert to Invoice at the far right to bill the customer.
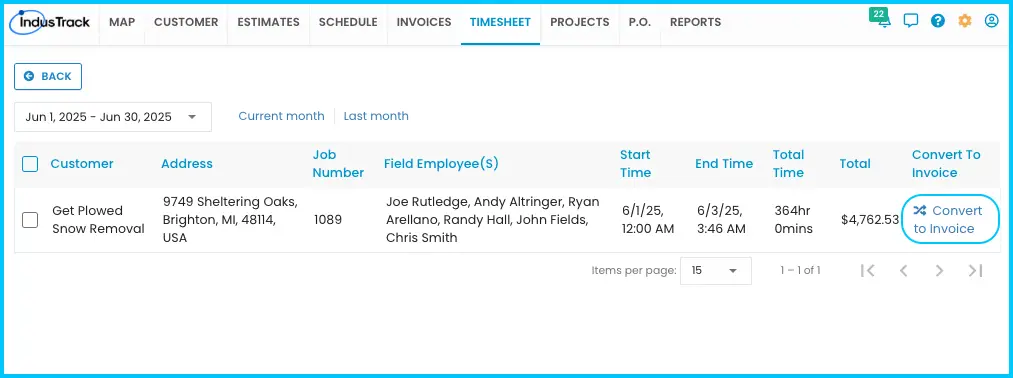
Watch: Viewing completed timesheet jobs and converting one to an invoice
The Actions menu also has Track Equipment Time. Use it to track how long a vehicle or piece of equipment spends at a customer's location. You can then convert that tracked time into an invoice.
Approve and sync time to QuickBooks
This works with both QuickBooks Online and QuickBooks Desktop.
-
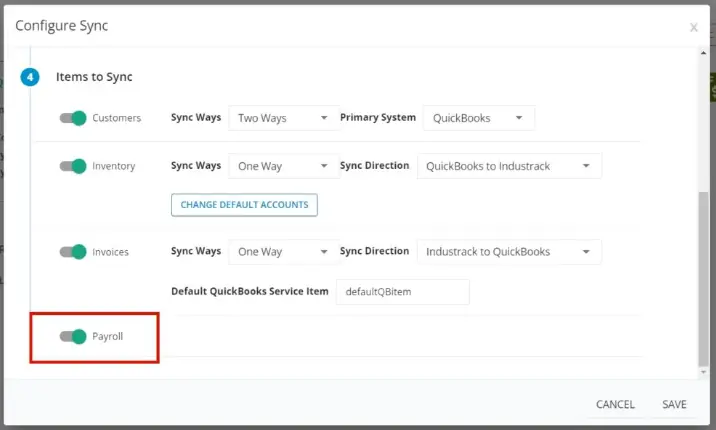
Turn on payroll sync once: go to Settings›Integrations›QuickBooks, click Configure Sync (top right) and enable Payroll.
-
In the Timesheet module, click Actions›Approve & Sync.
-
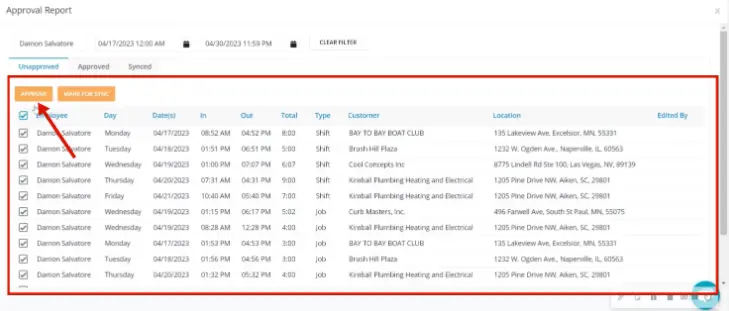
On the Approval Report, select the employees, set the date range and click Apply. Their time appears in the Unapproved column.
-
Check the records you want to sync and click Approve. They move to the Approved column.
-
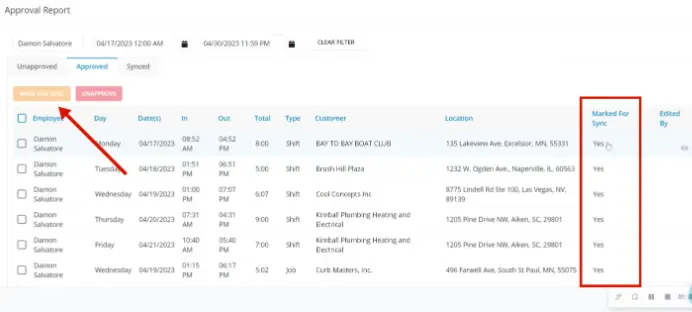
In the Approved column, check the records to sync and click Mark for Sync.
-
At the next sync cycle the records go to QuickBooks and appear in the Synced column.
Common questions
Why doesn't a job show up in reports?
Jobs that last less than a minute don't appear in reports. If a job is completed but has no duration, check the Timesheet module for conflicts. Conflicts must be resolved before actual durations show in reports.
Can I see time that's still running?
Yes. Actions›View All Open Jobs lists entries with no checkout time.
Who changed this record?
Open the record's three-dot menu and click Audit Trail.
Was this article helpful?
Contact support