How do I add office users?
Go to Settings›Office Users and click + Add New. Fill in the user's login and password on the General tab, set their access on the Permissions tab, and click Save.
Add an office user
-
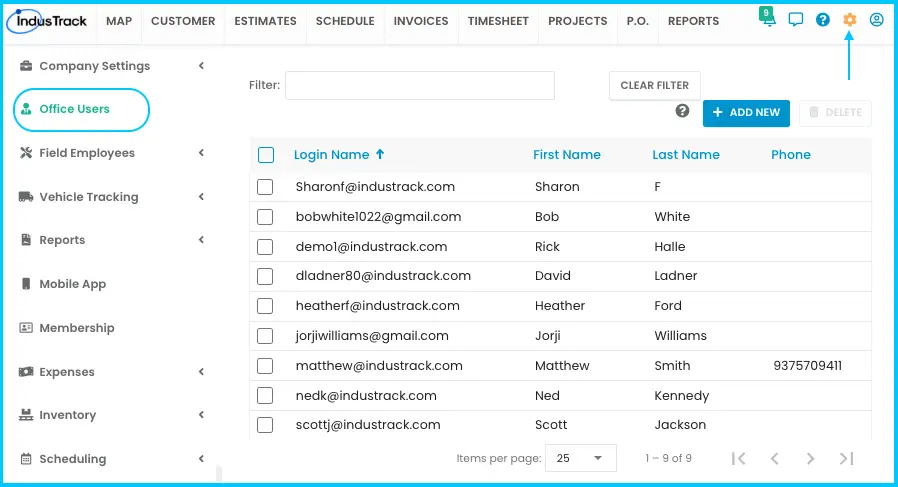
Go to Settings›Office Users.
-
Click + Add New. The Add Office User page opens with five tabs: General, Permissions, Email, Notifications and User Preferences.
Watch: Clicking + Add New to open the Add Office User page 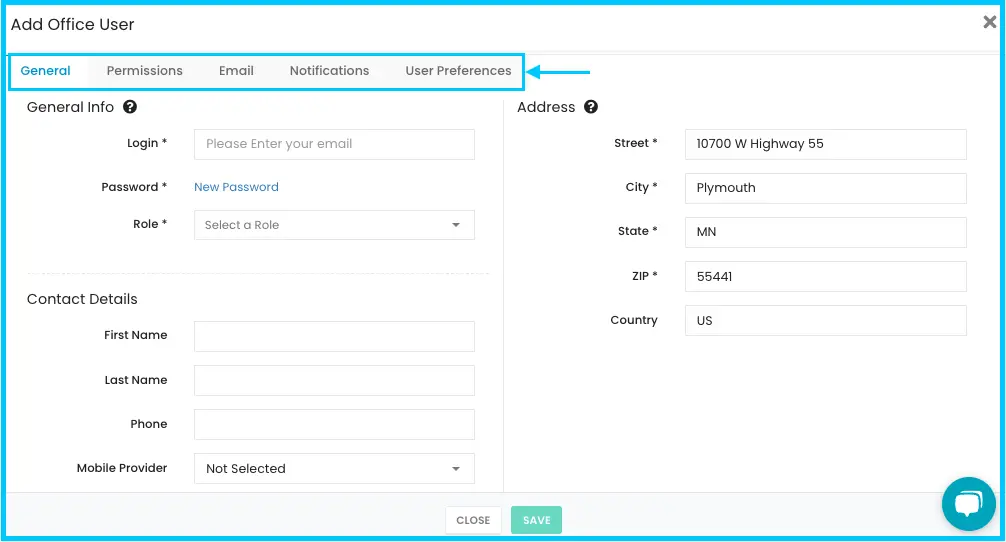
-
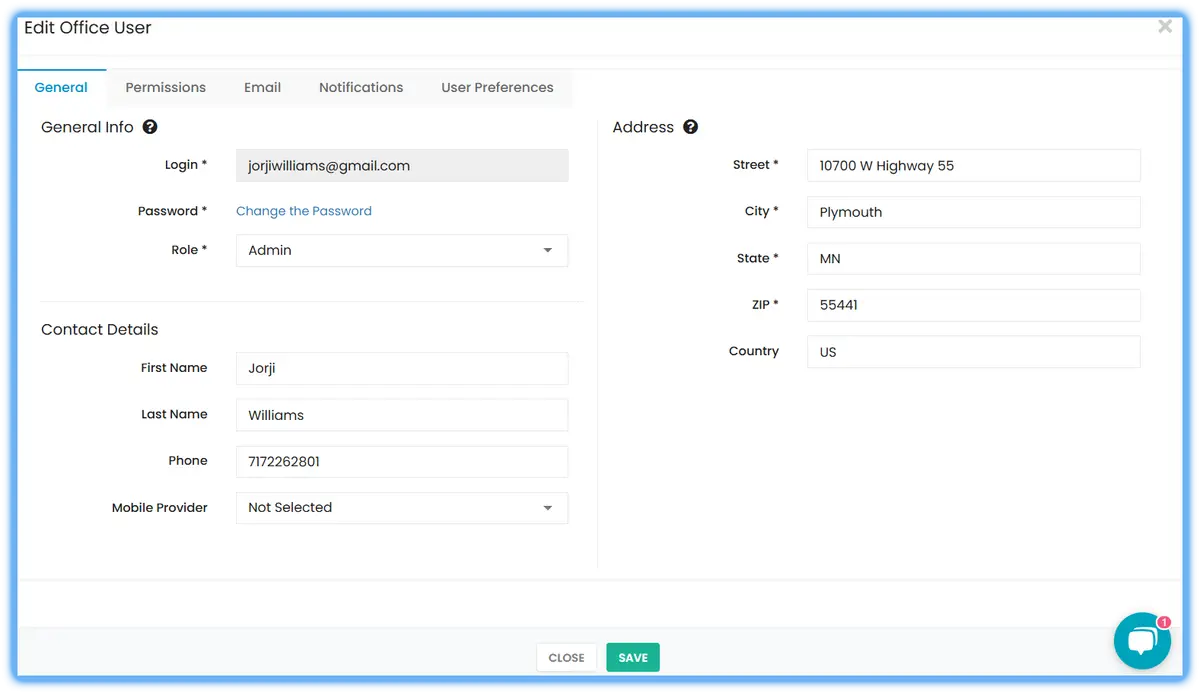
On the General tab, create the user's profile:
- Login (required): the user's email address.
- Password (required).
- Role: View Only (can view but not edit), Edit and View (can edit and view assigned modules), Admin (full access to settings) or Customize (set permissions module by module).
- Address: defaults to your company address; you can change it.
- Contact Details: first name, last name, phone number and mobile provider. The mobile provider is needed for text alerts.
-
On the Permissions tab, set what the user can reach, such as which calendars they can use (Calendar) and which vehicles they can track (Map Visibility). If the role is Customize, you set each module separately (see the table below).
Watch: Setting permissions on the Permissions tab, including module-by-module access for the Customize role -
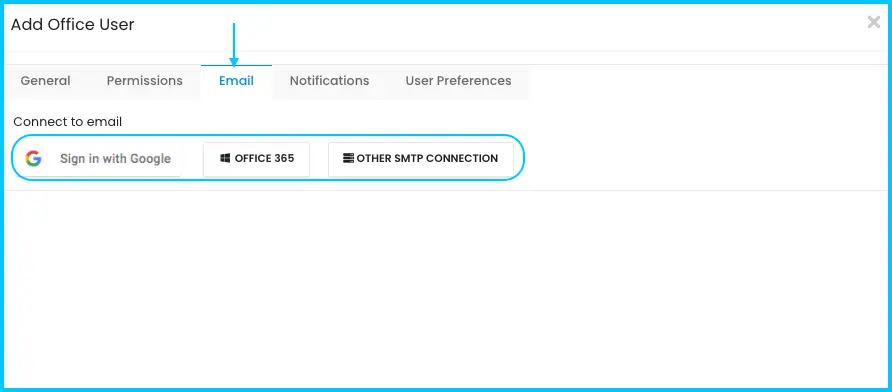
On the Email tab, set up email integration for the user. See How do I connect my email?
-
On the Notifications tab, turn on reminders for jobs, invoices, estimates and more, and choose when they're sent. Notifications can appear as emails, pop-ups or both.
Watch: Turning on reminders on the Notifications tab -
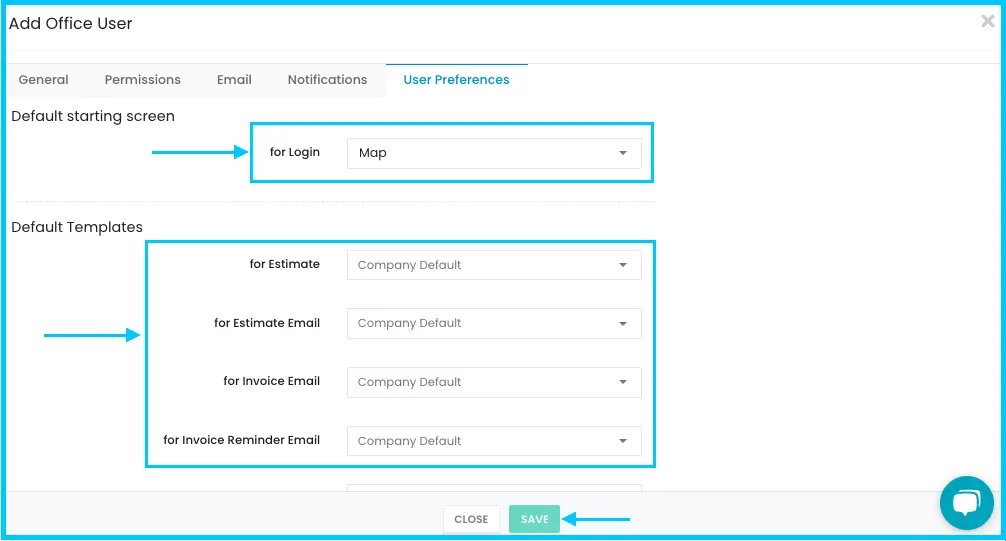
On the User Preferences tab, choose the user's default login screen and default templates. Default templates apply automatically when the user creates invoices or estimates.
-
Click Save. The user is added to the list and set to Active.
Module permissions (Customize role)
Each module is set to No Access (can't open it), View (can see but not change) or Edit (can see and change), unless the table says otherwise.
| Module | Options | What Edit (or On) allows |
|---|---|---|
| Scheduling | Needs access to a selected calendar | No Access also removes access to calendar settings. |
| Map | View or No Access | View only; the map can't be edited. |
| Timesheet | No Access, View, Edit | Change field employees' timesheets. |
| Messaging | No Access, View, Edit | Create and send messages from the IndusTrack web app. |
| Estimation | No Access, View, Edit | Create and manage estimates. |
| Invoices | No Access, View, Edit | Manage and edit invoices. |
| Inventory | No Access, View, Edit | Manage inventory items, services and equipment. |
| Forms | No Access, View, Edit | Create, edit and delete forms. |
| Contacts | No Access, View, Edit | Add customers and manage groups. |
| Payment Processing | No Access, View, Edit | |
| Dashboard | No Access, View, Edit | Access and manage the dashboard. |
| Integration | No Access, View, Edit | Set up integrations such as QuickBooks, Stripe, RingCentral and email. |
| Membership/Service Agreement | No Access, View, Edit | Manage service agreements and memberships. |
| Import | On or off | Import data from other systems into IndusTrack. |
| Reports | View and generate reports. | |
| QB Integration | On or off | Integrate IndusTrack with QuickBooks. |
| Warehouses | No Access, View, Edit | Manage warehouse information. |
| Inventory Tracking with QR/Bar Codes | Track inventory with QR codes and barcodes. | |
| Customer Notification | Manage customer notifications. | |
| Vehicle Tracking | ON or OFF | View field vehicles on the map. |
| Settings | No Access, View, Edit | Edit changes module settings but not user settings. For full access to settings, use the Admin role. |
Two extra options sit on the same tab:
- Enable All: gives View access to Maps, full access to Settings and Edit access to every other module.
- Allow Deleting Items: lets the user delete items in any module where they have Edit access.
Find, edit or delete an office user
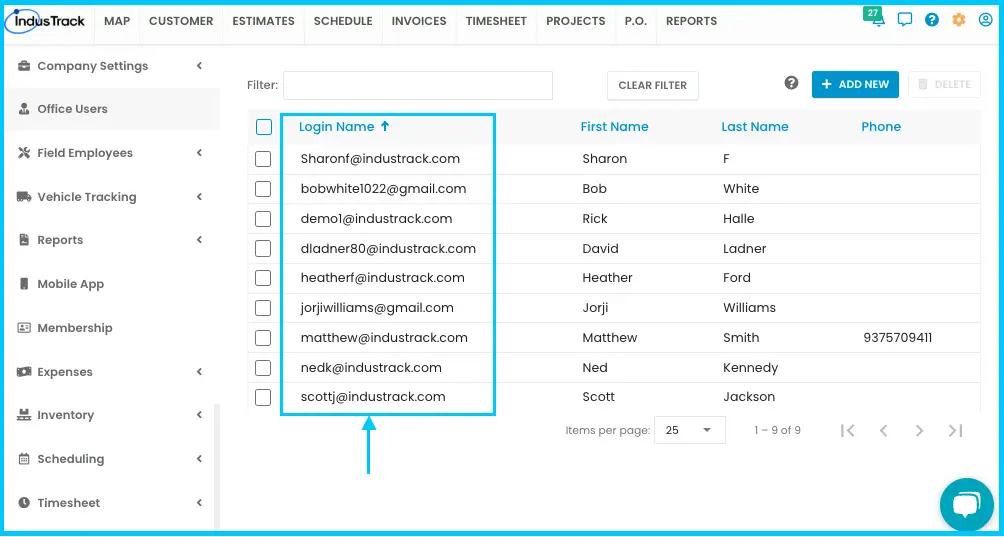
The Office Users list shows each user's Login Name, First Name, Last Name and Phone.
-
Edit: click the user's row, make your changes and click Save.
-
Delete:
- Tick the checkbox next to the user's name.
- Click Delete. It's only active once a user is selected.
- Confirm when prompted.
Watch: Selecting an office user and deleting them
Common questions
Can I bring back a deleted office user?
Not with the same email address. Deleted users can't be reactivated with the same email. Office users can't be deactivated; deleting is the only option, and it's permanent.
Which role gives full access to settings?
The Admin role. With Customize, you set the Settings permission yourself.
Why does the user need a mobile provider?
It's needed to send them text alerts.
Was this article helpful?
Contact support