How do I log fuel receipts?
Go to Settings›Vehicle Tracking›Fuel Receipts, click Actions and choose + Add Fuel Receipt Manually. Logged receipts help you track fuel costs and produce accurate reports.
Add a receipt
-
Go to Settings›Vehicle Tracking›Fuel Receipts.
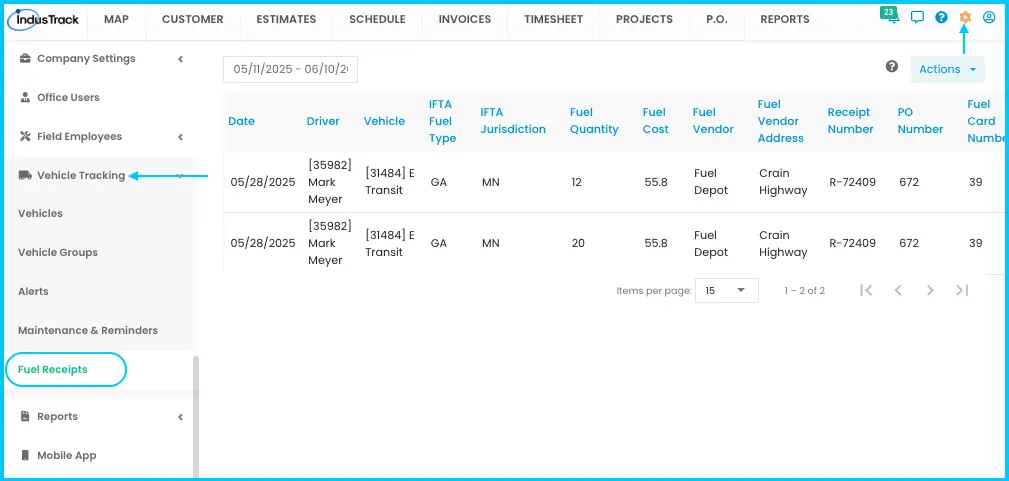
-
Click Actions›+ Add Fuel Receipt Manually.
Watch: The Actions menu on the Fuel Receipts page -
Fill in the receipt details. Required fields:
- Date: MM/DD/YY, or use the calendar.
- Driver: the employee who was driving.
- Vehicle: search by name or ID.
- Fuel Type: the IFTA fuel type.
- State: the IFTA jurisdiction where fuel was bought.
- Fuel Quantity: gallons or liters, from the receipt.
-
Add the optional details if you have them: Cost, Vendor (station name), Address, Receipt Number, PO Number and Fuel Card Number.
-
Click Save. The receipt appears in the list.
Watch: Adding a fuel receipt by hand
Edit or delete a receipt
Click the three-dot menu next to the receipt and select Edit (make changes, click Save) or Delete.
Find receipts
-
By date: type a date or range and click Apply, or open the date picker and choose a preset (today, this or last week, month or quarter) or a custom start and end date, then Apply.
Watch: Filtering fuel receipts by date -
Sort: click any column header, such as date, vehicle or fuel cost.
-
Page size: show 15, 25 or 50 receipts per page.
The list shows date, driver, vehicle, IFTA fuel type and jurisdiction, quantity, cost, vendor and address, receipt number, PO number and fuel card number.
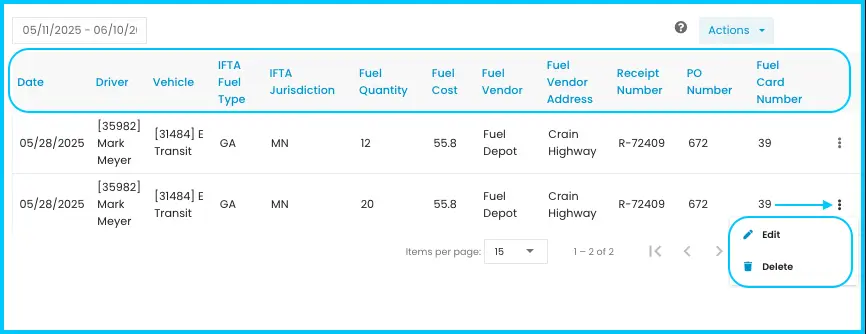
Common questions
Can I upload a receipt instead of typing it?
Yes. Go to Settings›Vehicle Tracking›Fuel Receipts, click Actions and choose Upload file.
What does "Set average fuel price" do?
It gives you a price to compare against when you upload fuel receipts or enter them manually. You'll find it in the Actions menu.
Was this article helpful?
Contact support